My Other Pages

To make it easier to read about our trip to Ireland, I have made a page that is just for that. There is a tab above for Ireland Trip 2014 or click on the Home tab to read my other posts. I have also created a new page for My Weight Loss Journey if you are interested in that, click on the tab above.
Showing posts with label Armour Etch. Show all posts

Sunday, January 9, 2022

Shot Glasses

Hi everyone!
I hope you're having a wonderful day.
Today I want to show you some etched shot
glasses that I gave my future son in law for Christmas.
He has a shot glass collection and loves the
Marvel characters.
I started by asking my local Buy Nothing Group if anyone
had clear shot glasses they no longer wanted.
(I've linked to the Buy Nothing Project site so you can
learn more about this and see if there is a group in
your area)
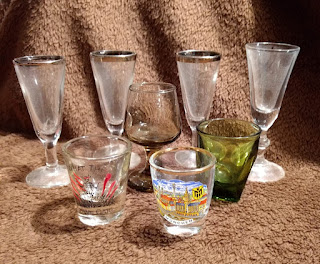
I got response from a couple people.  I only needed one
at the time, but it turned into a bigger project.
These weren't all what I was expecting, but I think they
will work out for a later project.
I did use the green one for this gift.
I also received these 6 glasses from another member.
They were perfect for what I was planning.
Using my Silhouette Cameo I cut stencils with 
vinyl, then applied the stencils to the glasses.
This one is the Captain America logo.
On the other side of the glass,
I etched the character's name.
Once the vinyl stencil was applied
It's simple to use, just follow the instructions
on the jar.
Here is the Avengers Logo.
And their name.  Sorry these pictures aren't
great, it's very difficult getting photographs of
etching on glass and the size of the names 
makes it difficult, but you get the idea.
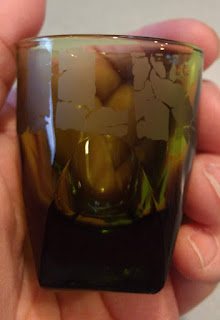
Hulk is Brad's favorite character and the
green shot glass was perfect for that character.
These 2 pictures show the HULK 
that is etched on the back of the glass.
Brad was thrilled with this little gift,
even more so because I made them for him.

I'm glad you stopped by today, I hope you are too. 
 Come again soon,
until then,
give something new a try and
check on a Buy Nothing Group
in your area.  I highly recommend 
being involved in one of these groups.


Note the links are only to give a reference so you can
see what the products are.
I didn't necessarily purchase from these sites,
except where specified,
and you may find better prices elsewhere,
I am in no way promoting any particular site.




Friday, July 16, 2021

Etched Glasses

Welcome to Kristie Kreates!
My daughter, Kelsie, daughter in law, Sara, and I
recently went to a shower and decided to go in 
together on the gifts.  We purchased a nice gift from the
their registry, but wanted to give them something 
a little special and handmade.
We decided to etch some glasses.
It's really quite an easy process.

We used Armour Etch which can be found at 
most craft stores and online.
It's simple to use, just cut out a stencil,
put it on your glass piece then cover the area that you 
want etched with the cream.  Wait for it to do it's work
and rinse with water.
Be aware that when the glass is still wet it might look like
it hasn't done anything, dry it off and then take a look, 
you'll see the etching then and when you take that stencil off
it's like magic. Also note there are some glass items
that this cream doesn't work on.  The label will
give you more information on this.
For our stencils, I designed and cut on my 
Silhouette Cameo and used vinyl which is easy to
remove.

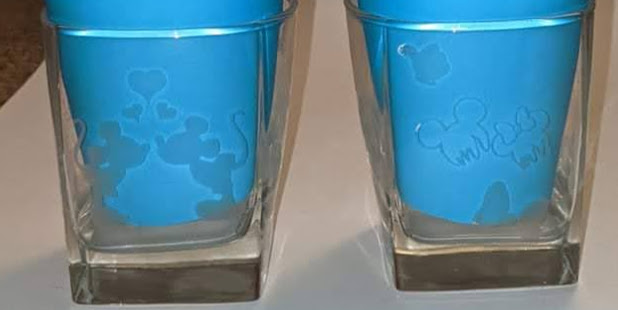
We etched 2 on the rocks glasses with 
Minnie & Mickey.

Kissing Minnie and Mickey on one side.

On the other sides we etched the Mr & Mrs and a variety
of Minnie and Mickey images.  Each side was a little different.

We also did a set of 4 tumblers.
One with Mickey on the front.

One with Minnie on the front.

and both had the Disney castle on the back.


It's hard to see in this picture as it is very difficult
to photograph the etching,  but I think Jaryd did a
pretty good job. When you look at the Mickey or Minnie
you can see through to the castle in the back.

We also did 2 glasses using images from Up,
which is the brides favorite Disney movie.
Here we have Carl's nose and glasses.

And we also did Ellie's aviator hat and goggles.

On the back of the glasses we did the 
house with balloons.
We all love how these glasses turned out.
Kelsey Ann, the bride, loved them too.

Thanks for stopping by to see what I've been
creating lately.
Have you ever tried etching?
I hope you will give it a try, it's fun, it's easy
and you can create very unique thing,
the sky's the limit.
Come again soon and I'll show you what else
we made for Kelsey Ann.
Until then,
create something unique.


Note the links are only to give a reference so you can
see what the products are.
I didn't necessarily purchase from these sites,
except where specified,
and you may find better prices elsewhere,
I am in no way promoting any particular site.


Sunday, January 17, 2021

The Office Beer Glasses

Hi all!
Are you a fan of The Office?
I'm not, but my son is.
He had mentioned that he needed some 
beer glasses for when his friends came over, so 
I bought him some for Christmas.
I wanted to do something different with them,
not just give him plain glasses.
Sara suggested something from The Office.
I found images online that I could cut with 
my Silhouette Cameo and made stencils from 
vinyl.  I then used Armour Etch etching cream
to etch them.
I have to apologize for the poor pictures,
I had a heck of a time getting pictures of 
the etching on the glasses.
I'm sorry, I don't even know this character's name,
but if you are a fan, you'll probably know,
"That's what she said" 
Is right next to him on the glass.
This was the hardest to photograph,
it says Schrute Farms.
These 3 are all together on one glass
Bears..................
Beets..................
Battlestar Galactica
And of course
Dunder Mifflin Inc
paper company.
I had fun making these up for Jaryd,
even though I don't get the meaning of them
all.  LOL  I knew he would get the meaning
and that's the important thing.

I hope you enjoyed your visit,
maybe you're inspired to give etching
a try.  It's really quite easy,
Hope I'll see you again soon.
Until then,
give etching a try.


Note the links are only to give a reference so you can
see what the products are.
I didn't necessarily purchase from these sites,
except where specified,
and you may find better prices elsewhere,
I am in no way promoting any particular site.


Tuesday, December 27, 2016

His and Hers

Hello!
I hope you had a lovely Christmas.
Now that Christmas has passed, I'm free to share
some gifts that I made.
Well, this one I helped make.
My daughter wanted to make a beer mug and a
wine glass for her friends with specific messages
on them.
So, of course, Mom offered to help.
We chose a font that she liked and cut vinyl stencils with
my Silhouette.  Once it was cut, we removed all the letters.
We then covered the stencil with transfer tape.
Removed the vinyl from it's backing sheet and
stuck it to the glass.
This one was a bit harder since it was on a 
wine glass that was curved.
The other one went on much easier since it
was on a mug that was straight up and down.
The transfer tape was then removed and we
had the stencils ready to go.
We used Armour Etch 
to etch the glass.
You can purchase this in most craft stores.
It really is an easy process,
just spread the cream over the stencil and let it
sit for a while.
Check the instructions for the length of time
you should leave the etching cream on the
surface.
We left ours on for 10-15 minutes.
You can see you don't have to be neat about it, just 
dab it on and leave it.
But do be careful, this is a strong chemical mixture
which can cause irritation to the skin and burning.
Be Careful!
Then just simply run it under water and clean the 
etching cream off the project.
Peel the vinyl off  and you have an etched
surface.
Here is how the beer mug turned out.
And the wine glass.
I'm sorry for the poor pictures.
It is very difficult to get a good picture
of the etching.
I'm sure her friends will like these,
especially since she took the time to make
them especially for them.

Thanks for popping in today,
I hope you'll be back soon.
I'll be showing y'all some of the other
Christmas gifts I made.
Until then,
I wish you the warm days
and happy times.