My Other Pages

To make it easier to read about our trip to Ireland, I have made a page that is just for that. There is a tab above for Ireland Trip 2014 or click on the Home tab to read my other posts. I have also created a new page for My Weight Loss Journey if you are interested in that, click on the tab above.
Showing posts with label Tags. Show all posts

Tuesday, December 6, 2022

Thank Full Journal - Junk Journal Style

I've been bitten by the junk journal bug!
I have made journals in the past and learned how
to make hand sewn signatures and such, but 
I guess, it was last spring I got interested in 
junk journals.  In June I made my first one and 
I'm now loving making them.
I made this one for a friend after seeing a 
video by Nik The Booksmith
where she made a "thought-full" book.
I combined her idea with a junk journal and 
now have made a few "thought full journals"
This is the outside of the journal.  I made the whole thing
from scratch, cover and all.  I used some canvas that I 
had sprayed with ink sprays to cover the cover.
I braided embroidery floss and wrapped it around buttons
attached to the front for a closure.
I can't show you all the pages I made, this would be a 
way too long post with all the pictures, so I picked a few
and will show you them.
This is the inside cover, I used paper that I created by
dipping string into paints, swirling them onto the page,
covering it and then pulling it out the bottom of the page.
My friend is a bit fan of Janet Evanovich, so I used the
dust cover from one of her books to create this page,
with a belly band.
I used some printed and embossed velum that has been in my 
stash for a long time for the page on the left.  I bought
it because I loved it, but then never found a use for it, until
now.  The page on the right has a large tuck area that is
made with some eco-printed paper from my stash.
I made a tag to go into the tuck too.
Using book pages and music is great for journals.
I used some lyrics for the page and sheet music for the
pockets.  The front is a piece of eco-printed paper.
Here is a video explaining how to make these
I used some of my alcohol inked background papers for the
page on the left and created a diagonal belly band with 
a coordinating piece.
The page on the right is part of a page from a very old
book on how to manage your household money.
On the left, more eco-printed paper and on the right
I used some instructions from an old sewing pattern.
The purple is some paper that I made a while back, it's
thicker than regular paper, so really lent itself to being
decorative.
Guess I've chosen several eco-printed pages for this post.
Here is another one.
I have a very small dictionary that I picked up at a 
recycle store and I love using the pages from it in my
journals, this one I have starred "flowery" since it is
on the page next to the eco-printed flowers.
An alcohol ink back ground, with an ink sprayed piece of
canvas for a tuck spot and a tag from eco-print paper on the left.
The right is a page for her to write about memories.
This page is a page that I colored from an adult coloring book.
Every wonder what to do with those colored pages, well
cut them up and use them in a journal, they are also
great to cut up to make cards.
The pocket on the left is simply a piece of card stock with lines 
to outline it and a small journaling tag.
The bottom right is a picture of M&Ms from a magazine
that I fussy cut and made into a small pocket.
This is one of the center pages in a signature.  It's a cover from
some very old sheet music.  I love the picture and there is 
a poem on it.  I think it's beautiful and she can write on it and still 
be able to see the picture, if she wants.
Here is the inside back cover.  Another piece that I made.
This time using paints and a gelli plate.
This is where I added the buttons that hold the 
string that closes the book.

Well, that's all I have for this journal.
I'm sure I'll be posting more about my journals,
I have made a few more already and intend to make even
more of them.  I love creating something from things I have
and things that are old.

Thanks for stopping in, I hope you have been inspired in some way
and will come again soon.
Until then,
think junk journals and give them a try.
Here are a couple links to some of the people I follow on 
YouTube that may help if you are interested in creating 
some of your own.


Friday, March 22, 2019

Tags - Foliage

Hello blog friends.
Today I have another tag post for you.

These were made with an alcohol inked background.
I used "Further Around The Edge" stamp set from
 Dyan Reaveley to stamp the vine design
 and heat embossed it with gold embossing powder.

For these 2 tags I used alcohol inks on silver card stock,
then stamped them with a variety of leaf stamps using
Alcohol Lift Ink.
The Alcohol Lift Ink does just what it say, it lifts the ink
off the card stock, leaving the design of the stamp.
Once it is lifted, you can take that stamp and stamp
the "lifted ink" onto another surface.
I would encourage you to watch some videos on this
product and technique and give it a try,
it's fun and gives a great look to projects.

Thanks for stopping in, come again soon.
Until then,
try something new.


Note the links are only to give a reference so you can
see what the products are.
I didn't necessarily purchase from these sites,
except where specified,
and you may find better prices elsewhere,
I am in no way promoting any particular site.

Thursday, March 14, 2019

Tags - Plaid

 Hi!
Today is tag series day.
I really enjoyed making these tags.
I have a stamp set that I got used, I don't even remember
where or when.  It has different styles of stripes, so I decided
to try my hand at making some plaids and these are what
I came up with.

I used different combinations of the stripes and
colors to create different looks
and I love how they turned out.
I wanted to make some tags that were a little more
masculine and I think these fit the bill.
I used Distress Inks and my
MISTI Stamping tool as each of
those stripes is stamped separately.
They didn't really take long with the
help of the MISTI.
These were all stamped on manila tags
 and I use a bit of jute twine for the tie.

Thanks for stopping by today to
see what I'm up to,
I hope you'll stop by again soon.
Until then stretch yourself and
think outside the box.


Note the links are only to give a reference so you can
see what the products are.
I didn't necessarily purchase from these sites,
except where specified,
and you may find better prices elsewhere,
I am in no way promoting any particular site.

Wednesday, March 6, 2019

Tags, Leaves

Hello, I hope you're having a lovely day.
Today is tag day and I have 2 similar,
but different tags to show you.

I used a polka dot background stamp
and Distress ink on white card stock,
then cut them to size.
The leaves were then stamped with
the same ink, but double stamped to
give a darker image.
Last the sentiment was stamped
with VersaFine Onyx Black ink,
which gives a nice crisp image.

This tag was done with the same technique,
I stamped the leaves, then used the same ink to
stamp the veins of the leaves.
I used a little dot cluster stamp to create the bunch of
berries in the center, I think this gives the tag
a nice little pop.

I'm glad you stopped in to spend a little time
with me today, I hope you are too.
I hope you'll come again soon.
Until next time,
happy crafting!


Note the links are only to give a reference so you can
see what the products are.
I didn't necessarily purchase from these sites,
except where specified,
and you may find better prices elsewhere,
I am in no way promoting any particular site.

Tuesday, February 12, 2019

Tags - Alcohol Ink and Foil

Good day crafty people!
I have a group of friends that are
crafty people.  We are in different areas
of the US and most of us know each other online.
I am close friends with some of them in real life
and I hope to meet the rest of them in person
one day. But for now we are close online friends.
Some of our group decided to have a
Tag Swap.
We have done this at Christmas before,
but this time decide to do other tags.
We needed to make 5 tags for each person
in the swap.  There were only 5 of us participating,
so I needed to make 20 tags for the other ladies.
I will be posting about these tags over the
 next couple weeks.  These are
the first tags in this series.

I knew I wanted to use some of my
alcohol ink pieces for the tags, so I looked
through my stash and found some of the ones
I liked the best.
This one I used alcohol inks on silver metallic
card stock.  I put the ink onto a felt blending tool
and pounced it onto the card stock.
The alcohol inked piece flips up on each
of these tags, you'll see that below.
I made a "messy nest" of silver thread
and topped it with a silver thread bow to
finish it off.

This one was made by dripping alcohol inks
onto white glossy card stock and blowing through
a straw to spread the inks.  I also pounce with
ink and blending solution to create this beautiful
design.  I added a few buttons for interest.

I had an inked tag that matched beautifully
with the alcohol inked piece, so I used that
for the tag base. I inked this tag with
Distress Inks then flicked water onto the tag
and picked it up with a paper towel, creating the
lighter areas.
For all of the tags, I used small strips of
clear acetate packaging to make the hinges.

These next two tags were done on one larger
piece of glossy card stock and cut down. 
I used alcohol inks
and when they were not quite dry, and still a little
tacky, I applied gold Deco Foil to them, then pulled it off.
Where ever the ink wasn't dried the gold foil stuck,
that's where you see it on the tags.
I love this technique, you never know
what you'll end up with, it's always different.
To finish one off, I wound gold thread around
the tag and tied a bow on the front.

This one I simply tied a bow with gold thread
and glued it to the front of the tag on top
of a messy nest of thread.

This is what the insides of the tags
look like.

I think my crafty friends will like
the tags I made, each of them will get one of these.
Next post I'll show you some other tags I made for the swap.

Thanks for stopping by today,
until next time, have fun
crafting something.


Note the links are only to give a reference so you can
see what the products are.
I didn't necessarily purchase from these sites,
except where specified,
and you may find better prices elsewhere,
I am in no way promoting any particular site.

Saturday, January 1, 2011

Tag You're It! contest.

Frantic Stamper's blog is having a Tag You're It contest.  I entered a few tags into it, but unfortunatly I didn't make the finals.  Below are 4 tags that I entered.  I think they turned out pretty nice.  I've never done a lot of tags like this, so this is something new for me. 
I love the rose on this tag.  It is one that I made a little while ago and knew that eventually I would find the perfect project for it. I got the doily at
Hollo's Papercrafts.  The bird is a stamp from The Paper Company.

Yeah, that's me on that tag.  I was thinking this would make a nice tag to give someone on a gift,  wouldn't have to sign it, they could just look at the pic  and see who it was from.

Made this one mostly with supplies I got in a grab box that I got for Christmas filled with Prima products.  It was bought from Frantic Stamper.

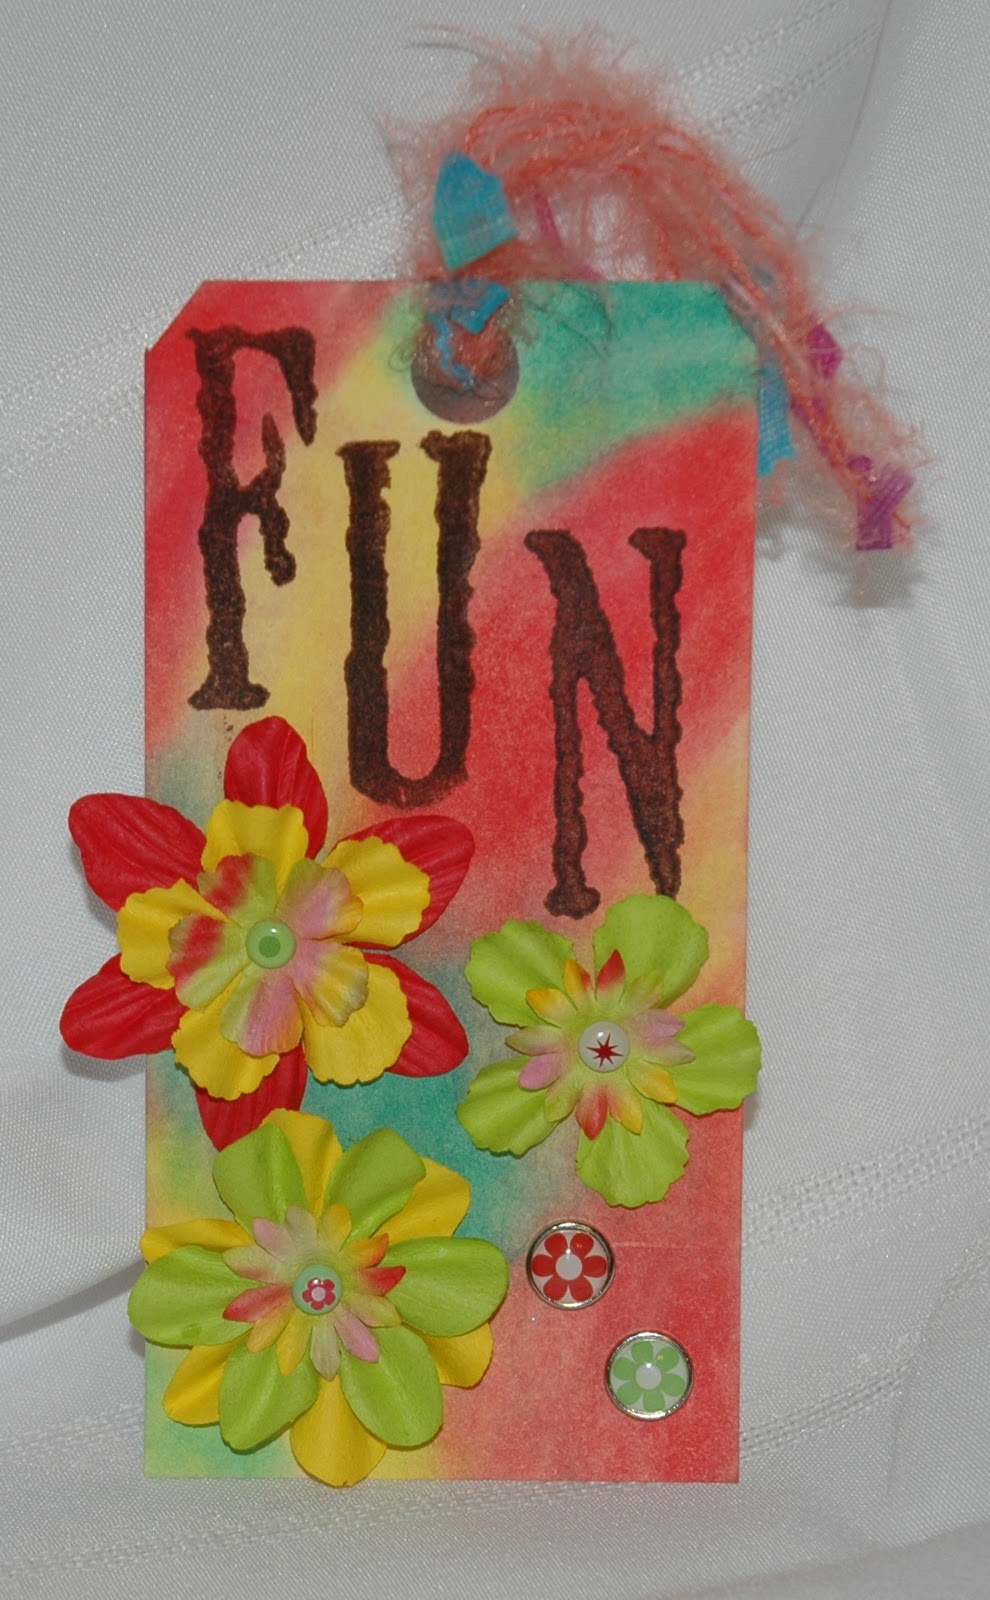
I love this FUN tag!  I received some Pan Pastels for Christmas and wanted to mess around with them.  That is what I used to color the tag.  Love it!  I stamped the FUN onto the tag and the flowers were others that I got in my grab box.  All the brads in the flower centers and lower right hand corner are ones I got in a prize pack that I won from Kristen Swain on her blog, Blankety Blank Blank.

Thanks for stopping by today.  I hope you have enjoyed my tags.  Leave me a comment and let me know what you think.  Which one do you like best?
Until next time, Happy Crafting!