My Other Pages

To make it easier to read about our trip to Ireland, I have made a page that is just for that. There is a tab above for Ireland Trip 2014 or click on the Home tab to read my other posts. I have also created a new page for My Weight Loss Journey if you are interested in that, click on the tab above.
Showing posts with label water color crayons. Show all posts

Wednesday, March 7, 2018

Party Poopers Card

Hi everyone!
I need a card for my great nephew's birthday,
since he loves animals, I thought this would be the
perfect card for him.  He'll be 3 yrs old on the 17th.
I stamped 
from Stamp On It
onto watercolor paper and colored it with my
I stamped the golden dog and the black and white one
again onto scrap pieces and colored them the same as
the original.
I fussy cut the extra images.
The black and white dog is adhered over the original with
foam tape.  The golden one is adhered with a 
The background was also colored with water color crayons.
I hope this video works for you, sometimes it does
and sometimes it doesn't, but I can't figure out why or
how to fix that.
Inside I stamped this Happy Birthday sentiment
with a stamp that I took off a wood block, so 
I don't know what company it is from.
I colored it with colored pencils.
I think Emmett will love this card, especially since it
has the movement of the action wobbler.

Thanks for stopping by today, 
I hope you'll come again soon.
Until then,
try making something a little interactive.


Note the links are only to give a reference so you can
see what the products are.
I didn't necessarily purchase from these sites,
except where specified,
and you may find better prices elsewhere,
I am in no way promoting any particular site.

Tuesday, October 10, 2017

Crazy Dog Card

Hello friends!
Today is another card from my 
unused stash of goodies.
I love the dogs from the 
They are just so darn cute and bring a smile to 
my face, they have such personality!
I colored this card using my 
watercolor crayons for the dog as well as the
sky and grass.
Inside I stamped this sentiment from the 
from Cas-ual Fridays Stamps.
I added a little Glossy Accents to his nose and tag
to give a little shine.
I also made an envelope, since it is a square card,
Did you know square cards cost more to mail?
I made the envelope a bit larger than the card, in 
a rectangular shape to avoid the extra postage.

Thanks for stopping by to see what I've been up to,
I hope you have a wonderful day and 
create something fun.


Note the links are only to give a reference so you can
see what the products are.
I didn't necessarily purchase from these sites,
except where specified,
and you may find better prices elsewhere,
I am in no way promoting any particular site.


Tuesday, August 15, 2017

HB2U

Hi All!
Today I have a birthday card to show you.
I love the Crazy Dogs stamp set from Tim Holtz!
One of my friends has the set and I stamped all the
different dogs onto watercolor paper to color
when I got to them.
I wanted to use one for a birthday card for my son
and I chose this cute little guy.
The stamp doesn't come with the spots, I added those
as I painted with my watercolor crayons.
I used the HB2U from the
Whole Shebang stamp set
from CAS-UAL Fridays Stamps
I added a bit of Glossy Accents to his nose 
and the tag hanging from his collar to give a little shine
and dimension.
The sentiment inside the card is from the
Whole Shebang stamp set also.
I think this card turned out adorable and Jaryd will 
love it.  He is a big dog and cat lover and I'm sure he'll
appreciate it.


Note the links are only to give a reference so you can
see what the products are.
I didn't necessarily purchase from these sites,
except where specified,
and you may find better prices elsewhere,
I am in no way promoting any particular site.


Friday, May 19, 2017

Mother's Day Card #5

Hi crafty friends!
Now you are probably wondering why I have 
made so many Mother's Day cards.
Earlier this year I decided that I wanted to make
a point of sending out more cards to my family,
so that's what I've been trying to do for 
holidays.  I'm lucky enough to still have my
Mom, she is 92 yrs old and going strong.
But I also have a few sisters in law that I'll be
sending them too.
Just because they are not MY mother
doesn't mean they don't deserve a card, right?
Today I have card #5 in my series.
This poppy stamp is one of my favorites.
I stamped it with Versafine Onyx Black Ink
onto water color paper.
I colored it with 
and fussy cut it.
The black background is from a piece I had
in my stash.  I made this using Perfect Pearls
and black card stock.
It's hard to capture the shimmer in a photograph, 
but in real life it's just beautiful.
The larger background was also in my stash,
it was made using
I simply wrapped it around a piece of white
card stock to give it stability,
then adhered it to the card base.
I love having these handmade background
pieces in my stash to choose from.
I used some craft foam on the back of the 
black piece to give a little dimension.
The sentiment is from 
from QKR Stampede.

I hope you are enjoying these cards,
I sure did enjoy making them.
Come again soon for card #6 and the
last in the Mother's Day Card Series.
See you soon!


Note the links are only to give a reference so you can
see what the products are.
I didn't necessarily purchase from these sites,
except where specified,
and you may find better prices elsewhere,
I am in no way promoting any particular site.

Wednesday, November 2, 2016

Coloring pad

Today I have something a little bit different to show you.
I often go to the craft stores just to walk around
and believe it or not, I often don't buy a single thing.
But every now and then I find something fun on clearance.
This was one of those finds.
I found this pad of 6x6" foiled paper on 
clearance for only $1.79
There are 9 designs and 2 of each.
They are just gorgeous.
For that price, how could I go wrong?
They also had 12x12" pads that are prints like this
to color, printed in black and I picked one of them 
up also for only $5.99.
I'm sure I'll be posting something about that one 
day also.
But for now, I'll show you this gold foiled paper.
I colored this page with my watercolor crayons.
This picture shows the entire page, 
although you can see it is cut at the right side, 
as I forgot to take a picture before making the 
card with it.
Here is the completed card.
I simply cut the piece to size and adhered it
to a white card base with ATG tape.
I decided to leave it with no sentiment
as a plain note card, I thought a sentiment 
would take away from the beautiful design.
Here is another of the pages that I colored.
I haven't decided what I will do with this one yet.
I may use it on a scrapbook layout, or make a 
card with it.
I'll be sure to post what I end up doing with it.
I haven't been able to find anywhere to link
these beautiful paper pads for y'all.
I got mine at Michael's,
but can't find any online.
Sorry about that.
They had other products in this line also,
craft tape, tags, journals, other coloring pads
and more,
they were all beautiful,
you might be lucky and find some at your 
local Micheal's if you are interested in checking
them out.
Good luck.

Thanks for stopping in today.
I hope you have been inspired in some way,
maybe just to do a little coloring,
or maybe make a card with something you've 
already colored.
Come again soon.
Until then,
have some fun!


Note the links are only to give a reference so you can
see what the products are.
I didn't necessarily purchase from these sites,
except where specified,
and you may find better prices elsewhere,
I am in no way promoting any particular site.

Friday, August 12, 2016

woven background

Hello all!
Today I'm showing you a card that I made for my Mom.
I was going out of town for a couple weeks and wanted
her to know that I was thinking of her while
I was away.  I made this card and sent it
while I was visiting a friend in Ohio.
For a tutorial on how to make the woven background
hop over to 
where you'll find a step by step tutorial.
.
I used "Flower Basket"(#24608) 
I colored it with water color crayons,
fussy cut it and adhered it right to the 
stamped background.
from Simon Says Stamp,
to make the banner and stamped
the sentiment with the coordinating
stamp set.
I used a little distress ink to give it a little color.
The inside was left blank and I wrote a note
to my Mom before sending the card.
I know she loved receiving this card
and I enjoyed making it.
Thanks for stopping by today
and be sure to pop over and check out
the tutorial on 
Until next time, have fun crafting!

The links on this post are not necessarily the brand
I used or the site
 I bought my supplies from.
They are just a reference for you.
You may find supplies at better prices 
than the ones in the links.
The stamps and dies, however are exclusive 
to the companies they are linked to.


Saturday, August 6, 2016

Kitty Cards

Hello everyone!
Today I have 2 cards I made, a little different,
yet mostly the same.
Someone very close to me was diagnosed with breast cancer
recently and I wanted to send a card letting her know
I'm thinking of her.
I made this "big hugs" card for her and wrote a personal
note inside.
The cat image is stamped with VersaFine Onyx Black  ink,
I colored the cats, on both cards, with 
colored pencils and blended with Gamsol.
The background was painted by scribbling some
water color crayon onto an acrylic block and 
mixing it with water, then painting it on with a
  I also made the envelopes since the cards are
not a standard size.  I used my
to make the envelopes for both cards.
This second card I made for my Aunt Marilyn who
will be 93 at the end of September.
She loves cats and I know she will get a kick out of this
card. I can hear her now, exclaiming how cute the cat is.
The cat image is
The sentiments are both 
I have linked many of the supplies I used,
I did not necessarily purchase them from the linked
sites. I only use them for reference for you to
see the supplies.
You may very well find these supplies at 
many other sites and maybe at better prices,
just do a little research.

Thanks for stopping by today,
I hope you have enjoyed my cards as 
much as I enjoyed making them.
Come again soon.
Until then, Happy Crafting!

Sunday, May 1, 2016

Recollections crayons

Hello crafty friends!
One of my favorite mediums is water color crayons.
I have a nice set from LYRA and some additional colors
that are Neo-Colors.  I use them often and really enjoy them.
Last week I was visiting a friend and she had a set of the new
water color crayons from Recollections (Michael's brand)
and I gave them a try.
They only come in this set of 12 colors, the price is
very reasonable at $14.99 (US) and with a coupon the 
price is even better.
I have to say that I absolutely loved playing with them.
They went on beautifully.
I like to use a water brush and pick up the color from the
crayon then put it to the paper.
I stamped this image with Archival black ink,
which is waterproof.
These aren't necessarily the colors I'd ever use for that image, 
but I wanted to use all the different colors and also see how they
blended.
The results was great, I loved working with them every step
of the way.
My only complaint is that they don't have a brown in the mix.
The difference with these water color crayons is that they have 
some shimmer to them.  If you have ever used Wink of Stella,
they have a comparable look.
This close up shows the shimmer a bit better.
Of course I had to get a set for myself and I was
lucky and got the last set in the store.
These will make a great addition to my water color crayon
collection.
I haven't tried them direct to paper yet, but I'll give that a try one
day soon and let y'all know how that works out.

Thanks for stopping by today,
I hope you'll stop by again soon.
You never know what you'll find on 
Kristie Kreates!


Tuesday, April 12, 2016

Thinking of you

Hello all you craft lovers!
Today I have a card to show you that I made for a friend.
I wanted to let her know she is always in my thoughts and prayers.
I started with a piece of water color paper and an acrylic block.
Using a few water color crayons, I scribbled on the acrylic
block and spritzed it with a bit of water.
Then I laid the paper onto the block to soak up the color.
I have seen this technique done before and I've tried it
a number of times and I'm never very happy with the results,
but this time, I really did love it.
I stamped the Thinking of You sentiment onto the water 
color piece using my Misti tool.
I started out stamping it with yellow, hoping that it would show
up on the pink, but it didn't work and I ended up stamping over
it with a slate gray ink.
I adhered it to a bright yellow card base and added a white
piece of card stock inside.
On the inside the yellow worked much better.
I left room so I could write a message to my friend.
When I was at Ikea, I picked up this hook to send her.
She had gotten one when we had gone to Ikea a few weeks
ago when I was visiting and I know she wishes she had
picked up another, so I sent this along with the card.
I'm hoping it brings a smile to her face.
Now I'm wishing I would have picked up a couple for
my craft room.  Oh well, I'll just have to make another
trip to Ikea.  I just wish there was one close to me.
Another excuse to go visit I guess.

Thanks for stopping by today,
hope you'll stop by again soon.
Until next time, Happy Crafting!


Monday, January 11, 2016

Swap gift

Hello!
I have to start by saying 
I LOVE paper!
Not just scrapbooking paper, although most
of what I have is for scrapbooking, but I love paper 
of different kinds.
And I have a real problem with it,
I hate to use it, I just want to keep it,
look at it, admire it and cherish it.
I have been getting better about that,
and this past year I have made a real effort to use
some of my favorite papers.
After all isn't that what they are for?
No more saving them for just the right project,
I'm MAKING them the right projects.
Okay, now that I've made that confession,
I'll get to the reason for this post.
There is a store in Rochester, NY, about an hours
drive from where I live, that I just love.
The Art Store
isn't a crafty type of store, they have a LOT
of wonderful art supplies.
One of the things they have is paper!
Not just any paper, but some gorgeous handmade papers.
Thanksgiving weekend I went with my friend, Mary,
to do a little shopping and I couldn't resist buying some 
of the papers, but this time, I had a real purpose in mind.
This picture doesn't really do the paper justice,
but I bought this with Mary in mind.
We are in an Art Swap Group together and I 
happened to be given her name for the Christmas
exchange.
It took a while to decide what I wanted to do,
but then when it came to me, it came together pretty easily.
I started with some nice quality heavy weight watercolor paper
(Sorry I don't remember which inks I used to create
this background.)
I wet the paper with a generous amount of water.
I "smooched" some ink onto an acrylic block and
picked it up with a wet paint brush, then dropped it into 
the water on the paper.
I let the color flow through the water and then used a 
heat gun to dry the entire piece.
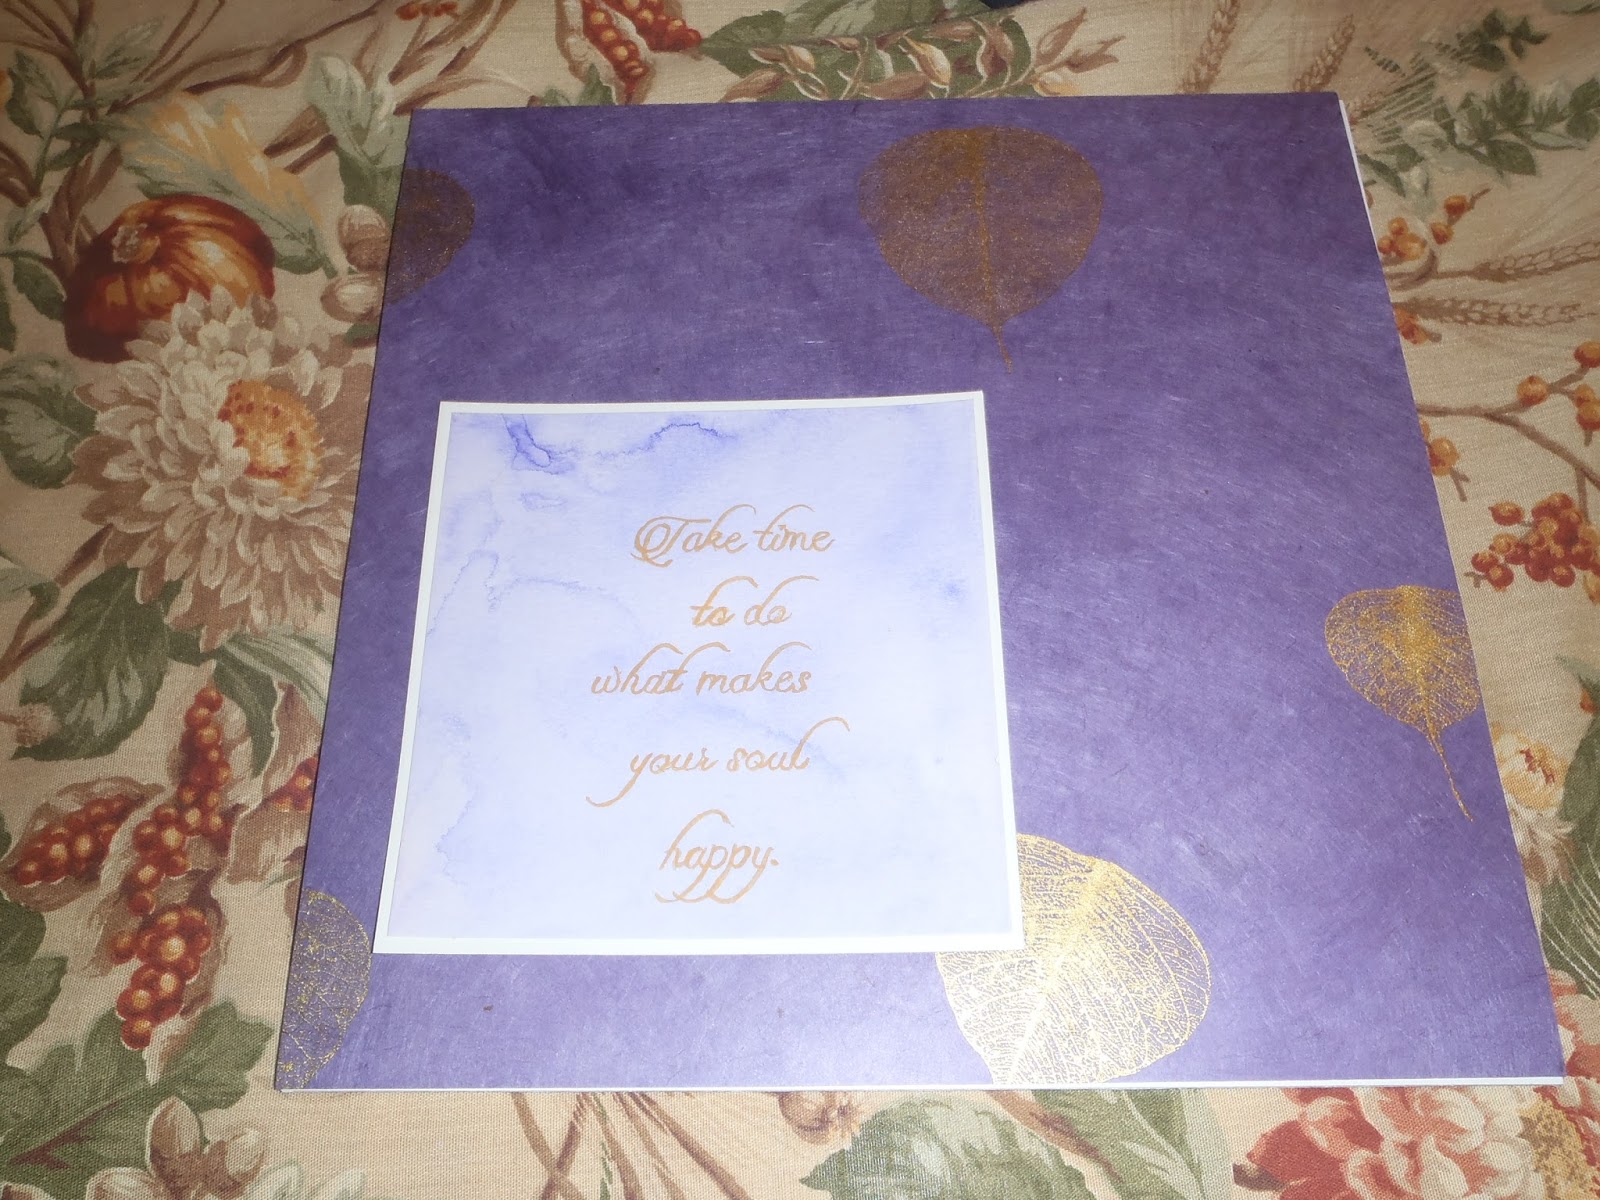
It took me a while, but I finally found a quote that I
thought was perfect for Mary.
I printed the quote out in a font that I liked onto
plain computer paper.
I taped the quote to my light box,
then taped the painted paper over the quote.
I painted the quote with a gold water color crayon
and a fine paint brush.
I love how it turned out.
Now I needed to decide where to place it on the paper
and what size I wanted it to be.
I trimmed down the quote as well as the background paper.
I matted the quote with white card stock to set it off,
adhered it to the background paper and adhered that to
a piece of foam core.
I'm very fortunate to have a husband that is a photographer
and custom framer.  He had just the frame I needed
and we framed the piece in a gold frame
I love how this turned out and hope Mary loves it
as much as I do.

Thanks for stopping by today.
I hope you'll think about some projects you can
make with some special papers that you've 
been hoarding, or pick up something wonderful
to work with.
Come again soon and you'll see the projects
 I made for my kids for Christmas with
some of these gorgeous papers.
Until then, Happy Crafting

Thursday, June 26, 2014

Post card - Life is Good

Hello craft friends!
Today I have a post card to show you.
Our art swap group had a swap of post cards in May.  
I decided to send out a card to the gal who organized the swap
I used a water color post card and stamped
"Tub of Flowers" (#82001) from 
onto the card and colored it with water color crayons.
I also used 
"Field Grass Right" (#38925) also from 
for the grass around the tub.
"Life is Good" (#16307) is from 
I think MB will like this postcard
I hope it brightens her day.
Thank you for stopping by today,
come again soon.
I wish you a bright day.

Until next time, Happy Stamping!

Wednesday, June 4, 2014

Art Swap Group

Hello crafty friends!
Our Art Swap Group has had another swap.
This time it was to make a post card with a season theme.
It could be the season we're in, our favorite season,
whatever we want as long as it has to do with a season.
I chose to use "Rose" (#17505) from 
My favorite season is the summer and what says summer
more than beautiful flowers?!?!
I stamped the roses onto a water color paper post card
with Staz-On ink then colored them with 
water color crayons.
For the background I colored a bit of the crayon onto an
acrylic piece and watered it down with water.
I wanted just a light blue for the "sky"
"Life is Good" (#16307) is also from 
I hope this post card brings some sunshine and warmth to Heather.
She lives in Australia, so as we are just going into our summer season,
she is going into her winter season.
When I receive my post card from the swap in the mail,
I'll post it for y'all to see.

Thanks for stopping by today,
leave a comment if you will and come again soon.

Until next time, Happy Crafting!

Thursday, May 15, 2014

Masculine Happy Birthday

Hello!
Today I have a masculine birthday card that I made.
I used
"Happy Birthday" (#36314) from 
"Fishing Hat" (#20309) and
"Fishing Gear" (#20401) from
For my background I used water color paper,
brushed it with a good amount of water then
brushed on water color crayons.
The Happy Birthday is stamped directly onto the background.
I stamped the hat and fishing gear onto
white card stock and colored them with water color crayons 
then fussy cut them.
The are adhered with foam tape to give a little 
dimension to the card.

Thanks for stopping by today.
I hope you have been inspired in some way.

Until next time, Happy Crafting!

Monday, January 20, 2014

3 Favorite Embellishments

Hello blog fans!
Today we start a new challenge on the
This weeks theme is
"Use 3 Favorite Embellishments"
I used
"Cool Cat With Shades" (#23902) from
Eureka! Stamps for this card
I stamped Cool Cat onto white card stock
colored him with water color crayons and fussy cut him.
For my 3 favorite embellishments I used
1.  The sunglasses.  I bought several pair of these sunglasses a long time ago.  They were on clearance and had pins on the backs. I cut the pins off and have used them on cards and layouts when I can.  I love them.
2.  Ribbon is another of my favorite embellishments, so I tied a bow for a tie around his neck.
3.  I have these little wood stars that I just love.  I covered them with a bit of Glossy Accents and dipped them into gold glitter.
I thought I could write
"You're a star!"
inside.
Thanks for stopping by today, I hope you've been inspired in some way.
I'd love to see some of your favorite embellishments,
so pop over to the Eureka! blog and check out the
challenge particulars.
Come again soon.
 
Until next time, Happy Crafting!

Monday, December 16, 2013

Beginning to look a lot like Christmas

"It's beginning to look a lot like Christmas!"
That's the theme of the Eureka! Stamps Challenge
this week.
All the particulars can be found on the
For my card I used
"Package Tower" (#23301) from
I stamped the image onto white card stock and
colored it with water color crayons.
I used Perfect Layers rulers
to mat the image onto patterned paper, red card stock
and then onto the card. 
It is so easy to get perfect mats
without any measuring with Perfect Layers.
 
I hope I have given you some inspiration and that
you will join us in this challenge.
 
Thanks for stopping by today,
I hope you will leave a comment for me
and come again soon!
 
Until next time, Happy Crafting!

Monday, October 28, 2013

Just A Note Of Thanks

Today is the start of another challenge on the
The theme is
"Just a note of thanks"
I have used
"Just a note"  (#6405)
"Parachuting Squirrel" (#27402)
both from
I stamped the image with Versa Fine Black Onyx ink
and colored it and the background with
water color crayons.
Just a note... was also stamped with the same ink.
I love this image, so cute and fun to color.
Eureka! Stamps has so many 
wonderful images and lovely sentiments!
Pop over to the Eureka! Stamps Store
and see what you find
that you'd love to work with,
then join in the fun of this weeks challenge. 
Thanks for stopping by today.
I hope you'll stop by again soon.
 
Until next time, Happy Crafting!