My Other Pages

To make it easier to read about our trip to Ireland, I have made a page that is just for that. There is a tab above for Ireland Trip 2014 or click on the Home tab to read my other posts. I have also created a new page for My Weight Loss Journey if you are interested in that, click on the tab above.
Showing posts with label We R Memory Keepers Envelope Punch Board. Show all posts

Saturday, November 6, 2021

Anniversary Card

Good day blog fans!
Today I'm showing you the Anniversary card I mad
for our son and daughter in law.
I stamped the
Large Knot Heart
from Eureka stamps, now sold through 
Stamp On It, onto card stock with VersaMark ink.
I then heat embossed it with silver embossing powder.
The sentiment was also heat embossed, but on
The sentiment was wrapped around the image
panel and adhered to the back.
I then layered it onto white card stock and 
more of the silver vellum, then onto a 
card base.
Since this card was a odd size, I made my own

Thanks for stopping in today,
I hope you are having a wonderful day.
Come again soon.
Until then,
try some heat embossing.


Note the links are only to give a reference so you can
see what the products are.
I didn't necessarily purchase from these sites,
except where specified,
and you may find better prices elsewhere,
I am in no way promoting any particular site.

Wednesday, May 26, 2021

Birthday Card and Envelope

Hello everyone and welcome!
Today I have a card and envelope to share with you.
I needed a birthday card for a friend and chose this one
from my stash.  I'm sure I have shared this one with you before.
I was inspired by Cee Cee who is one of my favorite watercolor
artists.  I follow her on YouTube and Instagram
Creationsceecee
She has very calming videos and her work is beautiful.
I wanted to make this special, so decided to make a
mail art envelope for the card.
The card itself is an uncommon size, so I made an envelope for
it with my 
I used 1070AA ZINNIAS
and colored them with my 
I think it will make her smile when she receives it.

Thanks for stopping by today to see what I've been creating
lately.  Hope you'll come again soon.
You never know what you'll see on 
Kristie Kreates.

Monday, February 3, 2020

Party Poopers Birthday Card adn a Fishy Envelope

Hi Everyone!
Today I have a card to show you.
Recently a mom in a group I'm in on Facebook
posted that he twins are turning 6 yrs old and that they
love opening mail.  She asked if anyone would be
willing to send them cards for their birthday, just so they
would have them to open from the mail.
Being a card maker, I was happy to help out.
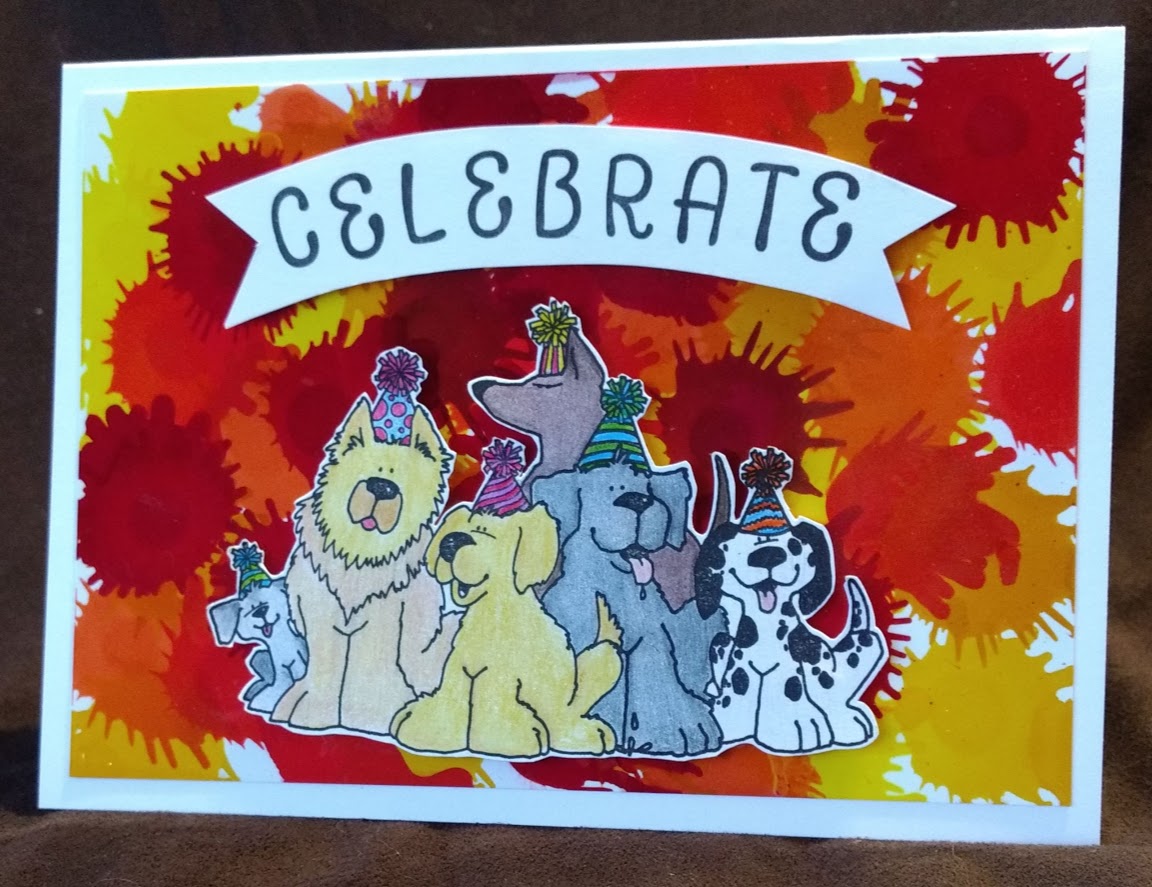
This is the card I made for her little guy.
The background piece was made with alcohol inks 
I thought it was a great background for a celebration.
The dogs are Party Poopers
I stamped the image with 
and colored them with colored pencils.
I fussy cut the image and adhered it to the background
with foam tape to give it a little dimension.
I stamped the Celebrate with an alpha stamp set
from my stash, I have no idea what company they are from.
I then fussy cut around it to make a banner shape.
The whole thing was then adhered to a white card base.
Inside I simply stamped "Happy Birthday"
I made the envelope with my
and decided to decorate it.
I stamped the fish onto the envelope, then stamped them 
onto scrap paper and fussy cut them to make a mask.
I put the mask over the fish (Sm Fat Fish & Lg Fat Fish)
and used Distress Inks to 
apply the 'water' to the envelope.
After taking the masks off the fish I colored them with 
colored pencils.
I covered the colored areas with 
which is a glaze that makes it water resistant, 
so the inks and coloring won't be ruined if they get wet.
I think the little guy will get a kick out of receiving 
this in the mail.

Thanks for spending time with me today,
I hope you have enjoyed it here at
Kristie Kreates 
and will come again soon.
Next up, the card I made for the other twin.


Note the links are only to give a reference so you can
see what the products are.
I didn't necessarily purchase from these sites,
except where specified,
and you may find better prices elsewhere,
I am in no way promoting any particular site.

Friday, November 22, 2019

Becky's Christmas Swap

Hello crafting fans.
I belong to a facebook group of friends
that are all into crafting and art of various
types.
We decided to do a Christmas gift swap
and the gal who I made my gifts for 
is very into crocheting.
I decided to make her a bag to carry some of
her work in.  I downloaded the yarn and crochet hook
pattern from The Craft Chop and cut it from
I then used my heat press to add it to the bag.
For this little bag for her crochet hooks,
I altered the original design and made the
crochet hooks.
I designed my own wording and cut them
then added them to the little pouch.
I think she'll get a kick out of this.
I'm very happy with the way these gifts turned out
and I'm pretty sure Becky will enjoy them too.
I wanted to send a card along with the gift, so
I made this spinner card. The Santa is on a string and
before putting the card in the envelope I will spin it around.
When she opens the card the Santa will spin.
This is made from the 
and colored with colored pencils.
Inside the card, I made a flap that shows through 
the front of the card, once she opens the card, she can
lift the flap to read the sentiment..
I also made a Christmas envelope to go with the card,

Thanks for coming and spending some time with me
today.  I hope you have been inspired in some way
and will come again soon.
Until then,
make something nice for someone else!


Note the links are only to give a reference so you can
see what the products are.
I didn't necessarily purchase from these sites,
except where specified,
and you may find better prices elsewhere,
I am in no way promoting any particular site.

Thursday, October 31, 2019

Halloween Cards

Happy Halloween!
Today I'm sharing a couple cards I made for
Halloween.
I made this spinner card using 
I stamped the image onto white card stock, 
colored it, adhered it with temporary adhesive
to another piece of card stock and fussy cut it.
Adding the other card stock to the back gives 
that second layer to sandwich the thread
to make the spinner mechanism.  It also
gives a nice clean look to the back
of the image.
I didn't want the sentiment and what I wrote
to show through the front of the card,
so I made a circle flip up the same size as
the cut out in the front of the card.
Where I stamped Happy Halloween and
signed the card.
This card was an odd size, so I made my own 
envelope with my 
I stamped 
and colored it for a festive look, 
using colored pencils.
The other card I made was this
spider card.
I think he turned out pretty cute.
I love the little shoes I made for him too!
It was a little bit of a challenge getting him into 
the envelope, but since I made my own envelope
I made it happen.  I just hope he arrived okay, 
having been squished into the envelope.
I attached a card base to the bottom, 
where I stamped a greeting and could sign the card.
I stamped the envelope with 

I hope the kids I sent these to enjoyed them,
and had a frightfully good Halloween.

Thanks for stopping by today,
hope you enjoyed your Halloween.
Come again soon,
until then 
don't eat too much candy!


Note the links are only to give a reference so you can
see what the products are.
I didn't necessarily purchase from these sites,
except where specified,
and you may find better prices elsewhere,
I am in no way promoting any particular site.

Saturday, August 25, 2018

Shower Card

Welcome to Kristie Kreates!
Today I have a card to show you.
This is the card I made for my almost daughter in law
for her bridal shower.

Sara is mostly Irish and loves her Irish heritage,
so I thought this heart was appropriate for her card.
I stamped "large knot heart" onto
white card stock with purple Distress Ink.
(I'm not sure which purple this is)
I trimmed down the image and adhered it to
a background from my stash.
This one was done on glossy paper with
alcohol inks.
I then adhered it to a gray card base.

On the inside I cut a piece of plain white card stock
then adhered thin strips of the same background
paper to the sides before adhering it to the inside
of the card.
I love that little pop of color inside the card.

Since this card was an odd size, I used my
We R Memory Keepers Envelope Punch Board
to make an envelope for the card in a coordinating color.
I know Sara appreciated the card, she loves hand
made cards and gifts.

Thanks for coming by today.
I hope you are having a crafty day
and were inspired in some way while
you were visiting.
Hope to see you again soon.
Until then,
happy crafting!


Note the links are only to give a reference so you can
see what the products are.
I didn't necessarily purchase from these sites,
except where specified,
and you may find better prices elsewhere,
I am in no way promoting any particular site.

Tuesday, July 18, 2017

Baby Boy and B-day love

Hello Everyone!
Today I have a few cards to share with you.
A few weeks ago I shared this card and this one
using the same style and techniques that I used for these cards.
I needed a baby shower card and thought this would be perfect 
for it.
So I made this Baby Boy card.
I was playing with the colors and blending them
and had made 2 more heart panels and made them into 
birthday cards.
These are not standard sized cards, so I used my
to make envelopes for them.
If you are interested in how I made this watercolor piece, 
you can see this video on Kristina Werner's Blog.
I get so much inspiration from her!

Thanks for stopping in today!
I've been away for a bit on a little vacation
and crafting weekend.
I'll be posting what I made on my weekend away
soon.
Until then, enjoy some creative time!


Note the links are only to give a reference so you can
see what the products are.
I didn't necessarily purchase from these sites,
except where specified,
and you may find better prices elsewhere,
I am in no way promoting any particular site.


Tuesday, February 7, 2017

Kelsie's Card

Hello!
Today I have a card to show you that my daughter made.
She wanted to make a card for her boyfriend's father
for his birthday.
First she made the striped background with my 
and 
She then stamped the cupcakes onto white card stock
The cupcakes are an old set from Inkadinkado
and I can't find them anywhere to link to.
She fussy cut the cupcakes, adhered them to the 
striped panel with foam tape 
and adhered that to the card base.
Inside she simply stamped 
'happy birthday' 
from 
stamp set.
She then made an envelope to go with the card 
I think it turned out great.
We had a nice time and I got to teach her some new things
which I know she will use again for future cards.
Thanks for stopping by,
have a wonderful day
and learn something new.


Note the links are only to give a reference so you can
see what the products are.
I didn't necessarily purchase from these sites,
except where specified,
and you may find better prices elsewhere,
I am in no way promoting any particular site.


Saturday, January 9, 2016

Gift card holders

Hi blog friends!
I know these gift card holders are Christmasy,
but just change up the papers and they would
be any theme you want.
We had several gift cards that we gave this year and
needed holders for them, so I created these on the fly.
It's really quite easy to make a gift card holder.
For the front you can just add any themed paper
and embellishments that you like.
Here I used some snowflakes, but they could have
been flowers or balloons or whatever you may have in 
your stash.
For the inside, I made a fold about 1.5" from the bottom
and  used my ATG tape on the sides. 
Then fold the top of the card stock
down to line up with the bottom of the card.
Just be sure when you cut your card stock that there is enough
room for the gift card.
Most gift cards are about 3.5" which means the card stock 
needs to be about 8.5" long.  I made the width about 3"
for this card.  
This holder was very simple.
I cut a piece of card stock about 5 - 5.5" x 4"
I used a piece of trim paper for the "pocket" and
taped it along the sides and bottom,
then stamped a greeting in the upper corner.
I made a plain white envelope with my
We R Memory Keepers Envelope Punch Board
cut the design from a piece of scrap paper and 
added it to the front of the envelope to dress it up.
This holder was actually a "happy accident"
Somehow I had cut the wrong size piece of card stock,
so decided to just turn it sideways
and use it as the inside of this holder.
I'm not sure of the exact dimensions on this,
but I'd say they are probably pretty close to the one at the top.
There was plenty of room to write a sentiment in this
holder, or I could stamp something along with the 
leaves and berries.
After I'd made all my gift card holders I realized that I 
needed one for a card my Mom was giving and I had to make 
one more.
I simply folded some card stock to fit the card and dressed it
 up with some scrap paper.
I wish this paper showed better in the pictures,
it's one of my favorites with the leaves and berries 
flocked and the background a shimmery paper.
Probably the last little bit of that paper in my scraps.
So glad I hang onto scraps like I do.

Thanks for stopping by today.
I hope you were inspired in some way and 
maybe will try creating some gift card holders.
Just take some scraps or card stock
 from your stash and start folding around
a gift card and see what you can come up with.
And like I said, they can be made to work for any occasion,
just use your imagination and whatever you have in your stash.

Hope to see you again soon!


Friday, February 13, 2015

Birthday card for Elliot

This past weekend we were invited to
 a birthday party for a 1 yr old.
So of course, I had to make a card.
I stamped the balloons onto different colors of 
paper and card stock and fussy cut them.
They were adhered to the card base with foam tape.
I tied a bit of home made baker's twine to each balloon and
gathered the strings and tied them together.
I stamped the Happy Birthday greeting onto white card stock 
then used my Perfect Layers Mini tools to 
mat it with all the colors I used for the balloons.
Perfect Layers make getting perfect cuts every time easy.
I made the envelope using my 
from We R Memory Keepers
Making envelopes is quick and easy with the
Envelope Punch Board.
For the name I just punched circles and stamped 
the letters with Crushed Olive Distress Ink.
Of course, Elliot didn't have a clue that he even received the card
and gift.  He's only 1 year old after all.
But his Mom knew right away that I had made it and
she loved it.

Thanks for stopping by today, hope you'll pop in 
again soon.

Until then Happy Crafting!

Friday, December 27, 2013

Card box


Hi everyone?
Have you recovered from all the Christmas hustle and bustle?
Or are you still in the midst of it all?
I'm still up to my neck in celebrations.
 
Today I want to share a little gift I made with y'all.
This little box is simple to make using the
This one was a gift for my friend Sue. 
I filled it with some hand made cards.
I used
"Poinsettia Flower" (#83407)  and
"To Everything"  (#35104)
both stamps from Biblical Impressions
 
Here is a video tutorial to make this box.
I modified it just a little bit.
  I didn't use a belly band,
but cut a slit in the back for the flap to fit into.
It's easy with the Envelope Punch Board
and makes a great gift filled with cards.
Here is a link to another post
with a birthday themed box
that also shows the back of the box.
Thanks for stopping by today and I hope you
will come again soon.
I hope you've been inspired
and will try making some of these
little boxes for gifts in the future.
 
Until next time, Happy Crafting!


Friday, November 15, 2013

Gift card holders

I don't know about you, but it seems that
more and more people like receiving gift cards.
I didn't used to give them, but in recent years I've found that
this is what people seem to want.
If I'm going to give a gift card,
I want to do it with style.
I have a couple gift card holders to show you
that I made with my
We R Memory Keepers Envelope Punch Board,
the more I use that board, the more I love it!
I have even set up a Pinterest board for ideas that I find.
Feel free to check them out and follow me if you like.
A while back I saw an offer online for a free roll of
"Scotch® Expressions Masking Pattern Tape"
Of course I signed up, who doesn't like free?
A couple weeks ago I got a nice roll of tape from them.
Completely free with not request to endorse them or anything!
I used the Expressions Masking Tape on this card.
It is very much like Washi tape and used just the same.
So far I'm really liking it.
I know it comes in a lot of different patterns too.
The "Holiday Wishes" sentiment is part of the

This gift card holder is made so that when the card is opened
it pulls the holder and card up out of the little pocket.

Something a little unique and fun.

Here is the other one I made, using different papers.

Thanks for stopping in today.
I hope you have enjoyed my
gift card holders and have been inspired to
try making some of your own.
There are lots of interesting and fun
ideas and tutorials out there.
Check Pinterest and You Tube and have some fun!
 
Until next time, Happy Crafting!
 

Wednesday, October 16, 2013

Birthday box

Hello bloggy friends!
and I've been having a ball with it!
I've learned that there is more to be made with it
than just envelopes.
Today I'm showing you a little box that I created with it.
How fun is this?
I made the 'base' box with card stock and decorated it with
some shocking yellow card stock and patterned paper.
It doesn't look it in these pictures, but believe me that yellow card stock is so bright it hurts the eyes.
 
To get that patterned paper measured just right onto the yellow,
Cutting the mats just perfect with out measuring is so easy with
Follow the link to find out more about these wonderful tools
and you will also see that you will receive a discount
with a special discount code provided for any purchase through my blog.
This discount is good for any of the items sold by
 
Thanks for stopping by today, leave a comment if you will and
come again soon.
 
Until next time, Happy Crafting!