My Other Pages

To make it easier to read about our trip to Ireland, I have made a page that is just for that. There is a tab above for Ireland Trip 2014 or click on the Home tab to read my other posts. I have also created a new page for My Weight Loss Journey if you are interested in that, click on the tab above.

Friday, January 30, 2015

Our Favorite Nuts

Hi crafty people!
Today I'm sharing a gift I made for a couple friends.
Rocky and Diane are our neighbors and our friends.
We couldn't ask for nicer neighbors!
Dave and I wanted to give them a little something
for Christmas and to share our favorite nuts with them.
"Our Favorite Nuts" 
has a double meaning as we do get quite
nutty when we are together sometimes.
We actually did fill this jar with our favorite nuts
from Nuts.com which we love.
Here is the front.
And the sides.
I used the nuts that are on all the bags of 
their nuts.
If you ever want some good nuts, this is the
company to buy from.
We have ordered from them a few times and 
their nuts are the best.
We filled this jar with pecans and cashews,
but we have also ordered their 
shelled pistachios and their mixed nuts.
All of them have been fabulous!
Their service is great, delivery is fast and 
above all the nuts are wonderful.
And by the way, they are not paying me and 
have not asked me for this review, I just love the company
and it's product.

Thanks for stopping by today,
hope you like my Nutty jar.
Do you have a favorite kind of nut?

Tuesday, January 27, 2015

Ireland #23 Eiobhan and Bird Poop

We woke to a pretty dreary day, rainy and a little on the cool side.
We decided it was a good day to visit Parke Castle.
This isn't a big huge castle, but one of the smaller ones.
More like a big house.
It is located Lough Gill.
I love the entrance with it's long entry way and 
wrought iron gates.
Here is the "courtyard" you'll notice the outline of stone in the
center.  I believe this used to be the site of another building.
I'm not sure what it was meant for.
Here are a couple out buildings and the well.
Notice the ground is very uneven and the stones are not
placed down in flat.
One of the reasons for this is, because there would be animals
in the courtyard as well as people and wagons etc.
All the debris would end up down between the stones
and as the people walked over the top of the stones
they would not be walking in the excrement from the animals.
When it would rain the debris would be washed away.
Looking though the gates at the outbuildings. 
The well that supplied the water for the castle.
There was a tunnel from inside the castle walls leading out to the lake.
This could be used for a quick escape via boat.
This is our guide.  Her name on her tag said "Eiobhan"
when she introduced herself she said her name is 
"Eileen"  thus we learned another Irish word.
I would have never guessed that this was how her name would
be pronounced.
That turret in the corner had an interesting story.
Here is a picture looking up into the turret
This became the nesting place for lots of pigeons over 
the years.
And looking down at the floor, you can see that.
Yes, I did take a picture of bird poop. 
There was a reason for that, I needed to take the picture 
to remind myself that this turret and it's pigeons and
their poop, played a big part in the life of the castle.
The bird poop was collected and they used it to make
gun powder.
Who'd a thunk!?!?!
We also had quite a lesson in thatched roofing.
Inside this building, which was used to make horseshoes,
there was a huge bellows that was used to start and keep the fire
going for the forging.
To the left side you can see the thatch that was used for
the roofing.

These pictures show the roof of the building from the inside.
Buildings that are used to live in, would have this all covered
and in fact most of the buildings would, but they left this open
to show how it was made.

This was used to hold the thatching in place.
It was sort of like a giant hair pin.
The thatch would be layered and then this "pin" would
be shoved down into the thatch to hold it in place.
There are several different kinds of thatch as well
as different grades.  Obviously some are better than others.
Layer after layer would be applied to the roof.
Some buildings would have "chicken wire" covering the thatch on the
outside of the building, this can keep birds and animals from burrowing into
it.  There are some buildings that also attach large rocks
to the roof, with ropes.  This keeps the roof from blowing off in 
high winds.
There was one young boy in our group, so he was 
the lucky one to get the chance of going into this
small room. The rest of us would have had to crawl in.
This was in essence a sauna.
They would build a fire and it would get hot inside the room
and it would be relaxing to go inside and sit for a bit.

Here is a view of the lake from the top of the castle
where there is a walkway to look out over the land and lake.

We also toured inside the castle. 
Below are some pictures from that tour.
Unfortunately, I didn't write down the stories she told us
and my memory isn't so great for the details.
I do remember that this straw "outfit" had something to 
do with marriage customs.
Don't ask me what, I just remember that it had 
something to do with dressing up and visiting the 
newly weds.
But then again, I could be confused on that point.
Sorry about that!
The piece of furniture that she is sitting on is a bed of sorts.
The seat lifts up and the front folds down and turns into
a bed when needed.  This could also be used for storage.
Sorry for the reflection in this picture.
There was a room set up with renditions of the family that lived
in this castle.  This is the wife and mother, that circle in blue is a 
table where she was making lace.
The ever popular spiral staircase.  Pretty much every castle
has some spiral staircases.  
This does not make me happy, I really hate going 
up and down them.
And last but now least, one of the fireplaces.
Can't imagine doing any cooking over one of these.

Thanks for stopping by to read a little more about Ireland.
Next post I'll tell you about some Celtic crosses and place 
W.B. Yeats is buried.


Sunday, January 25, 2015

Birthday gift card

My nephew just celebrated his 40th birthday
and my niece had a surprise party for him.
Here is the card I made for him.
I had seen one with a similar design, so I made this
one with the dimensions I needed and made a little 
pocket for a gift card.
It opens to reveal a greeting
And the gift card can be placed in the bottom pocket.
To be honest, I wasn't crazy about the belly band I made,
so I didn't use it and put the card into an envelope with out it.
If I made this card again, I would stamp the
"Life is Good" and attach it to the belly band
and stamp the "Happy Birthday" inside.
This was a time consuming card, since I didn't have any 
measurements and there were a lot of
pieces to it, but it was worth it.
I think it turned out great.
And, by the way, he was totally surprised
when he came home to a party.
We had a lot of fun.

Thanks for stopping by today.
I hope you've been inspired in some way.
Happy Crafting!


Thursday, January 22, 2015

S'Mores Maker Tutorial

Have you ever seen a project and you knew you wanted 
to make one, but you just couldn't find the right supplies?
Or it was just not the right size?
Or for whatever reason it just wouldn't work out?
I had that problem with making an indoor s'mores maker.
I saw this picture a couple times on Pinterest and facebook,
but a large bucket just wasn't going to work.
But I really wanted to make a couple of these.
I bought a couple buckets, but realized that they were 
far to large and once it was filled it would be far to heavy.
Finally I hit on an idea of how to make one.
Here are the supplies I used.
I found a metal planter at Joann's
Then came up with the idea of using the clay pot
and saucer for inside the planter.
Here's how you can make one of your own.
Turn the clay pot upside down and apply hot glue
around the bottom edges.
Place the saucer on top of the pot, so it
is glued on securely.
Now apply hot glue to the top of the clay pot,
turn it upside down and glue it to the 
bottom inside the planter.
I used my Silhouette software to create and cut the
design for the outside of the planter.
You can decorate the outside any way you want,
or not at all.
I bought these stones at The Dollar Tree.
I do love that store!
3 bags of these stones filled the bucket nicely.
This makes it heavy enough to sit safely, 
but not too heavy to pick up and move.
I placed a can of "Sterno" on top of the saucer.
This can be easily replaced once it is all used.
I bought skewers for roasting the marshmallows
and got corks to put on the ends for protection.
I thought this was a good idea, 
especially for anyone with children.
Also a good idea while storing.
Here is how my finished S'mores maker looks
all together.
As a gift I gave this along with a box of
graham crackers, chocolate bars and a bag of marshmallows.
This can be used indoors or out.
No need to build a big fire for just a couple s'mores.
And it's a fairly inexpensive gift to make.
The cost of the whole thing was around $20-$25.
I know I could have done this cheaper, if I hadn't waited
till the last minute to finish it.
Take advantage of the coupons at Joann's,
buy the skewers when they are 'in season' and on sale,
use coupons for the chocolate and other food products
and get them on sale.
I actually think the most expensive part of this project 
was the chocolate. 
Darn chocolate is expensive!

I hope you've enjoyed this tutorial and maybe have been inspired
to make a S'more's maker for yourself or as a gift.
Really???  Who doesn't love a s'more?

Thanks for stopping by.
I think this is the last of my Christmas project,
but keep coming back,
you never know what I'll have to show you.

Tuesday, January 20, 2015

M&M ornaments


Hi!  
Today I want to show you how I finished off the 
M&M ornaments that I made.
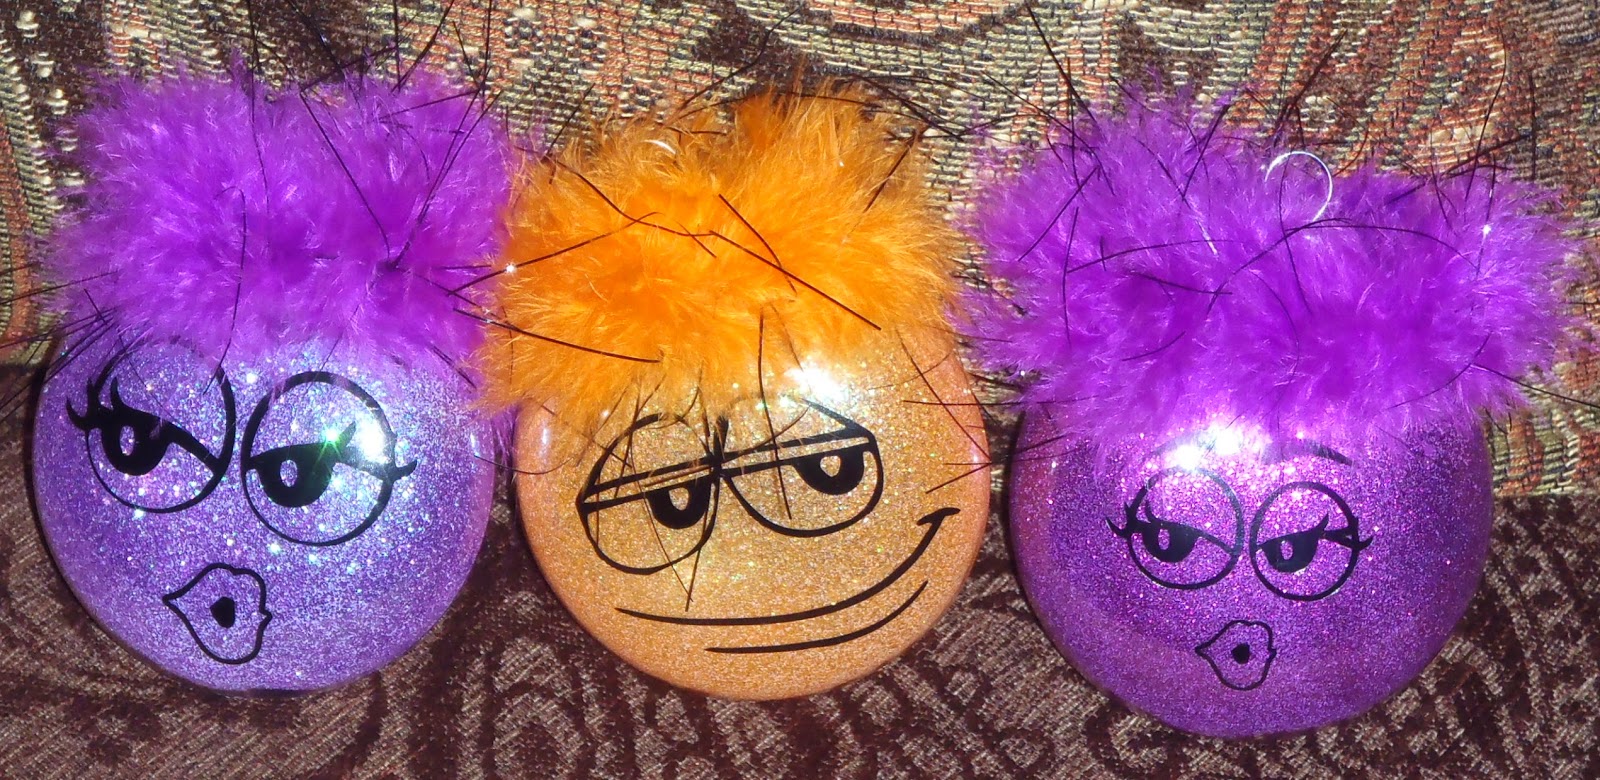
In this post I showed you some of them when
I first made them.
I found this great feather trim and had to finish them off
with a little of it.
What a difference a little dressing up does for them.
I love them even more now than I did before.

Sunday, January 18, 2015

Backstrom Favorites

I want to share with you my vary favorite 
Christmas gift that I made this year.
As I've mentioned before, my Mom is 90 yrs old
and has a limited budget.
She still wants to be able to give Christmas gifts 
to everyone.
This is what I came up with this year.
I have Moms recipe box and together we went through
it and chose the family favorites.
I scanned the recipe cards into my computer, printed
them onto card stock and made them into a cook book.
Most of the recipes are in Mom's handwriting,
some have stains from being used for so many years,
some are faded and/or yellowed.
BUT they are all hers.
Some of them are recipes that will probably never 
be made, but they bring back happy childhood
memories for me as well as my brothers, so 
they are included in the book.
The picture on the cover was one I took of 
Mom at my nephew's wedding in October.
I was thrilled with how these books turned out
and everyone seemed to love them.
We will have a "piece" of Mom with us forever.

Before I assembled the books, I was going to visit
Mom and thought I'd take a cover to show her what
it would look like.
I had a doctors appointment before I went to see her,
so I took the picture in to show Dr. P, as he was her doctor before
she moved to assisted living. I thought he'd like to see
a picture of her and how great she looks.
When I showed him the picture, he looked at it turned it over
then asked "Where are the recipes?  I want the recipes."
I told him I hadn't put the books together yet and he
said that he wanted one, that he would love to have
some of her recipes and that he wanted to buy one from me and
did I think she would autograph one for him.
I gotta say, I just love my doctor, he is absolutely 
wonderful, not only as a doctor, but as a person.
He just adores Mom and treated her with great
respect and care.
Well, of course, he got a cook book and she 
autographed it for him!

Friday, January 16, 2015

Brushes and boxes

My Mom is 90 yrs old and lives in assisted living.
She has 9 great grand children and needed something for each of them.
With a very limited budget, I had to come up with something 
for each of them.
The newest of the 9 was born on Mom's 90th birthday
in November, a cute little outfit worked for her
as a Christmas/welcome to the world gift.
The other 5 girls received personalized hair brushes.
I made each one with a different font and swirl design.
I think they really liked them, I know some of them were
using them right away at the Christmas party.
The boys were a little tougher, but then I came up with
the idea of these little boxes.
Kids always have some little "stuff" that needs to be 
kept somewhere.
So I personalized them for the 3 boys.
I don't know about y'all, but I have what I call
"fake relatives"
A couple of them also needed gifts, so we went with the
same ideas for them.
Here's what I made for them.


As I've said before, I love my Silhouette Cameo
and this shows why.
On a limited budget you can personalize some 
things and come up with some 
nice little gifts.
All the kids loved their gifts
and Mom was happy that she could still give them
something for Christmas.
Win - Win situation.
Everybody smiles!