My Other Pages

To make it easier to read about our trip to Ireland, I have made a page that is just for that. There is a tab above for Ireland Trip 2014 or click on the Home tab to read my other posts. I have also created a new page for My Weight Loss Journey if you are interested in that, click on the tab above.

Monday, December 30, 2013

Tag Swap

Hi crafty people!
I have a wonderful group of online scrapping friends.
Many of them I have known
for several years online.
A while back one of them suggested a tag swap,
I volunteered to host it.
There were only 5 of us that participated.
We each made 10 tags, everyone sent them to me.
I separated them and sent everyone 10 tags.
It was such fun making and receiving the tags!
They are all so nice I hate to use them.
These are the ones I made.


Here are all the beautiful tags my friends made for me.
They were so sweet and sent extra tags and goodies
as a thank you for hosting the swap. 
I do have a talented group of friends don't I?
Thanks for stopping by today.
I hope you have been inspired in some way and
maybe you'll have a swap with some of your crafty friends.
Leave me a comment if you will.
Come again soon.
 
Until next time, Happy Crafting!
 

Saturday, December 28, 2013

Charlie Brown Tree

Our family is pretty big and when we are all together for our Christmas Celebration, there are around 30 of us.
Several years ago we went to picking names for the adults to exchange and last year we changed yet again to bringing a "generic" gift and we play a game of picking and stealing from each other.
It's lots of fun and people come up with some pretty cool gifts.
Last year after Christmas I found a Charlie Brown tree on clearance.
The Sunday before Christmas we had our party and here is what I took as my exchange gift.
I made all the ornaments out of money.
The star at the top was a $5.00 bill, the rest were $1.00 bills
Here is the tree.

Elephant

Fish

Cube

Shirt

Star

Bow tie

Heart with a quarter in the middle

Turtle

Pants

4 point star

Boat

Kimona

Butterfly

I (heart) U

Boot

I also included this candy dish that I made and had
been keeping for a bit.
I used to work at a couple paint your own pottery studios.
This is one of the things I made to keep for a gift.
My sis in law Susie got the tree.
 
I found the directions for all the dollar origami on
YouTube
there are tons of videos on how to do this
many of which I gave up on, some were just a bit too
much for me. 
 
Thanks for stopping by today.
Leave me a comment if you will
and come again soon!
 
Until next time, Happy Crafting!

Friday, December 27, 2013

Card box


Hi everyone?
Have you recovered from all the Christmas hustle and bustle?
Or are you still in the midst of it all?
I'm still up to my neck in celebrations.
 
Today I want to share a little gift I made with y'all.
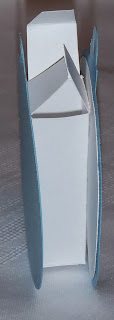
This little box is simple to make using the
This one was a gift for my friend Sue. 
I filled it with some hand made cards.
I used
"Poinsettia Flower" (#83407)  and
"To Everything"  (#35104)
both stamps from Biblical Impressions
 
Here is a video tutorial to make this box.
I modified it just a little bit.
  I didn't use a belly band,
but cut a slit in the back for the flap to fit into.
It's easy with the Envelope Punch Board
and makes a great gift filled with cards.
Here is a link to another post
with a birthday themed box
that also shows the back of the box.
Thanks for stopping by today and I hope you
will come again soon.
I hope you've been inspired
and will try making some of these
little boxes for gifts in the future.
 
Until next time, Happy Crafting!


Wednesday, December 25, 2013

Merry Christmas to all!

Merry Christmas to all!
One last Christmas card for this year.
This one was made with
"Lg. Snowman Couple" (#21801)
When I found this plaid paper in my stash,
I knew I wanted to use this image with it for a card.
I thought it matched perfectly with the hat, mittens etc.
And I think they turned out adorable.
Inside I used
"Christmas Blessings" (#7304) from
I hope you are having a very blessed Christmas
and have a wonderful prosperous 2014.
 
Thanks for stopping by today.
Come again soon.
Until next time, Happy Crafting!

Tuesday, December 24, 2013

2 Christmas layouts

Merry Christmas everyone!
I just wanted to share a couple layouts that I did of
Christmas 2012
I did a lot of fussy cutting on both of these as well as
a bit of stamping.
On this layout I used
"Snowy Christmas Tree" (#39401)
"Merry Christmas Script" (#3206)
"Poinsettia Flower" (83407)  from
and part of
"Snowy Cabin" (#13807) from QKR Stampede

On this layout I used
"Icicle Ornament" (#83406) from
 
Thanks for stopping by!
Here's hoping you have a very blessed Christmas
 and a happy and healthy 2014!
 
Until next time, Happy Crafting!
 

Sunday, December 22, 2013

Chap Stick Holders for the Greats

Hi all!
Just a quick post today.
Sorry I haven't been posting much recently,
I'm sure y'all understand how busy I've been.
Aren't we all?
Today is our family Christmas party,
I wanted to show you the chap stick/lip gloss holders I made.
The dresses are for my great nieces,
the ornament and trees are for the great nephews.


Chap Stick/lip gloss goes in the little box
in the middle.


These are fun to make and give.
You could probably fit a roll or dimes in the center,
or a roll of mints or lifesavers too.
 
I'm entering this in the
Simon Says Stamp Wednesday Challenge
"Bling It On"
The dresses have glitter card stock
for the bodices.
The snowflake ornament has glitter card stock
for the flake and
the Christmas tree has gem bling.
 
Thanks for stopping by.
Until next time, Happy Crafting!

Monday, December 16, 2013

Beginning to look a lot like Christmas

"It's beginning to look a lot like Christmas!"
That's the theme of the Eureka! Stamps Challenge
this week.
All the particulars can be found on the
For my card I used
"Package Tower" (#23301) from
I stamped the image onto white card stock and
colored it with water color crayons.
I used Perfect Layers rulers
to mat the image onto patterned paper, red card stock
and then onto the card. 
It is so easy to get perfect mats
without any measuring with Perfect Layers.
 
I hope I have given you some inspiration and that
you will join us in this challenge.
 
Thanks for stopping by today,
I hope you will leave a comment for me
and come again soon!
 
Until next time, Happy Crafting!

Monday, December 9, 2013

Side step card challenge

That's right, it's time for another
Eureka! Stamps Challenge!
This week the challenge is to make a
"Center or Side Step Card"
I have used 3 images from Eureka! Stamps for my card.
"Skunk and Lights" (#10901)
"You Light" (#10903) and
"Snowy Christmas Tree" (#39401)
My images were stamped onto white card stock.
The only coloring needed was the lights,
which were colored with water color crayons.
The images were then fussy cut and adhered to the card.
Side and center step cards
are not as difficult to make as you might think.
If you Google "Side step card pattern" you will find a lot of
patterns for this type of card.
They are something a little different with a real "Wow" impact.
I hope you have been inspired and will
make one of these styles of cards and enter the
Eureka! Stamps Challenge.
All the particulars can be found on the
 
Thanks for stopping by today.
Leave a comment if you will and
come again soon!
 
Until next time, Happy Crafting!


Wednesday, December 4, 2013

First Wednesday of the Month

It's the first Wednesday of the month!
You know what that means, don't you?
I have a tutorial up on
today. And here is a peak at what it's about.
Are you curious?
Now pop on over to see what it's all about!
 
Until next time, Happy Crafting!


Monday, December 2, 2013

A mistake that I love.

Hello blog friends!
Today is the beginning of a new
Eureka! Stamps Challenge
This weeks theme is "Button It Up"
I was searching through my images and got the idea to use buttons on
"Art Palette"
I stamped the image onto white card stock and used Distress Inks to give it the wood grain.  I stamped the image again and colored and fussy cut the paint brushes. I then used glue to add the paint brushes to the palette.
The buttons were adhered with Glossy Accents.
I used my Perfect Layers rulers to cut a perfect mat.
 
There is only one problem with this card.
I made it for the Eureka! Stamps Challenge as my
design team inspiration piece,
 when I went to check on the item number to include it in my blog post,
I found that this isn't an image from Eureka! Stamps. 
It is from the sister company,
This is Art Palette (#19601)
I even have the stamp marked at Eureka! 
Guess I better change that!
I do love how this mistake turned out though.
Why not pop on over to the Eureka! Stamps Blog
and check out the other inspiration
and the particulars on the challenge,
then stop into the Eureka! Stamps Store
and see what you can find that you might like to work with.
Both companies have tons of great images
 in both red rubber and digital format.
 
Thanks for stopping by today.
Leave a comment if you will and come again soon.
 
Until next time, Happy Crafting!