My Other Pages

To make it easier to read about our trip to Ireland, I have made a page that is just for that. There is a tab above for Ireland Trip 2014 or click on the Home tab to read my other posts. I have also created a new page for My Weight Loss Journey if you are interested in that, click on the tab above.
Showing posts with label Perfect Layers. Show all posts

Saturday, June 14, 2014

Father's day train card

Hello!
Today I have a Father's Day card to show you.
I have used
"Train" (#19205) and
"Happy Birthday Set" (#22803) from 
 "Forest Left" (#38905) and 
"Field Grass Left" (#38901)
The train was stamped onto white card stock and colored  
using color pencils and Gamsol.
I stamped the train again onto scrap paper 
and fussy cut it to make a mask.
I then put the mask over the stamped train image 
and inked the rest of the card.
Then stamped the trees and grass, 
removed the mask and adhered it to card stock.
I used my Perfect Layers Mini and Perfect Cutting Mat
to cut a perfect mat around this image.
When you lift the train panel another panel drops down
to show the
Happy Father's Day greeting.

Thanks for stopping by today.
If you check out 
and 
I'm sure you'll find some wonderful images to use for your
Father's Day cards.
Also be sure to check 
to see how those Perfect Layers work.
Use the code Kristie5% at check out and 
you will receive a 5% discount on your order.

Thursday, February 27, 2014

Perfect Paper Crafting and Splitcoast Stampers Challenge

Hello blog fans!
There is a challenge going on at Splitcoast Stampers
with Perfect Paper Crafting and this is my card that I made for it.
The challenge is to make a card, or other project using lots of layers.
Easy peasy when you use Perfect Layers rulers to cut the mats.
With perfect layers, you get a perfect cut every time.
For this card I have used 
"Love You" (#10301) and 
"Ball Jar" (#23102) both from
Using my links to Perfect Paper Crafting 
 you will find the code to receive a 5% discount
on your purchase.
Check out the Perfect Layers and all the 
perfect tools they have to offer.

Thank you for stopping by today, 
now why not check out the challenge on 
and join in the fun.  
You'll find a lot of great inspiration there.

Until next time, Happy Crafting!

Sunday, February 16, 2014

Card Swap and more

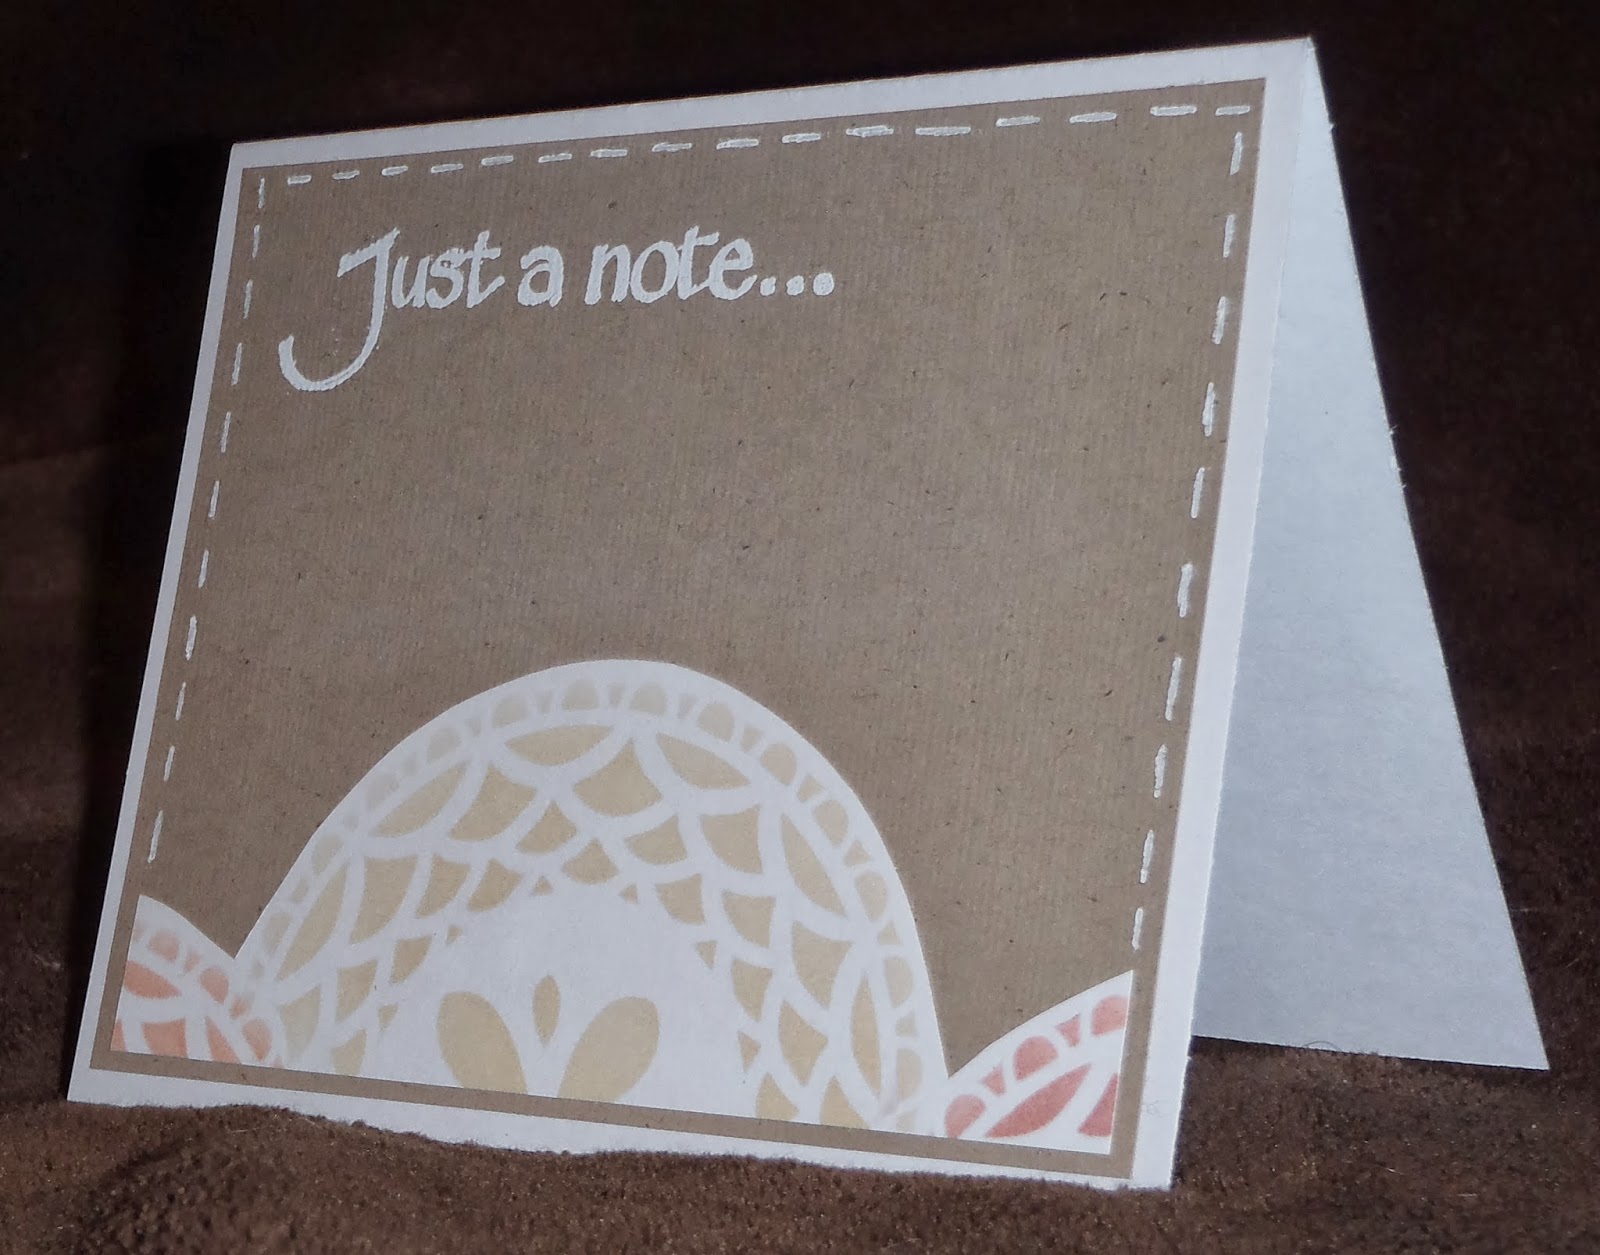
This month our theme in our
Art Swap Group
is using a doily on a card.
It took me a while to decide what to do,
then I hit on the idea of making my own doily
with my Silhouette Cameo.
Once that was done, I used that file to cut a stencil.
I used the stencil with Distress Inks
 and inked over a piece of white card stock
 to create this lovely pattern.
I cut the card stock down to size
for the card and layered it onto Kraft card stock.
I cut a perfect mat with my
With the Perfect Layers, it is quick and easy to cut a
perfect mat every time. 
 And with 10 different border measurements to choose from,
you always have a perfect mat. 
 I also used the Perfect Layers to cut the banner.
Here is a closer look at that banner.
"Just a note" (#6405) is from Eureka! Stamps

Here is another card I made with that same piece of
doily patterned card stock.
One more, made with a scrap of doily card stock.
Thanks for stopping by today,
I hope you have been inspired in some way.
Please come again soon.
Until next time, Happy Crafting!

Monday, January 6, 2014

Blue and Bling Challenge

Happy New Year!
And welcome to my post for the first
Eureka! Stamps Challenge of 2014.
This week our theme is
"Blue and Bling"
I chose "Snow Background" (#27301) from
as my background.
The sentiment is "Be Still" (#30126) from
which is a sister company of Eureka! Stamps.
Eureka! Stamps has this same sentiment,
but in a different font.
It is "Be Still and Know" (#27503)
 
I stamped the Snow Background with VersaMark ink,
embossed it with white embossing powder,
then inked over the entire surface with
blue Distress Ink.
The sentiment is also done with
white embossing powder.
I added some 'blink' to the centers of the snowflakes.
All the mats are cut using the
Perfect Layers
which give an equal cut every time.
 
For all the particulars on the
challenge, please check the
 
I hope you have been inspired here today
and will take the
Blue and Bling Challenge.
 
Until next time, Happy Crafting!
 

Monday, December 16, 2013

Beginning to look a lot like Christmas

"It's beginning to look a lot like Christmas!"
That's the theme of the Eureka! Stamps Challenge
this week.
All the particulars can be found on the
For my card I used
"Package Tower" (#23301) from
I stamped the image onto white card stock and
colored it with water color crayons.
I used Perfect Layers rulers
to mat the image onto patterned paper, red card stock
and then onto the card. 
It is so easy to get perfect mats
without any measuring with Perfect Layers.
 
I hope I have given you some inspiration and that
you will join us in this challenge.
 
Thanks for stopping by today,
I hope you will leave a comment for me
and come again soon!
 
Until next time, Happy Crafting!

Monday, December 2, 2013

A mistake that I love.

Hello blog friends!
Today is the beginning of a new
Eureka! Stamps Challenge
This weeks theme is "Button It Up"
I was searching through my images and got the idea to use buttons on
"Art Palette"
I stamped the image onto white card stock and used Distress Inks to give it the wood grain.  I stamped the image again and colored and fussy cut the paint brushes. I then used glue to add the paint brushes to the palette.
The buttons were adhered with Glossy Accents.
I used my Perfect Layers rulers to cut a perfect mat.
 
There is only one problem with this card.
I made it for the Eureka! Stamps Challenge as my
design team inspiration piece,
 when I went to check on the item number to include it in my blog post,
I found that this isn't an image from Eureka! Stamps. 
It is from the sister company,
This is Art Palette (#19601)
I even have the stamp marked at Eureka! 
Guess I better change that!
I do love how this mistake turned out though.
Why not pop on over to the Eureka! Stamps Blog
and check out the other inspiration
and the particulars on the challenge,
then stop into the Eureka! Stamps Store
and see what you can find that you might like to work with.
Both companies have tons of great images
 in both red rubber and digital format.
 
Thanks for stopping by today.
Leave a comment if you will and come again soon.
 
Until next time, Happy Crafting!


Monday, November 18, 2013

Cornstalk and Pumpkin card

Thanksgiving is so close
and that is the theme of this weeks
Check out the particulars on the
and then join in the fun.
I chose to use
"Cornstalk and Pumpkin"  (#29802) from
for my card.
For the background I taped a paper doily over white card stock,
then used a sponge applicator to apply
Distress Ink over the doily.
When I removed the doily,
I had a beautiful background panel for this card.
The Cornstalk and Pumpkin image was stamped with
brown Color Box Fluid Chalk Ink
and colored with water color crayons.
I love this simple image, to me it says
"Thanksgiving"
I like the idea of the Thanksgiving image
 over the "lace tablecloth" look of the background panel.
I used my Perfect Layers tool to get the perfect mats on
my card without the trouble of measuring.
Easy to use and perfect every time.
 
Thanks for stopping by today.
Why not stop by the Eureka! Stamps Store and
see all the wonderful images they offer
in red rubber and digital format alike.
 
Then stop over to the Perfect Paper Crafting site
and see how the Perfect Layers works.
And keep your eyes open for a give away, here on my blog.
I'll be giving away a set of Perfect Layers Tools one day soon
so come back for a chance to win.
 
Until next time, Happy Crafting!
 

Wednesday, November 13, 2013

peace and joy

Hello fellow stampers, scrapbookers, crafters!
Today I have a Christmas card to show you.
I used scraps from my stash,
I think the patterned paper is from SEI,
but I couldn't swear to it.
The "peace and joy" and the snowflake images are from
Simon Says Stamp
I used Perfect Layers Rulers to cut nice even mats.
You can see there are lots of mat cuts on this card.
No, I didn't cut the circle with the Perfect Layers,
but all the straight edges are cut with them.
Easy to use and accurate.
No measuring at all.
I like this style of card, what do you think?
Something a little different.

I haven't decided if I will write a note inside
or stamp a Christmas greeting.
 
Thanks for stopping by today.
Leave a comment if you will and come again soon.
 
Next week I'll be having a give away of a set of
Perfect Layers
so you'll want to come back and see how you can
have a chance to win them.
In the mean time why not pop over to
see how they work and what other wonderful
products they have.
 
Until next time, Happy Crafting!
 

Monday, November 11, 2013

Eureka! Stamps Color Inspiration Challenge

Hello Blog friends!
It's time for another Eureka! Stamps Challenge.
This week it's a color inspiration challenge
Here is the photo and colors that we are working with.
For my card I have chosen to use
"Cornstalk and Pumpkin" (#29802) from
I stamped onto white card stock with brown
Color Box Fluid Chalk Ink
and colored with my water color crayons
I cut the image very close and layered it
 onto 3 different colored papers.
A matting nightmare?
No, not at all!
to achieve even mats all around the image
as well as that horizontal stripe.
Once I had all my mats cut,
I adhered them to my card base,
which I had covered with some burlap paper.
The last thing I did to finish this card
was to stamp the pumpkins again,
color them and fussy cut them.
I then adhered them with foam tape
to give a little more dimension to the card.
 
Thanks for stopping by today.
I hope you'll stop over at the
check out the particulars of the challenge
and play along.
I hope I have given you a bit of inspiration
and that you will come again soon.
 
In the mean time why not stop over to
and see what images might inspire you.
Eureka! Stamps has something for everyone.
And they come in red rubber as well as digital format.
 
Until next time, Happy Crafting!
 

Saturday, November 9, 2013

Hope your day is awesome leaf card

 Hello!
Today I have a fall themed card
that I used a little different technique on.
For my images I used
"Open Maple Leaf" (#10501) from
"Hope your day is awesome"
sentiment is from the
"All Occasions Banner" stamp and die set from
I used Perfect Layers to easily cut equal
sized mats.
 
I stamped the maple leaf randomly onto the
kraft card stock with VersaMark ink to make
a background paper.
For the large leaf, I heat embossed the leaf onto
glossy white card stock,
 I dropped alcohol inks onto a craft mat,
then swiped the glossy piece, with the embossed leaf,
across the alcohol inks.
Next I placed a clean piece of paper over
the embossed leaf and ironed it with a hot craft iron.
This melts the embossing and removes it
from the glossy card stock
leaving a white image.
I then fussy cut the leaf.
I used a small leaf punch on some scraps
 of the inked glossy card stock to scatter over the card.
The sentiment was stamped onto
white card stock and cut with the banner die.
Once I got the front panel created I used
to cut the red mat. 
It's so easy to get equal cuts with these fabulous tools,
with no measuring.
Follow my link to their site where you can watch a video
on how to use these amazing tools.
You will also see there is a code for a discount on your purchase.
 
Come back and check my blog often as there will be a
give away of a set of Perfect Layers rulers soon.
 
Thanks for stopping by today,
leave a comment if you will.
 
Until next time, Happy Crafting!


Wednesday, October 16, 2013

Birthday box

Hello bloggy friends!
and I've been having a ball with it!
I've learned that there is more to be made with it
than just envelopes.
Today I'm showing you a little box that I created with it.
How fun is this?
I made the 'base' box with card stock and decorated it with
some shocking yellow card stock and patterned paper.
It doesn't look it in these pictures, but believe me that yellow card stock is so bright it hurts the eyes.
 
To get that patterned paper measured just right onto the yellow,
Cutting the mats just perfect with out measuring is so easy with
Follow the link to find out more about these wonderful tools
and you will also see that you will receive a discount
with a special discount code provided for any purchase through my blog.
This discount is good for any of the items sold by
 
Thanks for stopping by today, leave a comment if you will and
come again soon.
 
Until next time, Happy Crafting!


Wednesday, October 2, 2013

"Mashed Potatoes" and something new

I have a couple things to tell y'all about today.
It's the first Wednesday of the month, so that means
it's time for a tutorial on
Hop on over and see my tutorial
on how to create a striped background
 like the one on this card.
The "something new" I have to tell you about is
that I have been chosen to be a
"Perfect Paper Crafting Brand Ambassador"
I'm thrilled with this as I just love my Perfect Layers!
If you follow that link you will be taken to
"my page" where you can see how these amazing tools are used.
See that green mat around the
"Christmas Blessings" (Eureka! Stamps #7304) sentiment?
I used my Perfect Layers
to get that nice even cut with no measuring at all.
Use my link to check out the video
and the other wonderful products that
Perfect Paper Crafting carries.
AND when you make a purchase using the code
Kristie5%
 you will receive a 5% discount on your order.
If you look back at my earlier posts
and see mats like the one above,
you know that they were cut using my Perfect Layers.
I've been using them for years and wouldn't
scrapbook or make cards with out them.
 
Thanks for stopping by today!
Now hop on over to see my tutorial
and check out the Perfect Paper Crafting site.
 
Until next time, Happy Crafting!