My Other Pages

To make it easier to read about our trip to Ireland, I have made a page that is just for that. There is a tab above for Ireland Trip 2014 or click on the Home tab to read my other posts. I have also created a new page for My Weight Loss Journey if you are interested in that, click on the tab above.

Wednesday, August 30, 2023

Alcohol Ink Stash Card

Good day to you all!
Today I have a card that I made when I decided to 
just use papers from my stash of  background papers 
that I made in the past.
I challenged myself to use this background piece that
I wasn't all that crazy about.
I decided to embrace the circles, so I punched out
the scalloped circles from another piece from my stash,
then the small circles from a scrap of the orange piece.
I layered them up and adhered it to a scrap of yellow card stock.
I stamped the sentiment on another scrap of yellow card stock.
Added onto a white card base and it was done.
This is a little different than my usual style,
but I think I did pretty good with a piece I didn't care for.

Thanks for coming by to check out what I've been creating.
I hope you'll come again soon.
Until then,
try working with something different and out of your
comfort zone.


Friday, August 25, 2023

Swap Tag and Card

Hello and welcome!
I'm in a small online group of friends who
are doing swaps.
For the month of August, the theme was
"All that glitters"
I could make whatever I wanted to make.
Usually they are ATCs, tags or cards.
This month I chose to make a tag for my friend
Becky.
I cut a mask and stencil from 
I first put down the mask of the lady and
ink blended around her.
Then I removed the mask and put the stencil
down, so only the lady was showing.
I used a VersaMark pen to "color" in the
hair and dress areas and applied 
to those areas.
For the face and arms I used colored pencils 
to get a skin tone.
"Just be fabulous"
 was printed with my 
label maker on clear label tape.
I wish the glitter of it showed up better in the picture.
I really enjoyed making this tag.
I always like to send a hand made card along with my 
swap, so I made this card.
I wanted it to go along with the theme of the swap, so I used
silver reactive foil. When some of the alcohol ink was 
still a bit damp I laid down the foil, gave it a good
rub and then pulled it up, leaving random areas
of silver foil behind.
The alcohol ink and foil were done on vellum,
then it was layered onto a shimmery silver card stock
and finally onto pink and a white card base.
I was very happy with the card and tag alike
and Becky said it made her day 
when she received them.

I'm so glad you have stopped in today to see what
I've been creating.
I hope you have been inspired in some way and
will come again soon.
Until then,
glitter something up.


Note the links are only to give a reference so you can
see what the products are.
I didn't necessarily purchase from these sites,
except where specified,
and you may find better prices elsewhere,
I am in no way promoting any particular site.


Monday, August 21, 2023

Baby Shower Card

Good day!
Today I have a card I made for a baby shower
to show you.
I bought the svg file from the 
Silhouette Design Store
and cut it on my Silhouette Cameo.
As fine as some of the cuts are, it was an
easy one to cut and weed.
I adhered the die cut to the background paper, 
added the cloud with the greeting and
then added it all to a white card base.
To be honest, I actually cut the image larger
than I intended, so I made it into a square card,
but I'm glad, as I like how it turned out.
I wrote a personal note inside the card to go
with the shower gifts.

Thanks for stopping by today, 
I hope you have been inspired in some way.
Come again soon.
Until then,
embrace your "mistakes"
As I always say, there are no mistakes in 
crafting, only chances to be more creative.


Thursday, August 17, 2023

Spin Painting Clean Up #3

Hello creative people!
Today I have one more card that I made from 
the spin painting clean up.
After spin painting with Marie, the paint dried onto
the inside of the salad spinner that we used.
I peeled that paint off and glued it onto
pieces of card stock.
For this card, I layered the piece with the paint onto
black card stock, which I think really sets it off.
I then layered that onto a piece of hand made paper that I
had from a paper making session a few months ago.
I like he rough tear on the hand made paper for this
card.  It was then adhered to a white card base.
The inside was left blank to be used for whatever 
it is needed for.

I'm glad you stopped in today, I hope you were inspired in some 
way and will come back soon.
Until then,
try something new!


Sunday, August 13, 2023

Using What I Have

Hi crafty people!
Today I'm showing you a couple cards that I 
made, using some of the things in my stash.
The background piece is a piece of card stock 
from my stash of gelli prints.  I've had it a long time,
so have no idea exactly how I made it.  Probably just 
craft paints on my gelli plate.
The leaves are some eco printing that I did, by placing 
leaves onto card stock and running them through my 
The shine sentiment is from a random set in my stash.
Once it was stamped onto a piece of the eco print card,
it was layered onto a piece of the gelli print card.
This purple and turquoise background piece was made with
Dylusion sprays that were sprayed onto a piece of photo paper.
The leaves were an eco print from my stash.
I decided to leave this with no sentiment on the outside
or the inside to make it a note card to be used for 
whatever I need at the time.

I'm glad you stopped by today to see what I've been up to.
I hope you've been inspired in some way and 
will come again soon.
You never know what you'll find on 
Kristie Kreates!
Until then,
use your stash!


Note the links are only to give a reference so you can
see what the products are.
I didn't necessarily purchase from these sites,
except where specified,
and you may find better prices elsewhere,
I am in no way promoting any particular site.


Wednesday, August 9, 2023

Baking With Marie

Hello everyone!
Today I'm sharing a couple layouts with you.
Sara and I both love baking with Marie and have for
a long time now.  She is only 3, but has been baking almost
since she could stand and walk.
She started out just licking batter, but now she 
measures and mixes with us.
Since I didn't have any embellishments of cooking
utensils, I made my own.
The whisk in the picture above doesn't show very well
in the picture, but it was drawn onto glitter paper and cut
out with a craft blade.  The spoons and cup were drawn and
fussy cut.
The oven mitt was free hand drawn and fussy cut also.
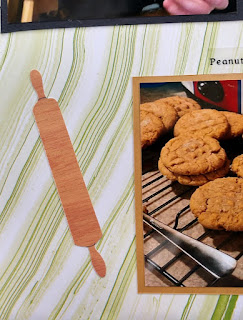
I found a scrap of wood grain paper and
drew and cut out the rolling pin.
This is another layout that was a simple one to 
put together.  I had the printed papers for years and 
knew that one day I'd find a layout to make with them.
This little gal puts love into everything.

Thanks for stopping in today,
I hope you were inspired in some way and 
will come again soon.
Until then,
have fun with a child!


Friday, August 4, 2023

be yourself

Hello crafty friends!
Today I have a card to share with you.
This was made with some things I had on my desk
and in my stash.
I had gotten this hexagon die from Temu
and was trying it out in different ways.
It was sitting on my desk and I decided to 
use it for a card.  I had cut the "outline" with the
die and cut another with different paper.  I simply
glued the pieces into the outline on a piece of
pink card stock.
I cut that to size and adhered it to a card base.
The "be yourself" was from a set of printed sentiments
 from my stash and layered onto another piece of  pink 
card stock, and my card was done.
This card is only 3.25" x 4.50"
so it's a small one but I love it.

Thank you for spending time here today.
I hope you will come again soon.
Until then,
use your stash!


Tuesday, August 1, 2023

Spin Painting Clean Up #2

Hello and welcome!
Today I have a couple more cards that I made
with the clean up from doing spin painting with 
Marie.
This is the paint that was dried onto the inside
of the salad spinner after making some 
spin painting prints.
I simply peeled it off and glued it to 
pieces of card stock.
I wanted to do something a little different for this
card, so I adhered the piece with the paint onto 
a piece of white card stock.
I folded that and adhered it to a piece of
heavy weight hand made paper.
The hand made paper was torn to A2 size.
Inside I stamped this sentiment from my stash.
I love how this card turned out, it's a little outside
the box for me and I love it.
I had this small piece of "paint clean up" on an odd
sized piece of card stock, so I cut it down to add
to the side of a card.
I then added the sentiment onto black card stock and
onto a piece of mulberry paper.  
I left the inside blank on this one.

So glad you stopped by today,
I hope you have been inspired in some way
and will come again.
Until then,
use something that is usually thrown away
to make something creative.