My Other Pages

To make it easier to read about our trip to Ireland, I have made a page that is just for that. There is a tab above for Ireland Trip 2014 or click on the Home tab to read my other posts. I have also created a new page for My Weight Loss Journey if you are interested in that, click on the tab above.
Showing posts with label card. Show all posts

Sunday, April 14, 2024

Be Magical Unicorn Card

Hello craft lovers!
Doesn't everyone love to receive mail?
My granddaughter, Marie, sure does.
That's why I decided to make her this card.
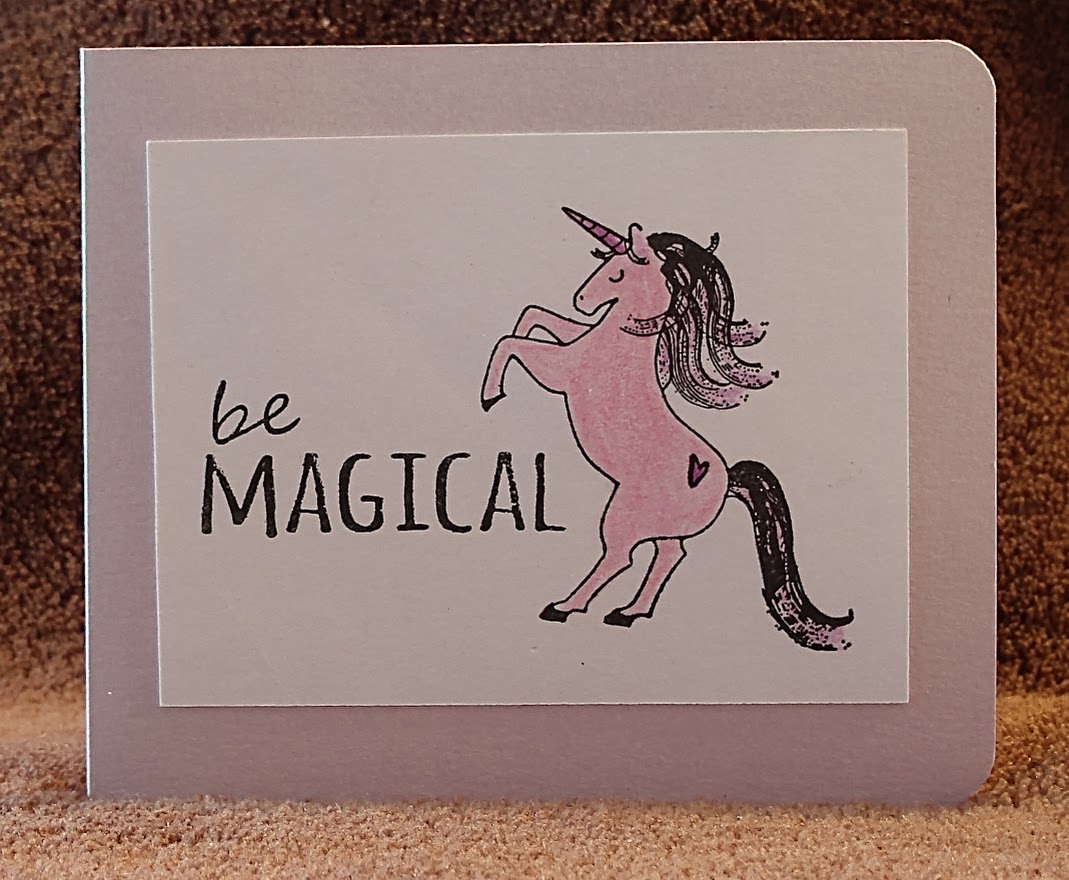
She loves unicorns, so when I found this stamp in my
stash, I decided to make a card with it.
Pink is her favorite color, so it had to be pink.
For the inside of the card, I stamped, colored and fussy
cut some other designs.  She does love rainbows too, so that
was another must.
I stamped and cut a few things for her to color herself.
Sending cards in the mail now and then is one simple
way to say I love you.

Thanks for stopping by today to see what I've been creating.
I hope you have been inspired in some way and will come again soon.
Until then,
send a card and make someone smile.


Wednesday, November 15, 2023

October Swap

Hello crafty friends!
Today I have a card I made for an art swap.
The "parameters" were
Color: Use green or blue
Technique: Stencil, stamping, collage
Product: stencil paste, ink, magazine page, 
paper napkin/tissue paper
Theme:  nature, peace/calm, women
Finished piece:  card,  ATC, frameable/hangable art piece
Color: I used blue and green
Technique: I just realized that I failed on this one,
I didn't use any of them. 
Product:  I used ink and tissue paper for the background "water"
I also used magazine pages for the fish and seahorses
I covered them with packing tape, then soaked them in water
and rubbed the paper off.  This leaves the image on the tape.
I then glued some of them to plain white card stock and fussy cut them.
The larger seahorse was easy to cut and glue down 
with out the card stock.
I went with the nature theme in the over all card,
as well as in the "sea weed" which is actually
pressed and dried pieces from one of our plants
that we had in a planter this summer.
I just heard from my friend that she had received 
the card and loves it.

Thanks for stopping by to see what I've been up to.
I hope you'll come again soon.
Until then,
challenge yourself!


Friday, August 4, 2023

be yourself

Hello crafty friends!
Today I have a card to share with you.
This was made with some things I had on my desk
and in my stash.
I had gotten this hexagon die from Temu
and was trying it out in different ways.
It was sitting on my desk and I decided to 
use it for a card.  I had cut the "outline" with the
die and cut another with different paper.  I simply
glued the pieces into the outline on a piece of
pink card stock.
I cut that to size and adhered it to a card base.
The "be yourself" was from a set of printed sentiments
 from my stash and layered onto another piece of  pink 
card stock, and my card was done.
This card is only 3.25" x 4.50"
so it's a small one but I love it.

Thank you for spending time here today.
I hope you will come again soon.
Until then,
use your stash!


Tuesday, August 1, 2023

Spin Painting Clean Up #2

Hello and welcome!
Today I have a couple more cards that I made
with the clean up from doing spin painting with 
Marie.
This is the paint that was dried onto the inside
of the salad spinner after making some 
spin painting prints.
I simply peeled it off and glued it to 
pieces of card stock.
I wanted to do something a little different for this
card, so I adhered the piece with the paint onto 
a piece of white card stock.
I folded that and adhered it to a piece of
heavy weight hand made paper.
The hand made paper was torn to A2 size.
Inside I stamped this sentiment from my stash.
I love how this card turned out, it's a little outside
the box for me and I love it.
I had this small piece of "paint clean up" on an odd
sized piece of card stock, so I cut it down to add
to the side of a card.
I then added the sentiment onto black card stock and
onto a piece of mulberry paper.  
I left the inside blank on this one.

So glad you stopped by today,
I hope you have been inspired in some way
and will come again.
Until then,
use something that is usually thrown away
to make something creative.


Wednesday, October 26, 2022

Small Poppy Card

Welcome to Kristie Kreates!
Today I have a little card to show you.  I made it
with a poppy that I had stamped and colored, but never
 used.
I fussy cut the image and used foam tape
to give a little dimension to the card.
I mounted the poppy onto light green card stock
then onto a white card base.
This is a small card that could be used as a gift enclosure,
or it could be sent through the mail as long as it's in
an envelope that is large enough.
This is one of my favorite stamps and is 
from Stacy Stamps, but apparently she has gone
out of business, as her website no longer seems to exist.

Thanks for spending some time with me today,
come again soon.
Until then,
use some favorite stamps and supplies.


Monday, September 12, 2022

Corrugated Cards


Hi everyone!
Do you have supplies that you've had a while and
just haven't gotten around to using?
I think we all do.
I have a 6x6 pad of corrugated card stock that
hadn't been touched and I decided to make a couple
cards using it.
Here is what I made.
For this card, I simply used some corrugated card
for the background and then punched out a star as 
an embellishment.
The other pieces were cut from one of the 
embossed backgrounds that I made a while ago.
I stamped a simple 'Shine' on the front of the card.
I thought shine was perfect with the bright yellow and
the star.
For this second card, I found this background 
in my stash.  This background was made using the
inks on a slick surface, then putting the paper on top of
the ink and "smooching" it.  When lifted it
gave me this interesting background.
I used the corrugated card for that strip down
the side and to put the sentiment onto.  I think 
the colors work perfectly together and the
corrugated card makes that inked piece really 
pop.

Thanks for stopping today,
I hope you have enjoyed my cards and gotten
inspired in some way.
Come again soon, until then,
use something from your stash that you haven't 
played with before.


Thursday, September 8, 2022

Eco-printing Card

Hello crafty friends!
Today I have a card to show you that I made
from some eco-printed pieces I had in my stash.
There are many ways to do eco-printing,
the easiest way that I have found is to use
my Cuttlebug.  Here is a post explaining 
how I do it.
There are a lot of tutorials online if you
want to see other methods, just search eco-printing
and you will find a lot of them.
I used a piece for the background, fussy cut a leaf print
then punched the other pieces from scraps.
I layered that onto a piece of dark gray card stock
then onto a white card base.
This is not my usual style, but I do like it.
I'm trying to think outside the box lately
when I'm making cards.
As usual, I left the inside blank so I can
use this card for any occasion.

Thanks for stopping by today,
I hope you have been inspired in some way
and will come again soon.
Until then,
give some eco-printing a try.


Sunday, September 4, 2022

You Make My Heart Smile

I'm Back!
Covid knocked me for a loop, but I'm pretty much
back to my usual self.  And I tested negative the other day.
Turned out the entire family, including my 2 month old Grandson
ended up with Covid, but luckily, we are all recovered now.
Today I have a card to show you that I made for my Granddaughter,
Marie.  I love to send her cards in the mail now and then.
After all who doesn't love to receive mail?  Especially a 2 yr old.
I used one of the Embossing Powder Backgrounds that
I showed in this post.  They are fun and easy to do.
I chose this one, because pink and purple are her favorite
colors.
The sentiment and heart were stamped and heat embossed also,
then fussy cut and adhered to the card.
Having some backgrounds ready to go in your stash makes
it quick and easy to put a card together.
Marie loved this card and when I was over visiting after she
received it, she brought her card to me, rubbed her fingers over the
embossing and asked "What is this stuff?"
I told her that it was embossing powder and that I'd show her
how it works one day soon.  
She already loves stamping, I'm sure she'll love the 
magic of heat embossing too.

Thanks for stopping by to see what I've been up to.
I hope you have been crafting and having some fun 
being creative.
Come again soon, until then
make a card and bring a smile to someone's face.


Tuesday, August 16, 2022

"Mickey" Cards

Hello creative people!
Today I have a couple cards to show you.
I decided that I wanted to send a card to my
2 great nephews, they are going to Disney for
a vacation, so I thought something Mickey themed would
be perfect.
It's hard to see the background paper under the
patterned vellum, but it is a piece that I created
with alcohol inks.  The blue and green were a great
match for that piece.  I adhered the vellum piece to the
inked piece with Bearly Arts Glue, I love that glue,
it is great for vellum and barely shows on the 'clear' 
spots, and doesn't show at all in the areas that are printed,
even though they are translucent.
I decided to use some corrugated paper that I had in my
stash as a mat on the card and I love the look.
I then made this card with the same technique, but
with different colors.  I decided to add the Mickey head,
but it needed something to make it stand out on the card.
I punched a circle from the corrugated paper and 
mounted the Mickey head and that did the trick.
This is the card I sent to the boys, hopefully they will
like it as much as I do.
I've been challenging myself to use up scraps and 
to think outside the box lately and I'm having a 
great time doing that.  These cards are very different
than what I usually create and I love them.

Thanks for stopping by today, I'm always
glad to have you check out what I've been up to.
I hope you'll come again soon.
Until then,
use those scraps!


Sunday, October 17, 2021

Gratitude Card

Good day!
Today I'm showing you the cards I designed for 
our Girlfriends and Gratitude Crop at
My Happy Place Scrapbooking and Crafting.
Each cropper got a kit in their goodie bag with all
the elements for the card.  
The card base is a simple white card stock, cut to
8.5" x 5.5" and scored at 4.25 to make a standard A2 card.
I cut pieces of kraft card stock slightly smaller than the
size of the card base.
The flowered piece is a strip of beautiful vellum
that I wrapped around and adhered to the back of the
kraft card stock.
I decided to give everyone a choice of sentiments to use.
I stamped them and cut them to size and cut the 
white card stock to mat them also.  All they need to do is 
put them together and they have a lovely card to send
to a friend or as a thank you card.
I wanted to show how easy it is to make a 
pretty card that someone will love to receive.
I think they turned out lovely.

Thanks for stopping in today.
I hope you'll come again soon.
Until then,
show gratitude.


Tuesday, September 29, 2020

Gelli Plate Card

Hello crafty friends!
Today I have a card to show you that I made with 
one of my gelli plate prints.
I cut the gelli print down and mounted it onto a piece
of handmade paper, then adhered it to a white card base.
I loved the colors and shapes that I got on this piece.
I didn't add a sentiment, but I may add something when 
I decide to use this card.
I had some small scrap pieces left from the
print, so I cut them down and added them to 
the inside of the card.
I really love how this card turned out
and had so much fun making the gelli print
that I used for it.
You never know what you'll get when you do
gelli printing, sometimes it's not so great
and other times you'll love it.
Either way, it's fun to play with the gelli plate.

Thanks for stopping by today, I hope I'll 
see you again soon.
Until then;
use your imagination.


Wednesday, September 9, 2020

Embossed Star Card

Hello crafty people!
Today's card is another one I made during my 
embossing folder craze that I went through one evening.
I embossed a piece of white card stock with
I then inked it with Mustard Seed and Carved Pumpkin Distress inks,
I cut the panel into 2 pieces and adhered to a white card base.
I stamped the words onto the card with 
from Studio Calico.
The inside is left blank to write my own message.

Thanks for coming by today,
I hope you are having a very crafty day and
will come again soon
Until then:
Do what makes you happy!


Note the links are only to give a reference so you can
see what the products are.
I didn't necessarily purchase from these sites,
except where specified,
and you may find better prices elsewhere,
I am in no way promoting any particular site.


Saturday, September 5, 2020

Happy Thoughts 2 for 1

Hi everyone!
Today I'm showing you a couple cards I made.
This is kind of a 2 for 1 deal.
I started by embossing white card stock with the
to color the panel.
I cut the panel into 2 pieces at an angle and adhered each piece
to a white card base.
I added a thin strip of black card stock and used
sentiment from the
Lovely Greetings stamp set from Cas-ual Fridays.
I'm sorry, I can't find a link to this stamp set.

Thanks for spending time with me today, 
come again soon.
Until then:
See if you can make some 2 of 1 projects.


Note the links are only to give a reference so you can
see what the products are.
I didn't necessarily purchase from these sites,
except where specified,
and you may find better prices elsewhere,
I am in no way promoting any particular site.


Saturday, July 25, 2020

Doodling Card

Hello! 
 I hope you're having a great day.
Today I'm sharing a card I made.
Lately I've gotten more into doodling,
one day I was going through my background
stash and found this piece that I had made
with watercolors and decided to do some
doodling on it.
I know I need to practice more and get better
at it, but the important thing is that I
enjoyed making it.  
I let this piece sit for quite a while,
not really sure that I was happy with it.
Then one day I picked it up and decided that
even if it wasn't unbelievably gorgeous or anything
close to it, it should be made into a card.
I trimmed it down and adhered it to a card 
base and I think whoever gets it will
love it even though it's not a 
"stunner"
I had fun, like I said, that's the important thing.
Thanks for visiting today,
come again soon.
Until then:
have fun with your crafting!

Tuesday, July 21, 2020

Split Image Cards

Hello crafty friends!
Today I have 2 cards to show you.
I made these cards using a technique that saw
from Jennifer McGuire
I stamped and colored 3 flower images,
then adhered them to a piece of card stock,
right along the middle of the sheet.
I then cut the sheet down the middle, creating
2 panels for the fronts of the cards.
I matted the panels with gold card stock and 
adhered them to white card bases.
I decided to leave them blank otherwise,
so I can use them for whatever occasion
I want.  The sentiments will be added when 
I use them.  I may also add some sequins or 
other embellishments when I use them, but for
now, they will remain clean and simple.

Thanks for stopping in today,
I hope you are having a happy crafty day.
Come again soon.
Until then:
make something beautiful!

Saturday, May 9, 2020

Card from background stash

Hello!
I hope you are all staying safe and healthy.
Today I'm showing you  a card I made with
a piece I found in my background stash.
I believe the background was made with 
acrylic paints and my gelli plate.
I then use a stencil and black paint to add
the flower image to the piece.
The edges didn't turn out perfect, but that's okay,
it's part of it's charm and look of being hand made.
This card was sent to a friend to let them know
I was thinking about them.

Thanks for stopping in to see what I'm up to.
I hope you'll come again soon.
Until next time:
Stay safe, stay healthy and do something
creative.


Wednesday, March 4, 2020

Using Embossing Folder with Ink

Hi All!
Welcome to my blog.
Today I have a card to show you that I absolutely
love.
I used an embossing folder, sorry I can't give you the name
of it, as I don't have the packaging for it.
I inked the inside of the folder with 
then ran it through the Cuttlebug.
This embossed it and left the ink 
 around the embossed areas.
I cut the birds with a set of dies that I have,
added that one to the card and made an envelope
for the card and used the others on that.
I used a silver mat, then adhered the panel to a
white card base.
I love how this card turned out.
Very clean and simple.

Thanks for stopping by today.
I hope you'll try inking up your embossing
folders and see what kind of impression you get.
Just remember to clean them after inking them, 
so you don't ruin the next piece you emboss.


Note the links are only to give a reference so you can
see what the products are.
I didn't necessarily purchase from these sites,
except where specified,
and you may find better prices elsewhere,
I am in no way promoting any particular site.


Thursday, March 17, 2016

1st Birthday

Happy Day!
My great nephew turned 1 yr old this week.
It's hard to believe that a little over a year ago we didn't even know
we would have another great in the family.
Then on the morning of March 16th my nephew and niece
received a phone call that there was a baby for them to 
adopt.  So off they went and they met their sweet baby boy.
This last year has been a long and crazy ride, filled with
joys and worries, but everyone got through it and 
in February his adoption was finalized and Emmett is now 
and ever more a legal part of our family.
Here is the card I made for his 1st birthday.
I love the bright colors!
The words and 1st birthday were cut on my 
Silhouette Cameo.
These animals are all from Paper Smooches,
the set is called Chubby Chums
I stamped, colored and fussy cut each animal.
I then adhered them to the card with Action Wobblers.
I'm sorry I don't have the name of the font stamp set
that I used for the "celebrate".
Here is a video of how the animals wobble.
I hope it works for you.
I know Emmett is going to love the 
wobbly little animals.

As always, thanks for stopping by for a visit,
I hope you enjoyed my card and will try out some 
Action Wobblers,
they are so much fun!
Come again soon.
Until then, Happy Crafting!


Monday, March 14, 2016

Happy Thoughts

Hi all!
Today I have another card I made using some of
the backgrounds I made with alcohol inks
I glued one of the papers onto a manila tag with
gel medium then stamped the image with 
Chestnut Roan ink.
I used gel medium to adhere the other paper to card
stock then adhered it to the card base, then simply 
adhered the tag to the front.
For the inside, I stamped the sentiment onto a scrap
of the background paper and cut it down and ATG taped it
to the inside of the card.
Here is a close up of the sentiment I used.

So glad you stopped by today,
I hope you'll come again soon.
I hope you're having a better than average day!

Saturday, September 25, 2010

Today I have two cards to show you. This first one I had the idea for quite a while ago. I had printed the sentiment onto the white cardstock and it was sitting waiting to be finished. Finally got it finished!

I used some red cardstock from my stash, of course! The stamps are "To The Point" by Stampendous. I laid out all the arrow stamps on the cardstock, then pressed the acrylic block onto them so they would cling to the block. Using Onyx Black Versafine ink, I stamped them onto the red cardstock.

The red cardstock was adhered to the white base which was cut to 5 1/2" x 8 1/2" folded at 4 1/2". Using a red Zig pen and a white Ultimate Gel Pen, I made dash lines, rounded the bottom corners with my Corner Chomper and my card was done.
This second card is a card for my great niece Alexandrea's birthday. The base is white cardstock cut to 11" x 4 1/4" folded at 5 1/2" I used a EK Success 1" circle punch to punch circles from scraps from my stash. I cut each of those circles in half to make the scallops along the bottom of the card topping them with some fiber trim.
I also used those 1/2 circles around the 2" circle, also punched with an EK Success punch, to make the large flower. I used a large button tied with some white yarn, both from my stash, for the middle of the flower.
The "Celebrate" is a stamp from a Studio G $1.00 acrylic stamp set.
I think this card turned out very pretty for a beautiful young girl like my great niece.
Thanks for stopping by, leave me a comment and become a follower if you would like.
Until next time, Happy Crafting!