My Other Pages

To make it easier to read about our trip to Ireland, I have made a page that is just for that. There is a tab above for Ireland Trip 2014 or click on the Home tab to read my other posts. I have also created a new page for My Weight Loss Journey if you are interested in that, click on the tab above.

Saturday, January 29, 2011

Dryer sheets?

Yes!  Dryer sheets! 

Hello there friends!  Today I have a card that I made using a dryer sheet.  My friend Jen sent me a link to a technique using dryer sheets and this is one of the cards I made.

I don't use dryer sheets, so Jen was also nice enough to give me some of her used ones and a couple new ones too. 

After a little experimenting with different stamps, I found this one worked great.
I cut a used dryer sheet down to size and wrapped it around a piece of white card stock, adhering it to the back with ATG Tape.

Then I used my favorite VersaFine ink to stamp the flowers.

The image is from the "In Bloom" set from Scrappy Cat.
I used water color crayons to color the flowers.

Once this was done it was just a matter of layering the card and adding the ribbon and bow.

I do love how this card turned out. 
If you see the card "in person" it has a soft look to it and I love that kind of fabric look/feel that it has.
I will be doing more experimenting with dryer sheets and let you see how they turn out.

Thanks to Jen for giving me this idea!  I'm loving it!

Thanks for stopping by today!  I hope you get some inspiration from my blog and maybe will try something different and out of the box sometime soon.
Leave me a comment and let me know what you think.  Tell me what 'different' supplies you use in your crafting.

Until next time, Happy Crafting!

Friday, January 28, 2011

Paper Patch Crafts Challenge

Hello friends!  Today I have a Valentine's card to show you. 
I made this card for the challenge for Paper Patch Crafts.  The challenge is to make a Valentine's card with an amphibian or marine life on it. 
I chose this adorable turtle  (In Love #10806)  from QKR Stampede.

I stamped "In Love" onto white card stock with Versa Fine Black Onyx ink and colored it with watercolor crayons.  I then fussy cut the image to be mounted with foam tape onto a purple card base.

The card base was trimmed a bit at the side and edged with a Fiskars border punch.  Lighter purple was added to the edge of the card to give a bit of contrast. 

I embossed the little hearts above the turtles head using a stamp from the
Queen & Company Valentines set and Soft Lilac Embossing Powder from Copper Kate. 

Inside I used the same embossing powder.  The "I Love You" image is from the Autumn Leaves,  Love With a Flourish set.

Lastly, I added a little white bow to the flower bouquet.

Thanks for stopping by today.  Leave me a comment and let me know what you think of my card.

Until next time, Happy Crafting!
Thursday, January 27, 2011

Outside the window.

Today I'm showing you a card that I have been thinking about for a while.  I have seen cards made with this technique several times and kept thinking I would try it.  Finally decided to just do it.
I started out by making the background with my Pan Pastels and set it with a bit of hair spray.  Next I used the Trees (21403 & 21601) stamps from QKR Stampede.  I used Smoke Gray VersaFine ink, stamped off onto scrap paper, then stamped onto the prepared background.  This gave me a light impression which I then colored with water color crayons.
To give it the feel of looking out the window, I adhered the image to the card base, then cut very thin pieces of brown card stock and used a glue pen to adhere them to the image.  Once the windows were formed, I used some ribbon from my stash to make the valance.
I ran a double line of score tape along the top of the 'window' then looped and adhered the ribbon to form the valance.  I then used another strip of score tape to adhere a finishing ribbon to the top of the valance.

To finish it off, I ran a piece of the ribbon along the inside of the card.

Thanks for stopping by today, leave me a comment and let me know what you think of my card.

Until next time, Happy Crafting!

Tuesday, January 25, 2011

Hello.....

Hello all you crafty people!  Today I have a card that I made last night.  I have been having a tough time with the crafting mojo lately and decided I needed to just sit down and create something.  I ended up making 2 cards and this is one of  them. 
I started with a standard A2 card base.  Then I went to my trusty scrap stash and found this brown paper with light blue stripes.  The light blue section is the opposite side of the brown paper.  I do love double sided paper!
To position the holes on the blue strip, I used a tip I learned from Kristina Werner, I punched some circles with scrap paper, adhered them where I wanted the holes on the blue strip, then positioned my punch right over them and punched out the holes.  Great way to get them in just the right spot.  
I then used ATG tape to layer the blue onto the brown.
I adhered the buttons to the card with a bit of Crystal Accents.
The [Hello] is from a $1.00 acrylic set that I got at one of the craft stores.

Thanks for stopping by today.  Leave me a comment and let me know what you think.

Until next time, Happy Crafting!

Thursday, January 20, 2011

QKR Stampede Valentines Blog Hop


Hello and welcome to the QKR Stampede Valentines Blog Hop. If you have come from Dawn's blog, you are on the right track. I'm sure you enjoyed what she had to show you!

If you have just happened to stop by my blog, you may want to start the hop at the QKR Stampede Blog. You won't want to miss any of the great projects from our Design Team gals. If you find a link that doesn't work along the way or get lost somehow, just head back to the QKR Blog as there will be a full list of blogs there.

This month we have a $20 QKR Stampede gift certificate for one lucky winner. Be sure to follow the entire hop, leave a comment on each blog and also on the QKR Blog. It would also be great if you were a follower, although that isn't required. One lucky winner will be able to choose $20 worth of wonderful QKR Stampede images. That is how I got started with QKR!  I won the prize on their first blog hop! How cool is that?!?!

Today I have two cards to show you.  Both of them are fairly non-traditional Valentines cards. This first one is made with 2 images from QKR Stampede called "Shy" (#13707) and "Huggable" (#15810)

"Shy" was stamped onto white card stock with brown StazOn ink then colored with water color crayons. I'm sorry about this picture, that really is a light brown on his belly and ears, I just couldn't get it to photograph correctly.

I layered the image onto the kraft card stock with foam tape to give it a bit of dimension. I stamped the "You're Huggable" sentiment onto the card with brown StazOn ink.

The little red heart was punched from a scrap of red card stock with a Fiskar's edge punch.

The bow is made with some 'wrinkle ribbon' that I got from a blogger friend, Kristen Swain, in a package I won from her.


This second card can be used for Valentines Day or any day. I thought the roses were a beautiful way to convey some love. This image is called "Large Roses" (#23301) I stamped this image onto white card stock with black VersaFine ink and colored it with chalks, then sprayed it with a bit of hair spray to fix the chalks.

I used a Fiskar's border punch along the edge, then adhered it to blue card stock. Once it was layered onto a white card base my card was done. I left the inside blank where a loving sentiment can be written.

Thanks for stopping by and participating in the blog hop. The next stop on the hop will be Kristine's blog where I'm sure you will find something wonderful.

Be sure to leave me a comment and let me know what you think of my cards. I love to hear your feedback. Now hop on, leave a comment at each blog and maybe you will be the lucky winner!

Until next time, Happy Crafting!

Post it note holder

Hello crafty friends!  Today I am showing you a Post It Note holder that I made using the Girl with Balloon (#4901) image from QKR Stampede.  When I saw her I thought she was so sweet and had to have her.

I stamped the image onto white card stock and colored her with water color pencils.  I punched the design into the right side with the EKSuccess Flower and Flourish Edger Punch. This was then layered onto pink card stock.

I wanted this to have a generic greeting, so I cut one of my stamps into separate words. (GASP!) I used the Happy Father's Day stamp, in pieces to stamp the Happy Day onto white card stock.  This is from the Happy Birthday Set (#22803) from QKR Stampede.  Once that Happy Day greeting was adhered to the pink card stock I trimmed it all down and used foam mounting tape to adhere it to the top of the note holder.


Here is a view of the inside of the note holder.  I plan to keep it right on my crafting table for quick notes or to use the post its to mask areas on projects when I am stamping. 

Thanks for stopping by today to see my project.  Leave a comment if you wish.  Be sure to come back tomorrow for the QKR Design Team Valentines Blog Hop.  I'm sure all the gals will have some wonderful projects to show you.

Until next time, Happy Crafting!

Monday, January 17, 2011

Valentine Treat Holder

Hello crafty friends!
I made treat holders at Christmas time that held Ghirardelli Chocolate Squares. 
I had a couple people request measurements and directions so they could make them, either for next year or for Valentines Day.  Today I have a tutorial on how to make those treat holders.
First you need to cut a piece of card stock, I use plain white, to 8 1/2" x 2" score it and fold it in half.
Next cut a piece of patterned paper to 4"x4" score it in half, then turn it and along the sides score it at 1/4", 1/2" and 3/4"  It is hard to see in this picture, but read on and I think it will all make sense.

Now fan fold the ends like shown in this picture.

Both sides should look like this.

Now run adhesive on both fan folded sides.  I used score tape,  you can use which ever is your favorite adhesive, as long as it is good and strong.

Now, take that piece of card stock and adhere the patterned paper to it as shown above.  Simply place the folds on top of one another, being sure to line up the sides and stick them together.

Now you should have this, with a pocket on each side.

Using a craft knife, cut a small slit in the fold, be sure it goes through the card stock and the patterned paper.
Next you will need to cut 2 pieces of ribbon, each measuring about 15"

Thread them through the slit in the fold.  I like to use a "floss threader"  These are used to thread floss through braces so you can floss your teeth.  I love these things!  Great for threading buttons too, and they are pretty inexpensive too.
Pull both ribbons through so there is about 5" coming out the bottom.
Next you will need to use a good strong adhesive and stick the card stock together with the ribbon coming out the top end of the card stock.
Be sure to tape at the top where the flaps will fold over to be sure the ribbon won't pull out.

You want the top ends to be able to fold over like this.  So be sure not to adhere it too far up the sides.

Now you have a holder that will look like this.  Each side will hold one Ghirardelli Chocolate Squares.  Yummy stuff!

You can leave them as they are, or embellish them how ever you want.  Just remember that the ribbon has to be able to be tied to hold the treat holder closed.
I simply used some red Stickles to bling up the front of this one.
Now wasn't that easy peasy?!?!

Thanks for stopping by today. I hope you will leave me a comment and let me know what you think of this project and the tutorial.  If you have any questions let me know.

Until next time, Happy Crafting!

Friday, January 14, 2011

Cute as a bug!

Hello out there in blogland! 
Today I have a card that I made for a challenge.  One of my favorite blogger friends, Enfys, on Going Buggy, is having a week long party on  her blog and the first days challenge was to make a card with a bug on it.  I'm showing you the card that I made for that challenge.
Enfys is so generous and is giving a prize to one person in the UK and one outside the UK for this challenge.  (I'm in the US)  She lives in the UK and the US both (depending on the time of year) and has some pretty cool supplies for her give aways.  Stop by her blog and see what she has, not only as prizes, but as inspiration for your next card or project.  She is really quite wonderful!

I started out by cutting a 3 1/2" circle on my Cricut Expressions in red and one also at 3"  I cut a small, 1 1/4" circle for the head, all the spots were cut at 1/4"  The antenna were simply hand cut from a scrap.

After cutting the larger circle in half and gluing the spots on, I attached the 'wings' to the body of the ladybug with brads.  I didn't have any black brads, so I took a couple other ones and colored them with a black permanent marker.  Worked great!
I put the head together and attached it to the body of the ladybug and adhered it to the white base of the card stock. 

For the sentiment I used my Sure Cuts A Lot 2 program and my Expressions to weld and cut the words.  "Cute as a" was cut with the same red card stock as the bug.  I then added the spots with a black Zig marker.  "Bug" was cut out of a scrap of black.
Once my ladybug and sentiment were done, it was simple to layer them with the black and red card stock. 
I wanted to add a little something to the inside, so I spotted some red card stock, adhered it to some white and then into the card.

Thanks for stopping by today.  Be sure to leave me a comment and let me know what you think of my ladybug card, then hop on over to Going Buggy and see what Enfys has to show you.  You'll probably get hooked on her inspiration and humor too.

Until next time, Happy Crafting!

Thursday, January 13, 2011

Going Buggy

One of my favorite blogs is having a party.  On Going Buggy, Enfys is having a week long party with a lot of prizes.  We are celebrating that she has over 2000 followers and over 1/2 million hits on her blog!  How cool is that?  Every day there is chances to win and there are mulitple prizes!  You should head on over and see the wonderful cards and projects she makes! 

Her blog isn't only inspirational and instructional, it is humorous!

Yesterday there was a challenge that we have until the 21st to work on and submit.  Today was a little trickier, you have to try and guess which colors of Promarkers (think Copic) she used to color her image.  I'm sure I got them wrong, but I tried anyway, you never know, right?

I haven't made my card for the challenge yet, but I will and then I will post it here.

So hop on over and join the party!  The more the merrier!

Thanks for stopping by, hope to see you at the Going Buggy party!

Until next time, Happy Crafting!

Life is Sweeter With a Friend.

Hello blogger friends!  Today I'm showing you a card I made with the "Life is Sweeter" (#9102) image from QKR Stampede.  

I started with some white card stock, stamped the image and colored it with water color pencils.  I did quite a bit of layering with this card, as you can see.  All papers are from my scrap stash.

Thanks for stopping by today.  Leave me a comment and let me know you stopped by and what you think.

Until next time, Happy Crafting!

Tuesday, January 11, 2011

Valentines Day is quickly approaching!

Hi blogger friends!  Valentines Day is quickly approaching and today I'm showing you an adorable card made with an image from QKR Stampede.
I think this little guy is so sweet.  I stamped him on white card stock and colored the image with watercolor pencils.  The red card stock that I layered the image onto and used as a base for the card is from my stash and as usual, I have no idea which company it is from.  However, the plaid paper on the card is from Pixie Press.  Surprised that I actually know a paper company, aren't you?

This was a pretty simple card, but I think it is very cute.  And it doesn't have to be a Valentines card, it could be used anytime.  Don't ya think?

Thanks for stopping by, I hope you have been inspired to get working on some Valentines of your own.  Leave me a comment if you wish, I love to hear what y'all have to say.

Until next time, Happy Crafting!

Sunday, January 9, 2011

Gift Tag

Hello there friends!  I had one more Christmas gift hanging around that Santa dropped off at my house for delivery and that darn Santa didn't have the courtesy to wrap it.  Sooooo, I thought I better do it. 
I decided this gal needed a special tag, as she is a very special person.  She owns the "studio" where I go, to do my scrapbooking.  My Happy Place truly is my happy place.
Here is the front of the tag.  I started with a premade tag and used some Broken China Distress Ink to give it a little color.  I then used a stamp from the Inkadinkado Christmas in New York set and embossed it with burgundy embossing powder.  The silver flakes at the top of the tag are from a different stamp in the same set.
The Merry Christmas is  from Bo Bunny  Merry Christmas Clearly Stamps set and embossed with green powder

This is the back of the tag.  For "Jen" I used gold embossing powder and stamps from "Coffee House Alphabet" also from Inkadinkado.  Both the Inkadinkado sets were ones I got for Christmas in a grab box of acrylic stamps from Frantic Stamper.  The little jewels in the bottom corner are from Frantic Stamper also, from the Prima grab box I received.

Here is what the gift looked like once I was finished wrapping it.  I simply used a grocery bag that had been cut open and ironed to smooth it out.  The ribbon and other embellishments are from my stash.  I think it turned out looking very pretty.  Hope she likes it.  I have orders to report back to Santa about it. LOL!

Thanks for stopping by today.  Leave me a comment to say hi or give me some feedback.  I always like to hear what people think.

Until next time, Happy Crafting!

Thursday, January 6, 2011

You're Huggable!

Hello crafty friends!  Today I'm showing you a card I made with an adorable image from QKR Stampede.  I stamped this cute little guy onto white card stock and colored him with watercolor pencils, then did a bit of fussy cutting around him. 
I used a heart shaped doily and adhered it to the card with tape runner, then cut the extra away.  I stamped "You're Huggable" onto the doily, this is another QKR Stampede image.  I then used foam tape to add the image to the card.  I used a white gel pen for the dots and dashes around the edge of the card. 
Here is a close up picture of this cute little guy's belly and ears.  It looks like Flower Soft doesn't it?  Well, it isn't. I simply took a styrofoam ball, cut it in half and rubbed the 2 halves together.  This causes it to crumble and it looks a lot like Flower Soft.  Easy peasy! 
I used glue on his belly and ears and then covered it with the crumbles, worked great and at a fraction of the cost of Flower Soft.  I haven't tried coloring it yet, but I have heard that a couple drops of ink, some ink spray or even food coloring works well.  When I try it, I'll let y'all know how it works.

Thanks for stopping by today, leave me a comment if you have any questions or just to let me know what you think of this cute little guy.

Until next time, Happy Crafting!

Saturday, January 1, 2011

Tag You're It! contest.

Frantic Stamper's blog is having a Tag You're It contest.  I entered a few tags into it, but unfortunatly I didn't make the finals.  Below are 4 tags that I entered.  I think they turned out pretty nice.  I've never done a lot of tags like this, so this is something new for me. 
I love the rose on this tag.  It is one that I made a little while ago and knew that eventually I would find the perfect project for it. I got the doily at
Hollo's Papercrafts.  The bird is a stamp from The Paper Company.

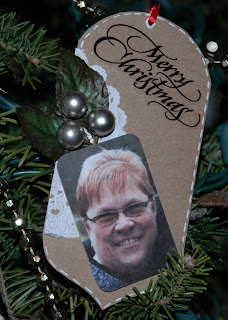
Yeah, that's me on that tag.  I was thinking this would make a nice tag to give someone on a gift,  wouldn't have to sign it, they could just look at the pic  and see who it was from.

Made this one mostly with supplies I got in a grab box that I got for Christmas filled with Prima products.  It was bought from Frantic Stamper.

I love this FUN tag!  I received some Pan Pastels for Christmas and wanted to mess around with them.  That is what I used to color the tag.  Love it!  I stamped the FUN onto the tag and the flowers were others that I got in my grab box.  All the brads in the flower centers and lower right hand corner are ones I got in a prize pack that I won from Kristen Swain on her blog, Blankety Blank Blank.

Thanks for stopping by today.  I hope you have enjoyed my tags.  Leave me a comment and let me know what you think.  Which one do you like best?
Until next time, Happy Crafting!