My Other Pages

To make it easier to read about our trip to Ireland, I have made a page that is just for that. There is a tab above for Ireland Trip 2014 or click on the Home tab to read my other posts. I have also created a new page for My Weight Loss Journey if you are interested in that, click on the tab above.
Showing posts with label Prima. Show all posts

Friday, March 25, 2011

Recycle, Reuse, Repurpose Project

Hello crafty friends! 

Recently there was a contest on the Glue Arts blog, it was to recycle, reuse and repurpose some items into a project.  I would like to share my submission with you today.  I didn't win the contest, but I had a great time making my projects.  I had to use Glue Arts products in my submission, but keep in mind that you can use which ever products you like.  To be honest, I wouldn't use the Glue Glider Max again.  I borrowed it from a friend (thanks Jen T!) for this project and I found it very difficult to use.  I would use my ATG Gun in the future.

Supplies needed:

pockets cut off old jeans
Glue Glider Max
Glue Glider Pro
Crop a Dile
scrap fabric
scrap card stock
Pearl accents
ribbon
silk flowers and leaves
charms
crystal accents
butterfly applique
old bracelet
glitter glue
Say it With Studs (hearts)
Say it With Crystals (flourish)

These are the supplies I used for the 2 projects I am showing. Any type of embellishment may be used. These just happened to be what I had on hand.

These are the two projects I made. They can be used for many different purposes. When my daughter was young I made one of these as a “locker pocket” and put magnets on the back so she could put it inside her locker door at school. She kept small things like pencils, pens, erasers etc. in it. The one with the strap can be used as a little purse, or it can be hung on a door, like in the picture to put notes into it for your child. Hang it on your child's bedroom door and leave little love notes in it, or maybe hang it somewhere it is sure to be seen and use it for outgoing mail. Keep the extra keys in it, or extra change, or maybe you sunglasses, so you know where they are. The one with out the handle can be used to put a small gift in as a gift bag, put magnets on it to go onto the fridge to hold coupons, or take out menus. There are a lot of uses for these adorable pockets.

Your first step is to find some old jeans and cut the pockets off the back. I use two matching pockets, although you could use one and back it with another fabric.

Next use the Glue Glider Max to apply adhesive to the back of the pocket right along the stitching . Fold over the extra fabric right along the edge of the pocket. Cut off any unwanted fabric. Do this with the other matching pocket.

Now you will apply adhesive to the back of the pocket, line up the 2 matching pockets back to back and press them together. You will now have a “double” pocket. You can decorate both sides, but I have only decorated one on mine.

Now you can embellish you pocket. For this first one, I used some scrap fabric to make flowers. I cut the fabric into long narrow strips, about 1” wide. I cut a piece of scrap card stock into a circle, using my Glue Glider Pro, I covered one side of the circle with adhesive. Starting in the middle of the circle, I began to attach the fabric as seen in this tutorial, I made 3 of these fabric flowers in different sizes and added some pearl accents to the centers of the flowers. I used Glue Glider Pro to adhere silk leaves to the back of the flower and then to adhere the flowers to the pocket. I embellished the pocket further with some “Say It With Studs” (Prima) hearts and a butterfly applique. You can embellish in any way you like, a little, a lot, girly, boyish, whatever you like.

Next use the Crop a Dile to make holes in the fabric between the 2 pockets. Narrow strips of fabric are again used, to make a strap for the pockets. Use the Glue Glider Pro on the back of the fabric and then folded the fabric onto the adhesive and trim off any extra threads. Then simply fed the ends of the strap through the holes and tie a knot at the end. You could also use ribbon as a strap.

The 2nd project was constructed the same way, but was embellished differently. I used all items that I had on hand in my stash.

First I took a red crystal bracelet that my daughter didn’t want any longer and I cut it, this I adhered to the pocket with liquid adhesive. I then used my Glue Glider Pro to adhere the flowers and a bow that I had made. The flourish and the small flower are “Say it With Crystals” (Prima) I found the butterfly and heart charms in my stash and adhered them with liquid adhesive.
I decided that I didn’t want a strap on this pocket project, but I can easily add one at a later date if I choose. I had a lot of fun making these and think they would make great gifts for the little girls in my life.

Thanks for stopping by today.  I hope you have enjoyed these projects and tutorial.  If you would like to leave a comment that would be great, if you have any questions, feel free to leave them in the comments section or e-mail me (address is in right column) and I will get back to you asap.

Until next time, Happy Crafting!

Sunday, January 9, 2011

Gift Tag

Hello there friends!  I had one more Christmas gift hanging around that Santa dropped off at my house for delivery and that darn Santa didn't have the courtesy to wrap it.  Sooooo, I thought I better do it. 
I decided this gal needed a special tag, as she is a very special person.  She owns the "studio" where I go, to do my scrapbooking.  My Happy Place truly is my happy place.
Here is the front of the tag.  I started with a premade tag and used some Broken China Distress Ink to give it a little color.  I then used a stamp from the Inkadinkado Christmas in New York set and embossed it with burgundy embossing powder.  The silver flakes at the top of the tag are from a different stamp in the same set.
The Merry Christmas is  from Bo Bunny  Merry Christmas Clearly Stamps set and embossed with green powder

This is the back of the tag.  For "Jen" I used gold embossing powder and stamps from "Coffee House Alphabet" also from Inkadinkado.  Both the Inkadinkado sets were ones I got for Christmas in a grab box of acrylic stamps from Frantic Stamper.  The little jewels in the bottom corner are from Frantic Stamper also, from the Prima grab box I received.

Here is what the gift looked like once I was finished wrapping it.  I simply used a grocery bag that had been cut open and ironed to smooth it out.  The ribbon and other embellishments are from my stash.  I think it turned out looking very pretty.  Hope she likes it.  I have orders to report back to Santa about it. LOL!

Thanks for stopping by today.  Leave me a comment to say hi or give me some feedback.  I always like to hear what people think.

Until next time, Happy Crafting!

Saturday, January 1, 2011

Tag You're It! contest.

Frantic Stamper's blog is having a Tag You're It contest.  I entered a few tags into it, but unfortunatly I didn't make the finals.  Below are 4 tags that I entered.  I think they turned out pretty nice.  I've never done a lot of tags like this, so this is something new for me. 
I love the rose on this tag.  It is one that I made a little while ago and knew that eventually I would find the perfect project for it. I got the doily at
Hollo's Papercrafts.  The bird is a stamp from The Paper Company.

Yeah, that's me on that tag.  I was thinking this would make a nice tag to give someone on a gift,  wouldn't have to sign it, they could just look at the pic  and see who it was from.

Made this one mostly with supplies I got in a grab box that I got for Christmas filled with Prima products.  It was bought from Frantic Stamper.

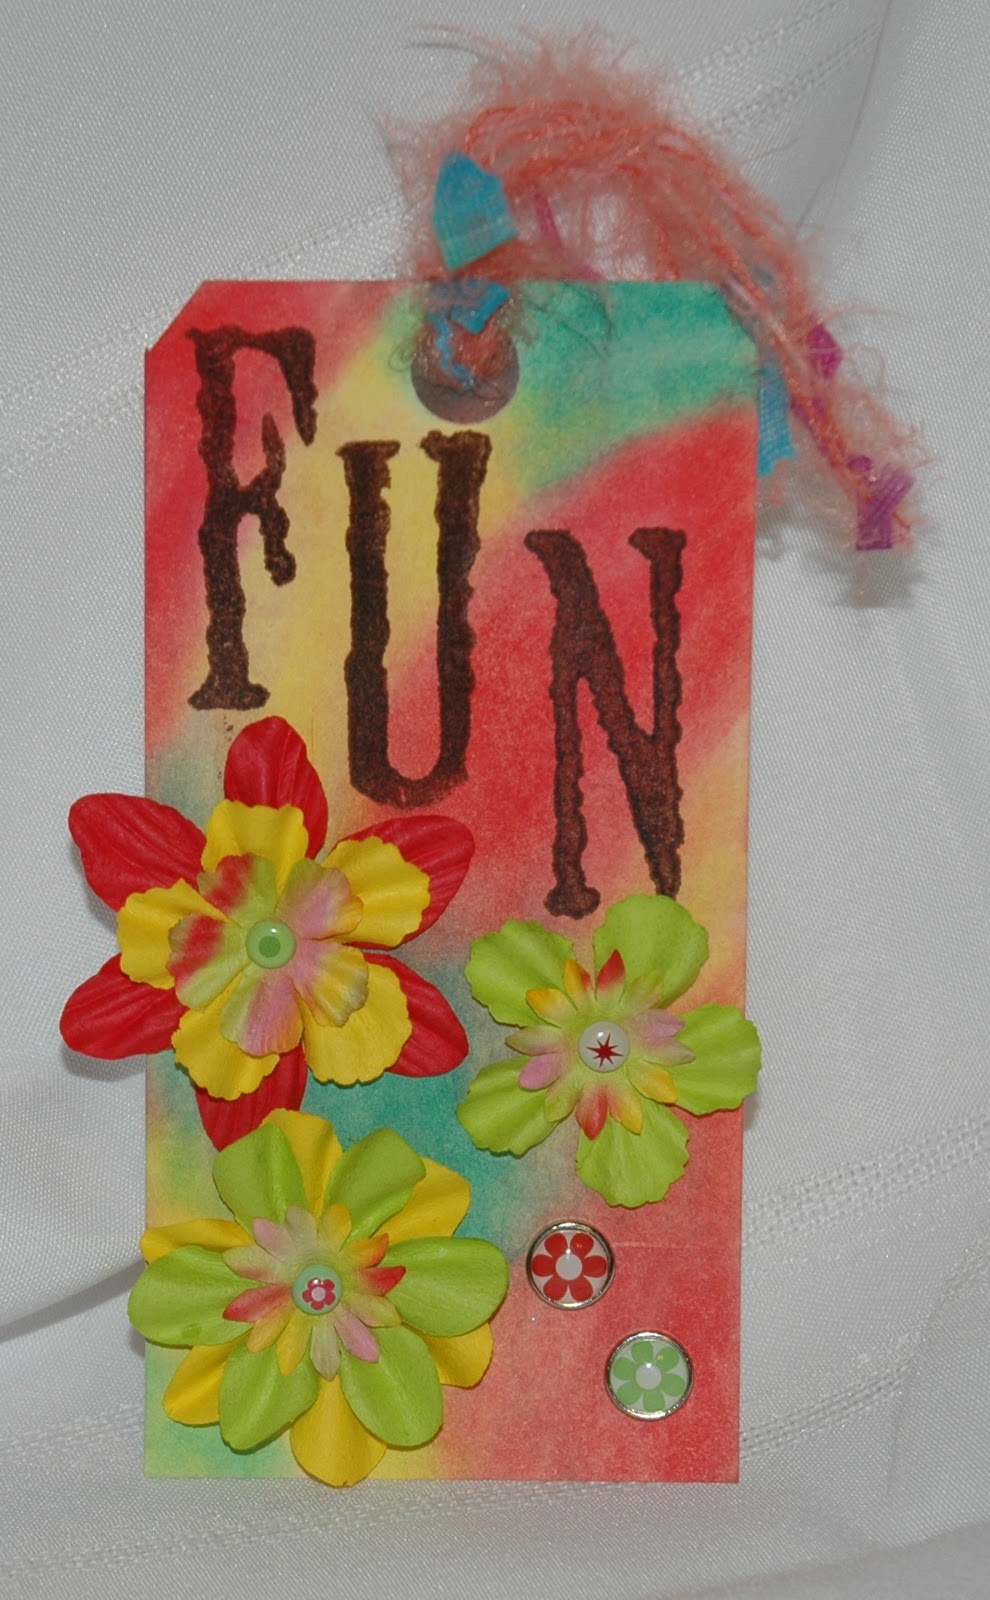
I love this FUN tag!  I received some Pan Pastels for Christmas and wanted to mess around with them.  That is what I used to color the tag.  Love it!  I stamped the FUN onto the tag and the flowers were others that I got in my grab box.  All the brads in the flower centers and lower right hand corner are ones I got in a prize pack that I won from Kristen Swain on her blog, Blankety Blank Blank.

Thanks for stopping by today.  I hope you have enjoyed my tags.  Leave me a comment and let me know what you think.  Which one do you like best?
Until next time, Happy Crafting!