My Other Pages

To make it easier to read about our trip to Ireland, I have made a page that is just for that. There is a tab above for Ireland Trip 2014 or click on the Home tab to read my other posts. I have also created a new page for My Weight Loss Journey if you are interested in that, click on the tab above.
Showing posts with label Going Buggy. Show all posts

Friday, November 8, 2013

Mini albums

Hello all!
About a year ago, my cousin asked me to make
a couple mini albums for her. 
She will be so glad to find out
that I have finally made them for her.
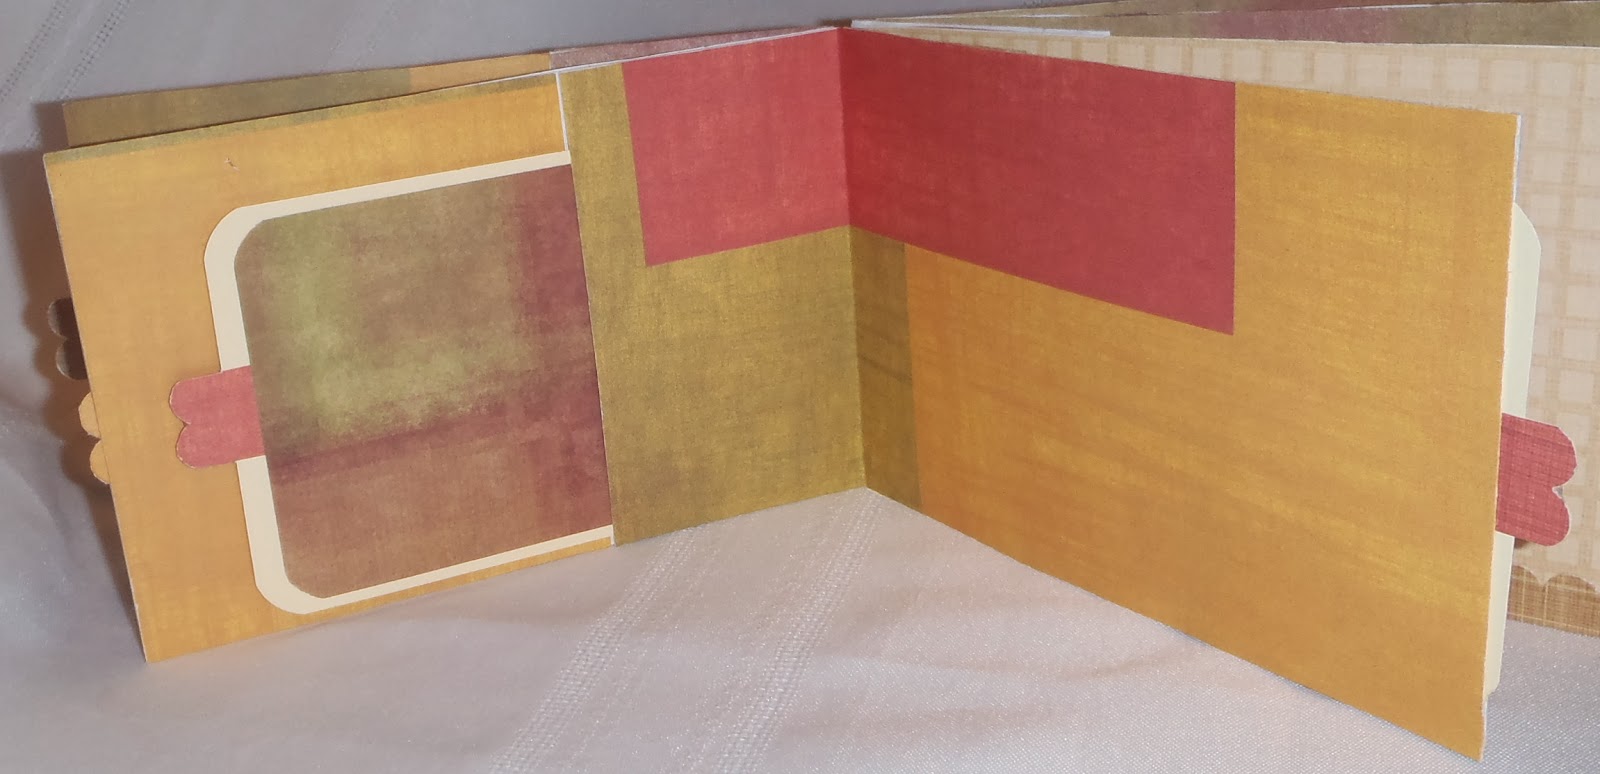
Below you'll see pictures of all the pages in the two albums.
Each page has a tag that pulls out of the end
as well as tags that are in the "short" pockets.
These minis are made from envelopes and are easy as can be.
You can find a tutorial on
Going Buggy
one of my favorite blogs.
Now have a look at my minis.
I was asked to make a boy one and a girl one.
Here is the "boy" book.


And book number 2, the "girl" book.


I hope you've enjoyed my mini albums
and have been inspired in by them.
Why not follow the link above to
Going Buggy
and learn how to make your own mini? 
They are lots of fun and make great gifts.
 
Thanks for stopping by today,
leave a comment if you will and
come again soon.
Until next time, Happy Crafting!

Thursday, October 18, 2012

Give away on Going Buggy Blog

Hello blog friends!
I want to let you know about a fabulous give away!
It's going on right now at
Enfys will be giving away a complete set of ProMarkers.
So drop what your doing, well, finish checking out my blog posts and then pop over to Enfys' blog and sign up to win.
Good luck!

Monday, April 23, 2012

Party Poopers

Hello all!

Today I have a card to show you that I made for a challenge on one of my favorite blogs, Going Buggy.
Each month Enfys posts a challenge and I have been saying that I'm going to do the challenge, but I haven't before. 
I always have good intentions,
but I am so bad at getting challenges done. 
Well surprise!  This month I did it!
The challenge was to make a card for a child.
Here is my card.
I used "Party Poopers" (#14303) from Eureka Stamps
I colored the image with my FlexMarkers (which I love working with)
I layered it onto some red card stock from my scrap stash and added the bit of ribbon and the balloon brad, then adhered it to a card base covered with some fun polka dot paper.

I had a lot of fun making this card.  I hope you'll pop on over to
and see all the cards entered into the challenge
and maybe you'll join in too.
Be sure to check Enfys' other posts, I'm sure you'll enjoy them.

Thanks for stopping by today, leave a comment if you will and come again soon.

Until next time, Happy Crafting!

Thursday, April 12, 2012

Easter Treats

On Saturday evening I decided that I needed to make little treats for those having Easter dinner at our home.
I don't know why I do that, wait until the last minute like that, but I do it often.  When I say I decided Saturday evening, I mean pretty late.
I started making these at about 11:30.
I'm a night owl anyway, so it was okay and I was happy with how they turned out. 
If I had more time, I probably would have done a bit more with them, but none the less, I thought they turned our cute.
I used 2 stamps from QKR Stampede,
Daydreaming Bunny (#15209) and Some Bunny (#10603)
I stamped "Daydreaming Bunny" onto white card stock and colored them with my new set of Letraset FlexMarkers.
These markers are alcohol markers and I won a complete set of 90 from my cyber friend Enfys' blog Going Buggy.
Thanks to Enfys and Letraset for this wonderful prize!


I had so much fun coloring them in all different colors.
Of course there aren't really pink or blue bunnies, but I wanted to try out as many colors as I could of my new markers. 
And boy did I love playing with them! 
I can tell already that I'm going to be using them a lot.

 On the back of each bag topper I stamped the "Some Bunny" sentiment. 
Then stapled them to the little bags full of Easter goodies.
The treat bags were placed on each plate at the dinner table.
Everyone seemed to like their little treats and I had a lot of fun making them.

Thanks for stopping by today!  Leave a comment if you like and come again soon.  I always like visitors to my blog.

Until next time, Happy Crafting!

Wednesday, April 13, 2011

New Cartridge give away on Going Buggy

Hello all!

My blogger friend Enfys is having a give away on her blog Going Buggy.
All you need to do is go over to her blog and comment, if you have a blog it would be great if you helped spread the word too.

The prize is one of the new summer Cricut cartridges called
Happy Graduation.

So pop on over and maybe you'll win.  While you are there take a look at her other posts, she is quite talented and her posts always bring a smile or a chuckle to my day.

Friday, January 14, 2011

Cute as a bug!

Hello out there in blogland! 
Today I have a card that I made for a challenge.  One of my favorite blogger friends, Enfys, on Going Buggy, is having a week long party on  her blog and the first days challenge was to make a card with a bug on it.  I'm showing you the card that I made for that challenge.
Enfys is so generous and is giving a prize to one person in the UK and one outside the UK for this challenge.  (I'm in the US)  She lives in the UK and the US both (depending on the time of year) and has some pretty cool supplies for her give aways.  Stop by her blog and see what she has, not only as prizes, but as inspiration for your next card or project.  She is really quite wonderful!

I started out by cutting a 3 1/2" circle on my Cricut Expressions in red and one also at 3"  I cut a small, 1 1/4" circle for the head, all the spots were cut at 1/4"  The antenna were simply hand cut from a scrap.

After cutting the larger circle in half and gluing the spots on, I attached the 'wings' to the body of the ladybug with brads.  I didn't have any black brads, so I took a couple other ones and colored them with a black permanent marker.  Worked great!
I put the head together and attached it to the body of the ladybug and adhered it to the white base of the card stock. 

For the sentiment I used my Sure Cuts A Lot 2 program and my Expressions to weld and cut the words.  "Cute as a" was cut with the same red card stock as the bug.  I then added the spots with a black Zig marker.  "Bug" was cut out of a scrap of black.
Once my ladybug and sentiment were done, it was simple to layer them with the black and red card stock. 
I wanted to add a little something to the inside, so I spotted some red card stock, adhered it to some white and then into the card.

Thanks for stopping by today.  Be sure to leave me a comment and let me know what you think of my ladybug card, then hop on over to Going Buggy and see what Enfys has to show you.  You'll probably get hooked on her inspiration and humor too.

Until next time, Happy Crafting!

Thursday, January 13, 2011

Going Buggy

One of my favorite blogs is having a party.  On Going Buggy, Enfys is having a week long party with a lot of prizes.  We are celebrating that she has over 2000 followers and over 1/2 million hits on her blog!  How cool is that?  Every day there is chances to win and there are mulitple prizes!  You should head on over and see the wonderful cards and projects she makes! 

Her blog isn't only inspirational and instructional, it is humorous!

Yesterday there was a challenge that we have until the 21st to work on and submit.  Today was a little trickier, you have to try and guess which colors of Promarkers (think Copic) she used to color her image.  I'm sure I got them wrong, but I tried anyway, you never know, right?

I haven't made my card for the challenge yet, but I will and then I will post it here.

So hop on over and join the party!  The more the merrier!

Thanks for stopping by, hope to see you at the Going Buggy party!

Until next time, Happy Crafting!

Sunday, December 12, 2010

Gift card holders ~ Polkadoodles Week 49 challenge

Joys of the season to you all!  Today I'm showing you a couple gift card holders that I made for Christmas gifts.  They are for the same person, just from different people.
 This first one is one that I made for my Mom to give to her bestest friend in the world, Aunt Marilyn!  They have been friends since they met in 4th grade and since they are 85 & 86 yrs old, you can see they have been friends for a VERY long time.  The image is from QKR Stampede and titled In the Manger (#16701)
I stamped the image onto kraft card stock and colored it with water color crayons, trimmed it out, rounded the corners and used foam tape to attach it to the front of the card holder.
 The inside of the holder is stamped with the word Rejoice, which I think goes very well with the Christ Child on the front. 
The holder itself was very simple to make.  If you are interested in making one yourself, there is a video tutorial here. 

Now on to my 2nd holder.  Aunt Marilyn lives in North Carolina and loves to take herself out for quick lunches.  She goes walking and then stops someplace for a quick and inexpensive lunch.  A few years ago I started sending her gift cards for Christmas, to a variety of fast food restaurants.  This year I saw this idea on one of my favorite blogs, Going Buggy, and decided this would be perfect for Aunt Marilyn.
 This cute little gift card book is made with toilet paper tubes.  First, I flattened them, then I covered them with papers from a DCWV Christmas Stack.  I had forgotten that I had this 6x6 stack and I'm so glad I found it.  The papers are adorable.  I'm pretty sure this stack has been discontinued as it has been in my stash for a couple years.
I then used my Bind It All to make them into a little book.
Each "page" has it's own tag with a gift card or certificate on the back of it.
The first tag is covered with paper from the same paper stack and says Merry Christmas. All the others I used QKR Stampede images that were stamped onto kraft card stock. 
The Santa is Santa Snowman (#16704) and was colored with water color pencils. I used Liquid Pearls on his beard, hair and the fur on his hat to make them a nice shimmery white. 
The next tag is Pine Sprig (#15702) was colored with water color pencils, I used gold Stickles on the bells. 
Holly (#15701) was used for the next tag, colored with water color pencils again and red Stickles were used on the berries. 
This picture shows where I used the Liquid Pearls and Stickles.
The last image I used was Trees (#21704), this one I stamped with Moss Green VersaFine ink and used a white gel pen to add the 'snow' to the image. 
I then added an eyelet to the top of each tag, using my Crop-a-dile.  Then threaded a ribbon through it and added the gift card or certificate to the back.  The gift cards I attached with a small amount of ATG tape.  For the gift certificate, I attached a loop of ribbon to the back of the tag, folded the certificate and slid it under the ribbon.
I know Aunt Marilyn will enjoy the gift cards and certificate and I'm pretty sure she will like the little book I made to send them to her in. 

Thanks for stopping by today.  I hope you have enjoyed your bit of time here and I hope you have been inspired to make something yourself.
Come back again soon and see what else I have to show you. 
Leave me a comment and let me know what you think!

Until next time, Happy Crafting!

Friday, November 26, 2010

Polkadoodles Week 46 Challenge - Give Thanks

This is my 2nd post for today, so be sure to scroll down and see what else I have to show you!

I'd like to share with you, a card that I created for the Polkadoodles Week 46 Challenge.  For this challenge the card had to have this "give thanks" sentiment, which they gave as a free download.  This is the first time I have entered a Polkadoodles challenge. 

I first became familiar with Polkadoodles when I saw it mentioned on my blogger friend, Enfys' blog Going Buggy.  I was fortunate enough to win one of their fabulous CDs from her blog and absolutely love it.
For this card I used the Polkadoodles Digital Papercrafting CD-ROM Jingle Jangle Christmas.  I printed the green polka dotted paper from that CD as well as the cute snowman.  I then did a bit of fussy cutting of that cute little guy.  I decided where I wanted him placed on the blue card stock, then stamped a variety of snowflakes with Versa Mark, drew the 'arms' with a Versa Mark pen and embossed them with white embossing powder.  I adhered the snowman to the blue card stock and then to the green dotted paper.

To add the sentiment, I changed up the size and positioning a bit and printed it onto white card stock.  I cut around the bottom of the 'g' so it would extend down over the main layers of the card.  This was all adhered to blue card stock cut to an A-2 sized card.  I think this cute little guy looks very thankful that there is more snow coming down around him.

Thanks for stopping by today, I hope you have enjoyed my post.  Leave a comment and let me know what you think.

Until next time, Happy Crafting!