My Other Pages

To make it easier to read about our trip to Ireland, I have made a page that is just for that. There is a tab above for Ireland Trip 2014 or click on the Home tab to read my other posts. I have also created a new page for My Weight Loss Journey if you are interested in that, click on the tab above.
Showing posts with label glue. Show all posts

Friday, September 16, 2022

Sequined Cards

Hello!
Welcome to Kristie Kreates.
Today I have a few cards to share with you.
They were made after seeing 
this video by Marion Emberson
I loved the technique she used and decided to 
do my own cards inspired by hers.
Of course mine don't look like hers,
but as I always like to say
"Inspiration not replication"
A short explanation of the technique is
that I put glue across the middle of the
panel, then using a brush spread the glue 
out to either side of the panel.
I then applied embossing powder and heated it
until it was all melted.
Once everything was embossed, I added another line
of glue and sprinkled sequins onto the glue and let it
dry.  I love how my cards turned out.
This technique can have many different looks,
depending on the amount of glue you use and how
much you spread it out.  Also what kind of 
embossing powder and the colors makes a big
difference.
Hop on over and watch Marion's video and see how
her cards turned out.

Thanks for spending time here at Kristie Kreates,
I hope you will come again soon.
Until then,
emboss on!


Sunday, August 21, 2022

Embossing Powder Background Technique

Hello Everyone!
I'm glad you have decided to spend a little time with me
today.  I have a technique to show you today and I 
hope what I tell you will make sense and you'll be able
to give it a try.
This is the card I made for my son for his
30th birthday this month.  I used this technique
to make it.  For lack of a better name I call it
embossing powder background technique.
The pieces I'm showing you when I explain the technique 
are not pictures of the background I used for the card, but
just the technique.
I started with some plain white card stock.
I put glue onto the card and spread it around with 
my finger.  Then added embossing powder and
heat set it.
On some pieces I use the glue in smaller spaces.
Unfortunately, I didn't remember to take pictures as I 
went.  I was so engrossed in experimenting, that it totally
slipped my mind.
I just kept adding glue in different areas and adding colors.
I tried different ways of applying the glue also,
I brushed it on with a brush, with a q-tip and right from the
bottle and just let it go where it wanted to go.
Just don't get it too thick.
Each layer of embossing powder changes the look,
and I found that the more layers there were, the more texture
I got.  It also depends on the brand and type of powder you have.
Some are chunky and some are fine, or anywhere in between.
I'm sorry I don't have more pictures to show you, but here is a
video from  Marion Emberson showing the basic idea of how to
do this technique.  I don't have the same products as she does,
I used what I have and experimented a bit with it.
I also gave some VersaMark Ink a go and swiped it on with
a make up sponge.  The glue and the VersaMark both worked great.

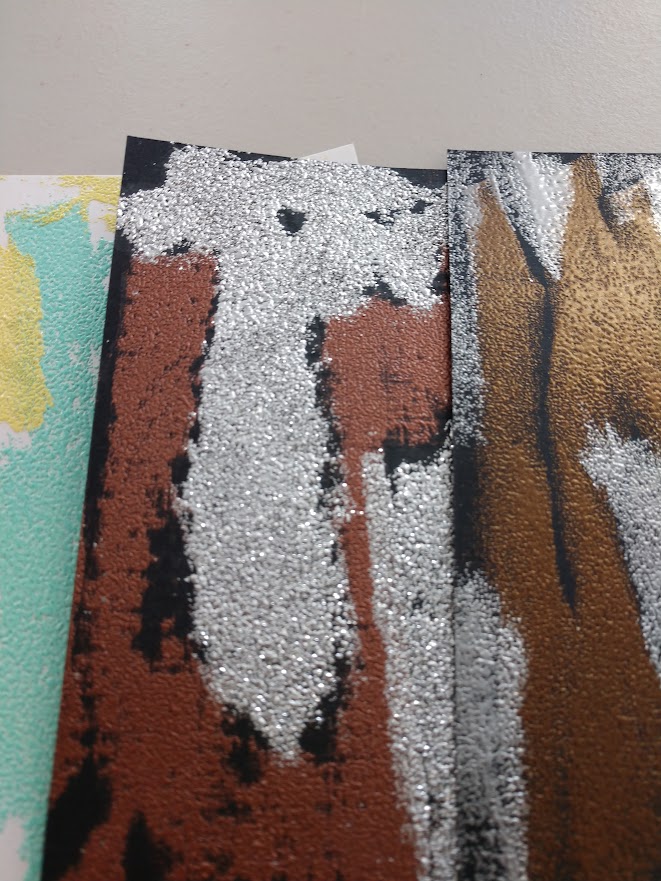
These are the pieces I created.
Here they are a little closer.
Click on the pictures and you can see them larger.
This one I used a silver sparkle embossing powder,
you can see that the results are different than the other
powders.  Not only the sparkle, but the texture also.
This is the one I used for Jaryd's card,
It was my favorite of the bunch.  
I thought the colors blended beautifully.

I hope you have been inspired in some way today,
and maybe will give this technique a try.
Be sure to watch the video linked above to 
maybe understand the technique a little better.
I hope you'll come again soon.
Until then,
emboss away!