My Other Pages

To make it easier to read about our trip to Ireland, I have made a page that is just for that. There is a tab above for Ireland Trip 2014 or click on the Home tab to read my other posts. I have also created a new page for My Weight Loss Journey if you are interested in that, click on the tab above.

Saturday, April 14, 2012

Stamped Easter Eggs

The day before Easter, I decided that I should make some Easter eggs and that I should try stamping on them and coloring them with my new FlexMarkers from Letraset.  FlexMarkers are alcohol markers, much like the Copics that are very popular.  Letraset is a company out of the UK.

I had won them (from Going Buggy, one of my favorite blogs)  and just received them in the mail the day before and was itching to try them out.

So I boiled up some eggs and set about gathering some of my stamps.

I learned a few things in the process.
*It is pretty difficult to stamp onto eggs.
*Ink doesn't dry very well on eggs.
*Ink doesn't clean off the eggs very easily.
*Even heat setting doesn't work all that well.
*I don't think this is something I will be doing again.

I found that getting a nice clear, unsmudged image was very difficult,
consequently, you will see that there are some areas that are missing a bit of the image and others where there is a bit of a smudge.

None the less, here are the 3 eggs that are good enough for anyone to see.  I had 10 eggs that I worked on and 3 that were decent.

For the first one I used "Bunny with Flowers" (#13407) from

The other two were made with "Happy Duckling" (#6807) from
QKR Stampede, both the same stamp, but colored a little differently.
How can they be the same image and one duckling looks happier and one looks a bit worried?


Since I only had 3 eggs that I wanted my company to see, this is how I "displayed" them on the dinner table.

So if you have any thoughts about stamping on eggs, here is what I'd recommend.
*Use small images, they will be easier to stamp.
*Maybe alcohol markers aren't the best choice as they can't be used with all kinds of ink and will cause the ink to run.
*Water color crayons may be another choice, although I didn't try them, so who knows?!?!
*Lastly, maybe it's not a good idea to decide to do this the night before you need them done.  LOL! Leave it to me to wait till the last minute.

Thanks for stopping by today.  I hope you have enjoyed seeing my eggs and maybe you have been inspired to try something different and new.
Take that leap, experiment, try different techniques and supplies. 
You never know what you'll discover.
Leave a comment if you wish and maybe tell me something different that you have tried.

Until next time, Happy Crafting!

Thursday, April 12, 2012

Easter Treats

On Saturday evening I decided that I needed to make little treats for those having Easter dinner at our home.
I don't know why I do that, wait until the last minute like that, but I do it often.  When I say I decided Saturday evening, I mean pretty late.
I started making these at about 11:30.
I'm a night owl anyway, so it was okay and I was happy with how they turned out. 
If I had more time, I probably would have done a bit more with them, but none the less, I thought they turned our cute.
I used 2 stamps from QKR Stampede,
Daydreaming Bunny (#15209) and Some Bunny (#10603)
I stamped "Daydreaming Bunny" onto white card stock and colored them with my new set of Letraset FlexMarkers.
These markers are alcohol markers and I won a complete set of 90 from my cyber friend Enfys' blog Going Buggy.
Thanks to Enfys and Letraset for this wonderful prize!


I had so much fun coloring them in all different colors.
Of course there aren't really pink or blue bunnies, but I wanted to try out as many colors as I could of my new markers. 
And boy did I love playing with them! 
I can tell already that I'm going to be using them a lot.

 On the back of each bag topper I stamped the "Some Bunny" sentiment. 
Then stapled them to the little bags full of Easter goodies.
The treat bags were placed on each plate at the dinner table.
Everyone seemed to like their little treats and I had a lot of fun making them.

Thanks for stopping by today!  Leave a comment if you like and come again soon.  I always like visitors to my blog.

Until next time, Happy Crafting!

Tuesday, April 10, 2012

I made my own ink daubers

I saw this idea on Pinterest and figured I'd give it a try.
I'll admit it, I'm cheap!  I hate to buy anything that isn't on sale or that I don't have a coupon for. 
Then there are the things that I think the price is ridiculous  and I just won't buy it.
Ink daubers is one of those things that I figure I could do with out, the darn things are a crazy price and I'm just too cheap to pay for them.
So when I saw some instructions on Pinterest I knew I needed to make my own.

Here are the supplies. 
* PVC pipe, this is a bit under 1" 
(it was in the garage, part of some project Jaryd did while in high school)
*My little saw from my craft room.
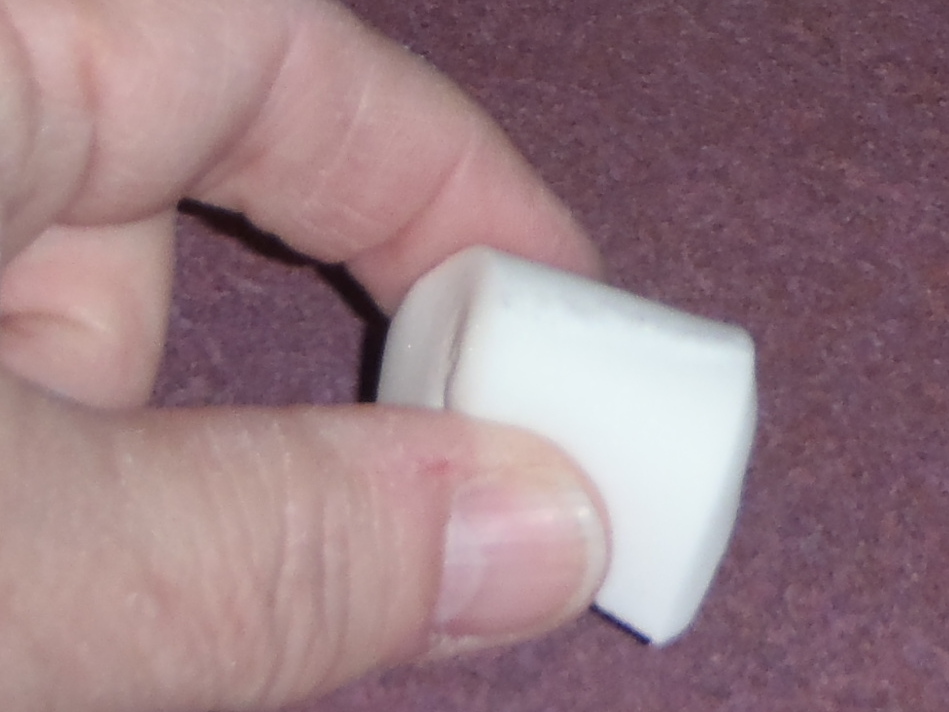
*Cosmetic sponges, which I had in my craft room also.

I used my handy little saw to cut the pipe into pieces.  You could of course mark it and actually cut it all the same size, but I tend to fly by the seat of my pants and I have several different sizes.
Wish I could have gotten to cut straight across, but they didn't and it really doesn't make a difference.
There were a lot of rough edges, so I used an emery board to sand them down nice and smooth.
Then I folded a cosmetic sponge in half.
And shoved and twisted and turned that little guy down into the piece of pipe.
Until it popped out the other end.  Some of the longer pieces of pipe, I needed to use a pen to push them through, my fat little fingers don't fit down into the pipe.
And here they are, my home made ink daubers!  
They may not be pretty, but they sure will work just fine.
And when the sponge gets too "dirty" or wears out, I can just pull it out and put in a new one.

Please ignore my terrible dry skin and lack of manicure.
Isn't that just the cutest little dauber?!?!
This little buggers didn't cost me a cent!  
I happened to have all I needed here in the house, but even if you don't, you can get those cosmetic sponges at the Dollar Store and some PVC at the hardware/home store.  
I hear it's pretty cheap.
So stop spending money on daubers, make your own and spend that money you saved on some other supplies that you can't make yourself.

Thanks for stopping by today.  Leave me a comment if you like and come again soon.

Until next time, Happy Crafting!

Up Up and Away!

Hello!  Welcome to my blog!
Today I'm showing you a fun card I made with stamps from
I used 4 different stamps from the Balloons/Holders category.

I stamped "Flying Girl Holder" (#21701) onto water color paper and colored her with water color crayons.
I stamped "Oval Balloon" (#5201) and "Heart Balloon (#5204) onto a variety of scraps.
I fussy cut all the pieces.
The background and hills were pieced onto a white card stock base.

I then added all the cut pieces and stamped the
"Up, Up and Away!" (#11802) sentiment onto the card.

I loved the card, just needed to add the strings to the balloon.
Well, let me tell you, card making is not an exact science and at times we just need to go with the flow and remember what I always say
"There are no mistakes, just chances to be more creative."

Well, this was one of those times!
I didn't think about the 'hills' being cut out of vellum when I stamped the sentiment.
VersaFine Ink does not dry on vellum, so when I went to tie the strings onto the balloons the black ink smeared all over the card.

Luckily most of it cleaned off with a baby wipe.
I stamped the sentiment onto white card stock, fussy cut it and
adherred it to the card. 

Honestly, I like it better before, but as they say, it is what it is.
I still like the card, just not as much as I did before my chance to be more creative.

Thanks for stopping by today. 
Leave a comment if you wish and come back soon.

Until next time, Happy Crafting!

Sunday, April 8, 2012

April Eureka! Stamps Blog Hop

Hello and welcome to my post for the Eureka! Stamps April Blog Hop.
If you have come from Jessica's Blog you are on the right track.
I'm sure she had something wonderful to inspire you.

If you have just happened upon the hop, you will want to start at the beginning so you won't miss any of the beautiful inspiration from our design team.

Eureka! Stamps has many beautiful and versatile butterfly stamps.
For my card today I chose "Eureka Butterfly" (#9702)
I stamped the image onto water color paper and colored it with water color crayons.  I then used Pearlessence to give it the shimmer.

Now, I'll send you off to
where I'm sure you will find something lovely.

Thanks for stopping by, I hope you have been inspired to create something beautiful.
Stop in to the Eureka! Stamp Store and see what wonderful stamps they have to create with.

Until next time, Happy Crafting!

Monday, April 2, 2012

Happy Easter Chicks

Happy Easter to all of you who celebrate!
Today I have a cute Easter card that I made with 2 stamps from
Lg Chicks in Egg (#3406)
and
Happy Easter with Bouquet (#3501)
I stamped the Lg Chicks in Egg onto white card stock with water color crayons and added some glossy accents and stickles to the design on the egg.
I then used just the Happy Easter greeting from the Happy Easter with Bouquet stamp, which I also colored with water color crayons.

The card base was made home made "washi tape."
To make the "washi tape" I put 'score tape' onto tissue paper, then trimmed it to the width of the tape.  Easy peasy!  Now just had to cut, peel the 'protective' cover off the tape and layer it onto my card base.

I think this makes a very cute Easter Card.  What do you think?
I hope you all will have a very blessed Easter.
Come again soon, I love having visitors!

Until next time, Happy Crafting!

Sunday, April 1, 2012

Rose and Butterfly

Happy day to you!

I have to say, I am loving this card today.
Being on the design teams for QKR Stampede and Eureka! Stamps
gives me the opportunity to use so many wonderful stamps and
I enjoyed making this card so much!

I love both stamps that I used on this card.
"Rose" (#17505) from QKR Stampede and
"Eureka Butterfly" (#9702) from Eureka! Stamps
have such versatility!

"Rose" and "Eureka Butterfly" were both colored with water color crayons.
I made a few score lines on either side of the Rose image to add a little interest.
Once the Eureka Butterfly was fussy cut, I added a bit of Glossy Accents to the body and antenna before adhering it to the card front. 
You can't see in the picture, but the wings are not attached to the card, so it has the appearance of being ready to fly off the card.

I hope you enjoy this card and these two images as much as I do.
Thanks so much for stopping by today.  Come again soon!

Until next time, Happy Crafting!