My Other Pages

To make it easier to read about our trip to Ireland, I have made a page that is just for that. There is a tab above for Ireland Trip 2014 or click on the Home tab to read my other posts. I have also created a new page for My Weight Loss Journey if you are interested in that, click on the tab above.

Saturday, July 24, 2021

I'm Taking A Little Break

 Hi crafty people!
Just wanted to let you know I'm taking a little break.
July is a very busy month for me and I haven't had
a lot of time for creating.
I'm taking a little vacation to visit some friends
and while I'm there a couple of us will be going to 
Inspiration Inn Bloom
for a few days of cropping and crafting fun.
Here are a few pictures that I have taken during other 
visits. This place is gorgeous, don't be jealous. LOL

I know this picture looks dark, but the lighting
is actually great, especially with all the windows.
Each table has a comfortable chair, a cutting mat, cup holder,
light and electric tower to plug in any other 
tools etc that we might need.

This is the room Mary and I stay in.
There are a lot of themed rooms,
I think they can accommodate
27 guests in all.

Upstairs there are more guests rooms and a 
wonderful craft supply store.

Fabulous kitchen
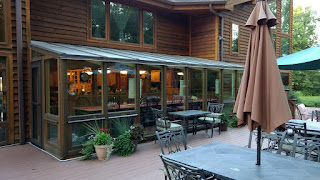
Gorgeous patio
Huge eating area

From the back outside, all those windows are in the 
main room where we do our crafting.
After our weekend here we will be doing at least part
of the Ohio Paper Crafting Shop Hop with some friends.
All in all it should be a wonderful time away.
I'll be back in August and give you a look at what I get
done at the crop.
Until then,
enjoy your summer!


Tuesday, July 20, 2021

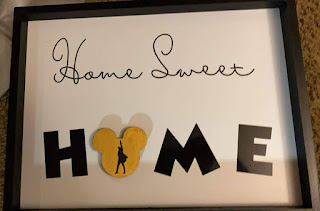
Disney Themed Home Sweet Home Sign

Hello everyone!
As I promised in my last post, today I'm showing you 
the other gift we made as a shower gift for Kelsey Ann.
Sara came up with the idea and we ran with it.
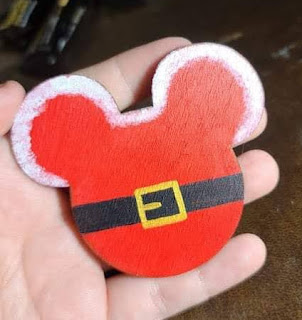
Kelsie, Sara and I divided up the Mickey heads and each
painted 4 of them.
This post has a lot of pictures, so you can see all the
different designs we painted.
Sara used her Cricut to cut the words from Vinyl and applied
it to the frame.
Jaryd got in on the process and helped with the 
application.
He also attached the magnet to the sign
as well as the backs of the Mickey Heads.
These pictures are in no particular order,
although we did do a loose monthly
theme on them.


Brian's (the groom) favorite team (by Sara)

Snow White (Kristie)

St. Patrick's Day (Kristie)


From Coco (Kelsie)

Olaf from Frozen (Kristie)


Little Mermaid (Kelsie)

Pride (Sara)


From Up (Kelsie)

Hamilton (Sara)

Christmas (Kelsie)

Wall E (Sara)


Finally, this is for October the month they are getting 
married.  I did the Mickey hands with wedding rings.
All the heads together in a monthly order,
although they can be used whenever they 
choose.  Most of them are pretty generic
as to what month they can be displayed.
Some of the pieces were done free hand and 
some we used stencils to guide us,
but all in all, I think they all turned out very
cute.
On the back of the sign Sara added this
little "trademark"
Kelsey Ann loved this gift.
She loves hand made gifts and we loved making this
for them.

Thanks for stopping by for a visit and I hope you have enjoyed
your time here and were inspired in some way.
Come again soon,
until then,
have a swell day!


Friday, July 16, 2021

Etched Glasses

Welcome to Kristie Kreates!
My daughter, Kelsie, daughter in law, Sara, and I
recently went to a shower and decided to go in 
together on the gifts.  We purchased a nice gift from the
their registry, but wanted to give them something 
a little special and handmade.
We decided to etch some glasses.
It's really quite an easy process.

We used Armour Etch which can be found at 
most craft stores and online.
It's simple to use, just cut out a stencil,
put it on your glass piece then cover the area that you 
want etched with the cream.  Wait for it to do it's work
and rinse with water.
Be aware that when the glass is still wet it might look like
it hasn't done anything, dry it off and then take a look, 
you'll see the etching then and when you take that stencil off
it's like magic. Also note there are some glass items
that this cream doesn't work on.  The label will
give you more information on this.
For our stencils, I designed and cut on my 
Silhouette Cameo and used vinyl which is easy to
remove.

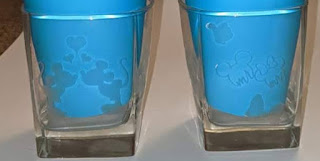
We etched 2 on the rocks glasses with 
Minnie & Mickey.

Kissing Minnie and Mickey on one side.

On the other sides we etched the Mr & Mrs and a variety
of Minnie and Mickey images.  Each side was a little different.

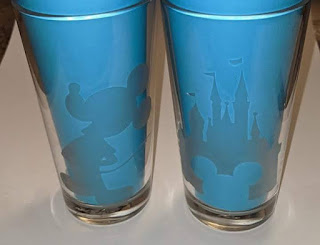
We also did a set of 4 tumblers.
One with Mickey on the front.

One with Minnie on the front.

and both had the Disney castle on the back.


It's hard to see in this picture as it is very difficult
to photograph the etching,  but I think Jaryd did a
pretty good job. When you look at the Mickey or Minnie
you can see through to the castle in the back.

We also did 2 glasses using images from Up,
which is the brides favorite Disney movie.
Here we have Carl's nose and glasses.

And we also did Ellie's aviator hat and goggles.

On the back of the glasses we did the 
house with balloons.
We all love how these glasses turned out.
Kelsey Ann, the bride, loved them too.

Thanks for stopping by to see what I've been
creating lately.
Have you ever tried etching?
I hope you will give it a try, it's fun, it's easy
and you can create very unique thing,
the sky's the limit.
Come again soon and I'll show you what else
we made for Kelsey Ann.
Until then,
create something unique.


Note the links are only to give a reference so you can
see what the products are.
I didn't necessarily purchase from these sites,
except where specified,
and you may find better prices elsewhere,
I am in no way promoting any particular site.