My Other Pages

To make it easier to read about our trip to Ireland, I have made a page that is just for that. There is a tab above for Ireland Trip 2014 or click on the Home tab to read my other posts. I have also created a new page for My Weight Loss Journey if you are interested in that, click on the tab above.
Showing posts with label Merry Christmas. Show all posts

Sunday, December 24, 2023

2023 Christmas Card

Hello! 
 Merry Christmas and Happy Holidays
I just want to take a moment to share 
a heartfelt wish with y'all for a very 
happy holiday season.
Whatever you celebrate, may it be
wonderful.
This is the Christmas card I sent out to family
and friends this year.
I love it and have received many compliments
on it.
Here is the sentiment I put inside and
I'm wishing you all the same.
Enjoy your holidays and I'll see y'all 
soon.


Saturday, December 24, 2016

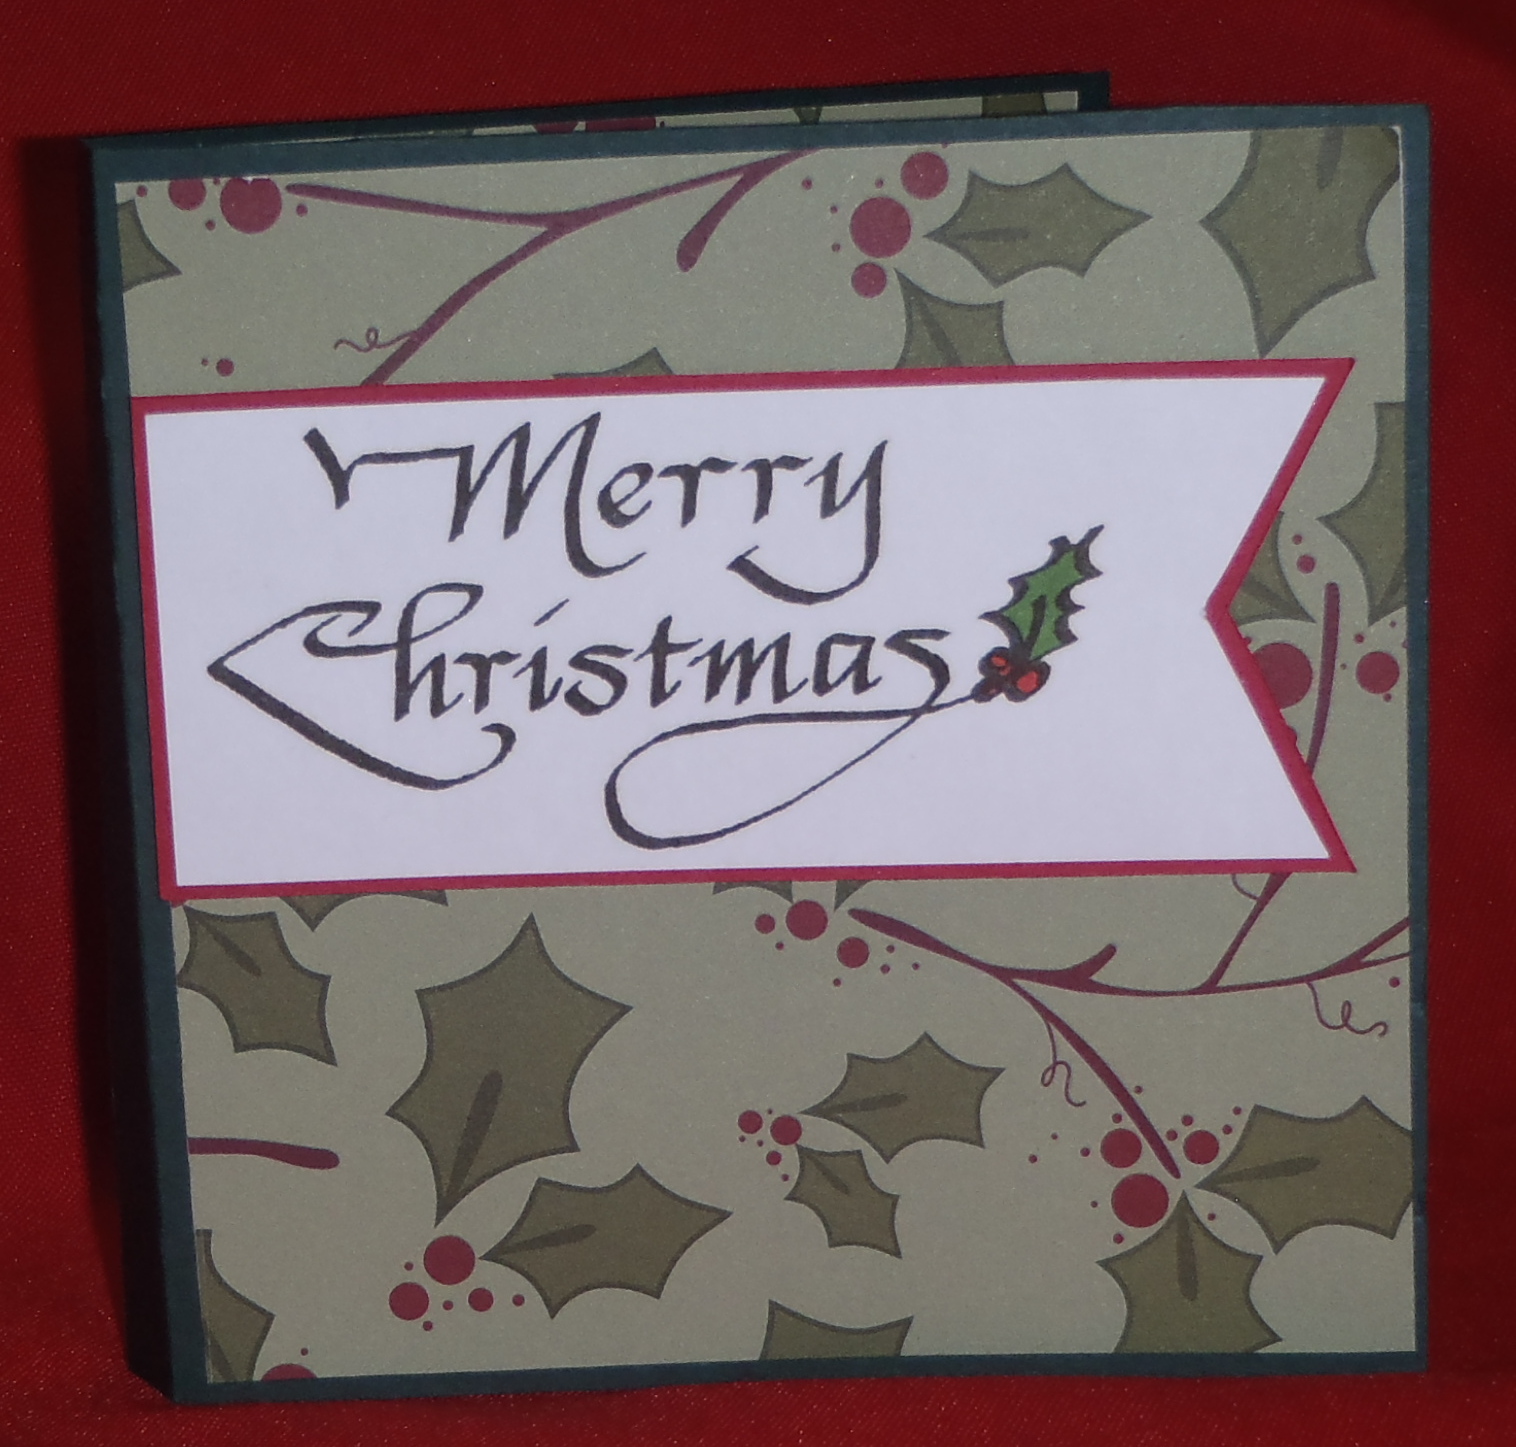
Our card

Merry Christmas!
Today I'm showing you the card that I decided
on for our Christmas card this year.
I decided on something simple and easy to
replicate.
I found this paper at Tuesday Morning
They have the best deals on card stock and papers.
This is double sided card stock, 25 sheets of 12"x12" 
for only $1.99.  How could I go wrong with that.
There was another that I picked up, but decided to 
use this one for my cards.
I used my MISTI to stamp all my sentiments
I cut them into banner shapes and
layered them onto white card stock 
to give them a little pop.
I made about 70 of these cards.
So all in all, with the cards for 
The Caring Hearts Card Drive and all,
I made almost 200 cards this year,
you can see why I wanted a simple design for
these.
I always have good intentions to start my cards
very early, but it never seems to happen as early
as I plan. 
Maybe next year, right?

I'm glad you stopped by today,
I hope you have enjoyed all the Christmas cards
I have posted over the last month or so.
I would like to wish you all a very 
Merry Christmas
and a happy and healthy
2017!
Until next time,
Peace to you all!


Note the links are only to give a reference so you can
see what the products are.
I didn't necessarily purchase from these sites,
except where specified,
and you may find better prices elsewhere,
I am in no way promoting any particular site.


Tuesday, August 30, 2016

Christmas shaker

Welcome!
I have a Fuse Tool and haven't really used it.
I tried it a couple times, but didn't get good results.
Recently I talked to a couple people about how to
use it and thought I'd give it a try again.
Of course I wanted to use it to make a shaker card.
I used a scrapbook page protector to make a small
"envelope" with my Fuse, added several colors of sequins
and sealed up the end.  And there I had it, it worked
out great.  The secret is to be sure the Fuse is 
heated up enough and to run the Fuse fairly slowly
over the plastic.  This gives it time to melt, but be 
careful not to go too slow, or it will melt right
through.  It's a delicate balance and takes a little
practice.  Be sure you are using the little wheel
nib and not the pointy one.  The wheel is for fusing seams
the pointed one is for cutting.
For my card, I stamped a simple Christmas tree
and cut just inside the stamped image.
I then cut the tree from the snowflake paper 
just a bit larger than the stamped tree and adhered it directly to the 
card base.
I used ATG tape to adhere the sequin envelope behind the 
tree cut out, then taped a white card stock panel over the back
of it, inside the card.
On the inside, I stamped 
First Christmas card of the year done!

Thanks for popping in today.
Have you started your Christmas cards yet?
I know a few people who have.
I probably won't do another one for a few more
months.  Guess I work better under pressure.

Until next time, make something fun!

Note the links are only to give a reference so you can
see what the products are.
I didn't necessarily purchase from these sites,
and you may find better prices elsewhere.
I am in no way promoting any particular site.
However the Eureka Stamps image is 
exclusive to that company.


Saturday, December 22, 2012

Christmas gifts

Christmas is very close now
 and I've been working like mad to get things finished.
I've made pretty good headway,
but still have some things left to finish.
One thing that I have done for a few years now,
is a gift I send my Aunt Marilyn in North Carolina.
One of my favorite people in the world
 is my Mom's best friend since she was very young. 
 Mom and Aunt Marilyn have been friends
for about 80 yrs and are like sisters.
A few years back, I came up with the idea
of sending her gift cards for a few different restaurants. 
She loves to go out for a little lunch, even by herself.
When you buy a cheeseburger and a senior coffee,
$10.00 at Burger King will last quite a while.
Each year I have come up with a different way to send them.
Today I'm showing you the gift card holder
 that I created for her this year.
The "Merry Christmas" (#8717) is from
 

On the inside of the card,
I created pockets to hold the different gift cards
that I sent her.
Then I decided that I needed something to put it into,
so I created a box for it.
For the top of the box I used
"Star Tree" (#17105)

I stamped with VersaMark ink and
embossed with gold embossing powder.
I used a Perfect Medium pen
 for the dash marks around the edge
 and again embossed with gold powder.
When I was trying to figure out what to give my Mom,
it occurred to me that she would love some gift cards too.
So that is what I'm giving her,
she loves to go out to eat and
what else do you give an 88 year old woman?
I think she is going to love it.
Here is the box and card I made for her.
I had a little bit of the gold ribbon left from
The May Arts challenge
that I recently participated in, so I used that on the front of the box.

For the card, I again, used "Star Tree"


Here is the inside of Mom's card.
And below is a picture showing how the box opens.
I really enjoyed creating these gifts for my Mom and Aunt.
I'm sure they are going to love them too.
Thanks for stopping by today,
 I hope you have been inspired in some way
and will come again soon.
I'd love to hear what you've been working on,
so leave a comment and let me know.
 
Until next time, Happy Crafting!

Thursday, December 15, 2011

Christmas cards

How are you doing on your Christmas cards?
I was having a tough time deciding on a card to make and I was thinking I wouldn't get them done.  Finally, a style ect. just hit me and I was set to go.

I decided to use the "Pine Sprig" (#15702) image from QKR Stampede.
I stamped it onto white card stock and colored them with water color crayons.
I used a few different colors of card stock with the image as a mat.
I then ran white card stock through my Cuttlebug with the snowflake embossing folder.

Here is a close up that shows the embossed snowflakes better.
I use just a touch of gold Stickles on the bells to finish them off.
On the inside of the cards I used the digital image of
"Merry Christmas" (#6803) from Eureka! Stamps.
By using the digital image, I could adjust the size and change the color to match the card fronts.

I'm lovin' how they turned out!
Did you make Christmas cards this year?  I'd love to hear about them.
Leave me a comment telling me about them and a link if you have them on a blog etc.

Thanks for stopping by today.  Come again soon.

Until next time, Happy Crafting!

Wednesday, July 27, 2011

Tangled lights.

Maya Angelou is an amazing woman with so much insight, I think she is wonderful.  Below is one quote from her and I think it is quite appropriate to go along with the card I am showing you today.
"I've learned that you can tell a lot about a person by the way he/she handles these three things: a rainy day, lost luggage, and tangled Christmas tree lights."

I wanted to end my July posts with one more "Christmas in July" project.
Hopefully, you have gotten some great inspiration and ideas from my blog this month and have gotten started on those Christmas cards and projects.

I love this image called "Skunk and Lights" (#10901) from Eureka! Stamps.
The "Merry Christmas" (#13806) sentiment is from QKR Stampede, one of the sister companies of Eureka!
This image is great to use on cards that you want to make a lot of, as most of the image is 'colored' for you already.  Once the "Skunk and Lights" is stamped all you need to color is the lights and they are quick and easy.
The sentiment was printed from my computer.  "Merry Christmas" comes as a rubber stamp and also as a digi, which is what I used.  I don't use a lot of digital stamps, but I do love that I can size this sentiment to whatever size I need to fit my card.

I used "Christmas Border" (#15706) also from QKR Stampede, on the inside of the card.

Thanks for stopping by today.  I hope you have gotten some inspiration and will hop on over to check out the images at Eureka! Stamps and QKR Stampede to see what wonderful images you can find.  While you are at it pop into
Biblical Impressions, the other of the 3 sister companies, and see what they have to offer.
Be sure to check out the QKR Stampede Blog if you haven't been there recently, for more ideas for both Christmas and many other occasions.

All three stores have some amazing images and the Design Team ladies have some wonderful projects and cards posted.  
Be sure to click on the tabs at the top of the blog home page and see what all three design teams have to show you.

Leave me a comment and let me know if you have started your Christmas cards yet and/or what your plans are for your cards.

Until next time, Happy Crafting!


Thursday, November 18, 2010

Best Friends Christmas Card

Hello crafty friends!  Today I have an adorable gate fold card to show you.  I used the Best Friends stamp from QKR Stampede for this card and I think it is just a darling image.
I stamped Best Friends onto white card stock and colored it with water color pencils.  I then used a glue pen to add glue to the snowman and covered him with glitter.  The image was then layered onto red card stock. 

The card base is a dark blue that I had in my stash, scored and folded into a gate fold card.  I then ran some white card stock through my Cuttlebug with the Snowflakes embossing folder, trimmed and attached it to the 'gates' then attached the image only on the right side of the 'gate'
For the inside of my card, I ran a piece of white card stock through the Cuttlebug with a different snowflake embossing folder.  I can't find this one on the Provocrafts site, it came in a set and it may be a discontinued set, as I don't see any of the ones in that set on their site.

I stamped the Merry Christmas sentiment with another QKR Stampede stamp with Memento Lady Bug Dew Drop Ink.

Thank you for stopping by, I hope you have enjoyed todays project.  Leave me a comment and let me know what you think.

Be sure to stop back tomorrow, I will be participating in the Christmas/Winter Design Team Blog Hop for The QKR Stampede Blog.  You won't want to miss any of the wonderful projects that the design team ladies have to show you.  You are sure to be inspired to make something wonderful too.

Until next time, Happy Crafting!