My Other Pages

To make it easier to read about our trip to Ireland, I have made a page that is just for that. There is a tab above for Ireland Trip 2014 or click on the Home tab to read my other posts. I have also created a new page for My Weight Loss Journey if you are interested in that, click on the tab above.
Showing posts with label blending solution. Show all posts

Monday, March 18, 2019

Kelsie's Card

Hi all!
Our family has a lot of birthdays and anniversaries
in February.  One of those is our daughter's birthday.
Kelsie loves purple, so I took a dive into my 
background stash and found this piece that I made
vellum.  It's hard to get a picture of how really 
beautiful this piece is, but I love it.
When the ink was still a little tacky in spots
I applied some pink metallic Deco-foil
Adhesives show through vellum, so I covered the 
entire back of it with wide score tape and adhered it to
a white card base. Covering the entire piece
gives it a uniform look and you can't see the adhesive.
I cut the Happy Birthday from some glitter card stock
and also cut 3 or 4 from plain white card stock.
I then layered them to give the sentiment some dimension.
You can see the shiny pink Deco-foil a little better
in this picture.
On the inside of the card, I wrote a personal note 
to Kelsie.

Thanks for coming by today,
I hope you'll stop again soon.
Until then,
make someone smile.


Note the links are only to give a reference so you can
see what the products are.
I didn't necessarily purchase from these sites,
except where specified,
and you may find better prices elsewhere,
I am in no way promoting any particular site.


Saturday, March 2, 2019

Abstract Card

Hello!
Something a little different today.
This is a birthday card that I made for my hubby.
I was looking through my stash of backgrounds for
something to use on his card and came across this piece.
I loved it so much that I couldn't stand to cut it into
pieces, so I used the whole thing.
I made it using alcohol inks on a glossy card stock 
along with some blending solution.
When the ink was mostly dry, I applied some gold
Deco-foil, which stuck to the areas that were still a little
wet and a little bit sticky.

I simply adhered the piece to a white card base,
wrote a message inside and called it done.

Here you can see some of the shiny gold areas where
the Deco-foil stuck.  It's really quite beautiful.

I chose to use the piece for a horizontal
card, but it could be used as a vertical also.
My hubby loved it and I told him I understand
that he doesn't know what to do with the cards
I make for him and I'll take this one off his hands
to hang in my craft room.
I may just have him frame it for me.

Thanks for popping in today.
I hope you'll come again soon and
that you have been inspired in some way today.
Until next time,
give something different a try!


Note the links are only to give a reference so you can
see what the products are.
I didn't necessarily purchase from these sites,
except where specified,
and you may find better prices elsewhere,
I am in no way promoting any particular site.

Thursday, July 5, 2018

Thank You...

Hello, I hope you are having a great day!
Today I'm showing you a card I made for
a good friend.
My Mom passed away in early May and my friend
jumped right in to help me in any way she could.
She came to be with us and help for the memorial service,
give me a shoulder to cry on and a listening ear.
There is no way I could repay her love and support,
but I wanted to at least make her a thank you card.
This is what I made for her.
Yupo paper is a plastic paper and is so much
fun to work on.
For some areas I dropped the ink onto the paper,
then used a straw to blow the ink across the paper,
other areas, I simply added Blending Solution and
let the ink flow where it wanted to flow.
I also used gold Deco Foil on some areas that 
were still tacky, to give it a metallic shine.
The sentiment was heat embossed with 
onto vellum.

Thanks for stopping by today.
I hope you'll stop by again soon.
Until then,
Happy Crafting!


Note the links are only to give a reference so you can
see what the products are.
I didn't necessarily purchase from these sites,
except where specified,
and you may find better prices elsewhere,
I am in no way promoting any particular site.

Sunday, March 6, 2016

Deli Paper and Alcohol Inks

Hi crafty friends!
Last month I spent some time visiting a friend,
we had some crafty time and I learned this technique
using deli paper and alcohol inks.
These are the supplies I used.
a coffee stir stick and a sheet of deli paper.
The colors are Lettuce, Caramel and Ginger.
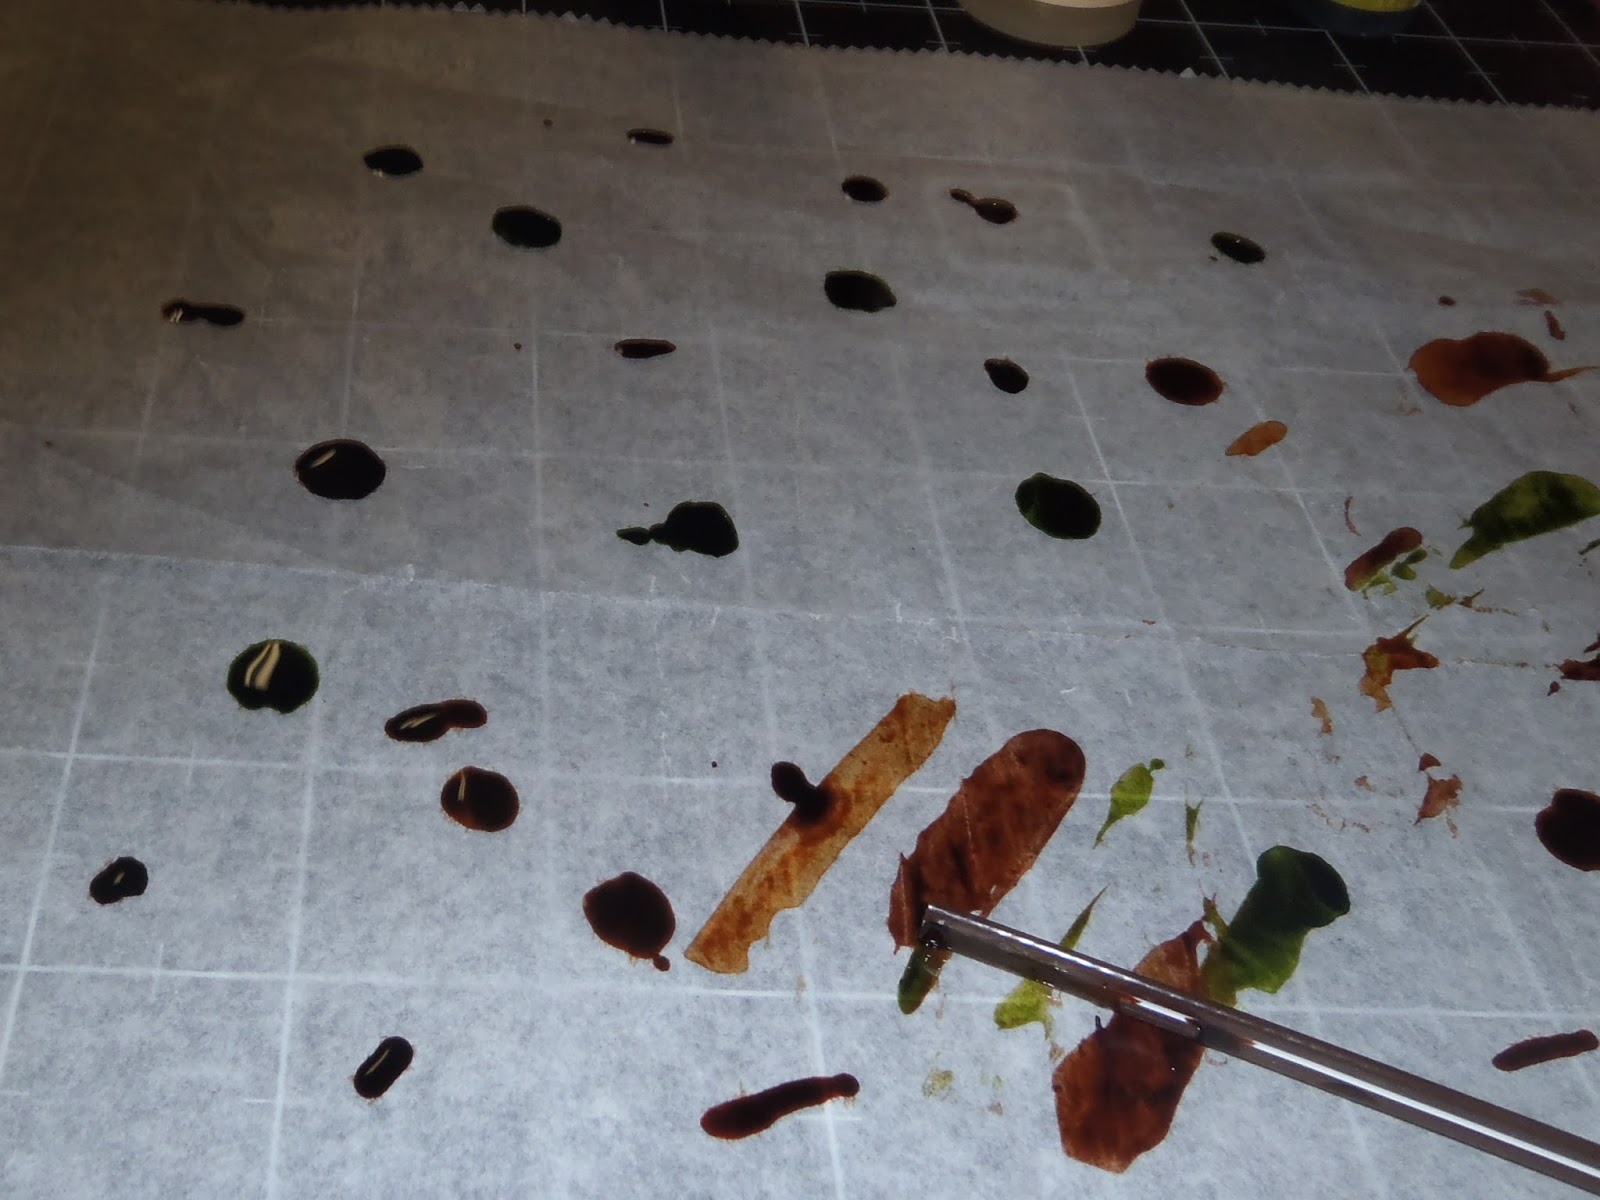
Drip the alcohol ink onto the deli paper.
Put the various colors around the paper.
Now spread the ink around with a coffee stirrer. 
(You can also use a straw.)
Continue moving the ink until it is spread out and dries.
You can add Blending Solution or alcohol
to 're-wet' the ink so you can spread it more
if you like.
Add more ink if you like and continue "playing" 
with it until you get a look that you like.
I chose not to cover the entire sheet of deli paper
with this one.  I like the colors as they were.
When I originally learned this technique,
we made many sheets with different color combinations.
It was great fun to just sit and play with the different 
combinations and see what we got.
To use this for a project cover a piece of card stock 
or a manila tag with an adhesive.  
Here I am using a glue stick.
You can also use products like Glue and Seal,  
Gel Medium, Mod Podge or whatever wet adhesive you prefer.
I chose to use Kraft card stock for this piece.
Be sure to press the deli paper down onto the surface
to be sure it is sticking all over.
Once it is dried, trim around your card stock and you have a 
beautiful background piece that you can use
on a card or even a scrapbook layout.
This time I chose to use a flat piece of deli paper,
I have also done this technique using deli paper that
has been crumpled and then flattened.
The folds and creases give the piece another 
bit of interest.
When I post some cards that I made with those
papers, you will see some of those creases.

I'm glad you stopped by today,
I hope you have enjoyed this tutorial and
will give this technique a try.
Be sure to come again soon,
I will be posting some cards I made with 
some of my deli sheets.
Until next time, Happy Crafting!

Tuesday, January 19, 2016

Bracelets for the Greats

Hello!
I hope you are having a wonderful day.
I don't know how old you are, but if you're my age
you'll remember way back when, when macreme was all the rage.
I made many, many macreme projects, plant hangers, even a couple
hanging table/lamp combinations.
I also made some jewelry and that is what I decided to make
for a few of my great nieces for Christmas this year.
Apparently, I forgot to take pictures of the process I used 
for those pieces in the center of the bracelets, sorry about that.
But it's really very simple.
I bought washers at the local hardware store,
they are very inexpensive, a matter of cents each.
It's pretty easy, just place a few drops of ink onto the 
felt pad and pounce onto the metal washer.
The best thing is, if you don't like the color or how it
looks for any reason, you can take it off with alcohol or the
blending solution and start again.
Try different color combinations and see what you like.
Once I had the washers to the colors I liked, I chose 
cords to match the colors and knotted them to make the
bracelets.
Here are 4 of the bracelets I made.
Here they are from the side showing the beads I added 
on each side of the bracelets.


As it worked out, I gave the right colors to the right 
great nieces.  It just happened that the one whose favorite color
is purple got that one, the same with the blue and the other one got
the gold/brown tones which she also loved.
And the pink one is left over, not sure about where that one
will go.


They each got one of these bracelets also.
I was happy to see they were putting them on right away,
not only to try them on, but to wear them.
I was a little leery about giving them these bracelets,
you never know with teens and tweens, 
but they seemed to love them.

There are many great patterns and videos
showing how to make macreme jewelry online,
so if you have an interest check them out.
These that I made are really very basic knots, 
but turn out looking great.

Thanks for stopping in today to see what I have going on.
I hope you'll be back again soon.
Until then, have some fun learning something new,
or playing with something crafty that you love.