My Other Pages

To make it easier to read about our trip to Ireland, I have made a page that is just for that. There is a tab above for Ireland Trip 2014 or click on the Home tab to read my other posts. I have also created a new page for My Weight Loss Journey if you are interested in that, click on the tab above.

Saturday, November 29, 2014

Ireland #21 PJ answers a couple questions, a couple places that were a bust and then something great.

Dave and I have never been shy about asking people
 questions or for help when we are traveling.
There were a couple things we saw that we 
wondered about, so I took pictures and planned to ask
at the B&B,
PJ was more than happy to help out.
In this picture above there are buoys and lines in the water.
They actually looked like racing lanes for swimmers,
but we knew that wasn't what they were.
Turns out they are farms. 
Some kind of fish or shellfish.
PJ said there is a lot of shellfish sold to Europe from
their area and this may be one of the farms.
Interesting.
Off in the distance, right in the middle of this picture,
there are a couple tall tower like structures.
They reminded me of the big "robot walkers"
from Star Wars. 
We were guessing at what these might be,
and we were right.
They are water towers.
PJ said most water towers don't look as
"futuristic" as these do, so he 
figures they must be fairly new ones.
This is a picture I took just because I loved the 
name of the place.
O'Gradys Victuallers
Quality Meats
The Oxford Dictionary defines a vicutaller as
"A person providing or selling food or other provisions."
Not a word we are probably going to come across too
often in the US.
Now that we've gotten our trivia out of the way,
let's move on to what we did for the day.
We left Dun Mhurie with a sad farewell
to PJ and Marion.
We really enjoyed this B&B.
We were off to see some sights, among them
a beautiful light house.  Jane looked up 
pictures online and it was gorgeous.
But first we wanted to see the very cool castle that
we'd heard about.
We could see it in the distance at the top of a hill.
When we got closer we found that it was now a private
residence and we couldn't really see much of it
except from a great distance.
That was a bust! 
On to the lighthouse!
We drove some pretty awful roads to get there.
The road into the lighthouse area was pretty much
a couple ruts.

There were some very pretty coastal areas.
With a little rock climbing and stair climbing
we could see some lovely ocean views.
But the lighthouse?  Not what was in the pictures.
Up close it was pretty dismal.
It was no longer painted the way it showed in the pictures
and a lot of the area around it was pretty run down.
Another bust!
And there were no restrooms anywhere around, 
so you know what that means!
Let me just say that I will be very careful
if I ever have to "use the facilities" on the side
of a cliff again.  The wind is not helpful!
That being said, next we were off to find
a very old Celtic cross.
Guess what?
Another bust!
We drove some pretty difficult roads 
and never did find the cross.
And to make matters even worse,
I was starting to get hives.
My arms were a mess and the itching was awful.
Luckily Ed had some melt on your tongue 
Claritin with him and gave me one.
Our luck changed when we stopped for lunch.
We saw this sign and decided to check it out.
And we were so glad we did.
One of the things I love that I hadn't had to eat
this trip are "jacket potatoes"
It's simply a baked potato
split open and smothered in topping.
I'm not talking butter and/or sour cream,
I'm talking things that make it a whole meal.
I had a huge baked potato
covered with tuna, onions and corn.
It was amazing!
I really should think of making this for our dinner
sometimes here at home.  So simple and so tasty!
And even better, that Claritin really kicked in and
by the time we were back on the road
the hives were getting to be under control.

We did see some pretty cute sheep along the drive.
See that blue, it's their way of "branding" the sheep,
they are sprayed after they are sheered and then 
they can be identified by their color and marking.
Jane and Roxie were on a quest to get some good 
sheep pictures and I think they did this day.
We did more driving and finally came to Slieve League
and some beautiful vistas and beaches.
The parking was way above the beach.
There was a stairway down to the beach,
but it was incredibly long and none of us
were up for climbing down and then up again.
In the picture above, you can see the stairs,
the people going up and down are so small you can't 
hardly see them.  
There were literally hundreds of steps!
But the views from the top of the cliffs was just gorgeous!
It was pretty cold out there on those cliffs 
and a couple of us were ready to go sit in the car
while Dave wandered around.
Then he motioned for us to come over where 
he was, so off we went!
We were glad we did as the views were incredible!
Here's another one of the panoramic shots that didn't
quite turn out.  It was so hard to hold the camera steady
long enough in all that wind, but it gives you an idea of the 
vastness and beauty.  Those are a couple of the
Celtic Adventurers over at the far right.
We walked along a path around to the other side of some 
fields and there were sheep grazing right at the 
top of the cliffs.  
One wrong step and off the cliff they could go,
but the sheep were smart enough that they didn't
get too close to the edge.
I can never get over how high the cliffs in Ireland are!
The cliffs at Slieve League are some of the highest 
in Ireland.  The Cliffs of Moher are not as high,
but they are a bigger tourist spot.
After a good long time and taking a lot of 
pictures, we were off to see more sights.
If you go here, you can see one of the shots
that Dave brought out from this spot.
There were more cliffs, more ocean views 
and more sheep.
We were on another adventure.
We had no idea where we were headed, except 
in the general direction of our next B&B.
As we drove the shoreline changed.
We were traveling down at sea level rather 
than up on the cliffs.
We found a little harbor,
with some small boats, tide pools and lots of rocks.
Then we were off to find our way to our next B&B
"Teach Eamainn"

Thanks for visiting Ireland with me again.
Next post a very different B&B and Parke Castle.


Friday, November 28, 2014

Sympathy card

Sorry it's been so long since I last posted.
Things here have been a bit crazy lately.
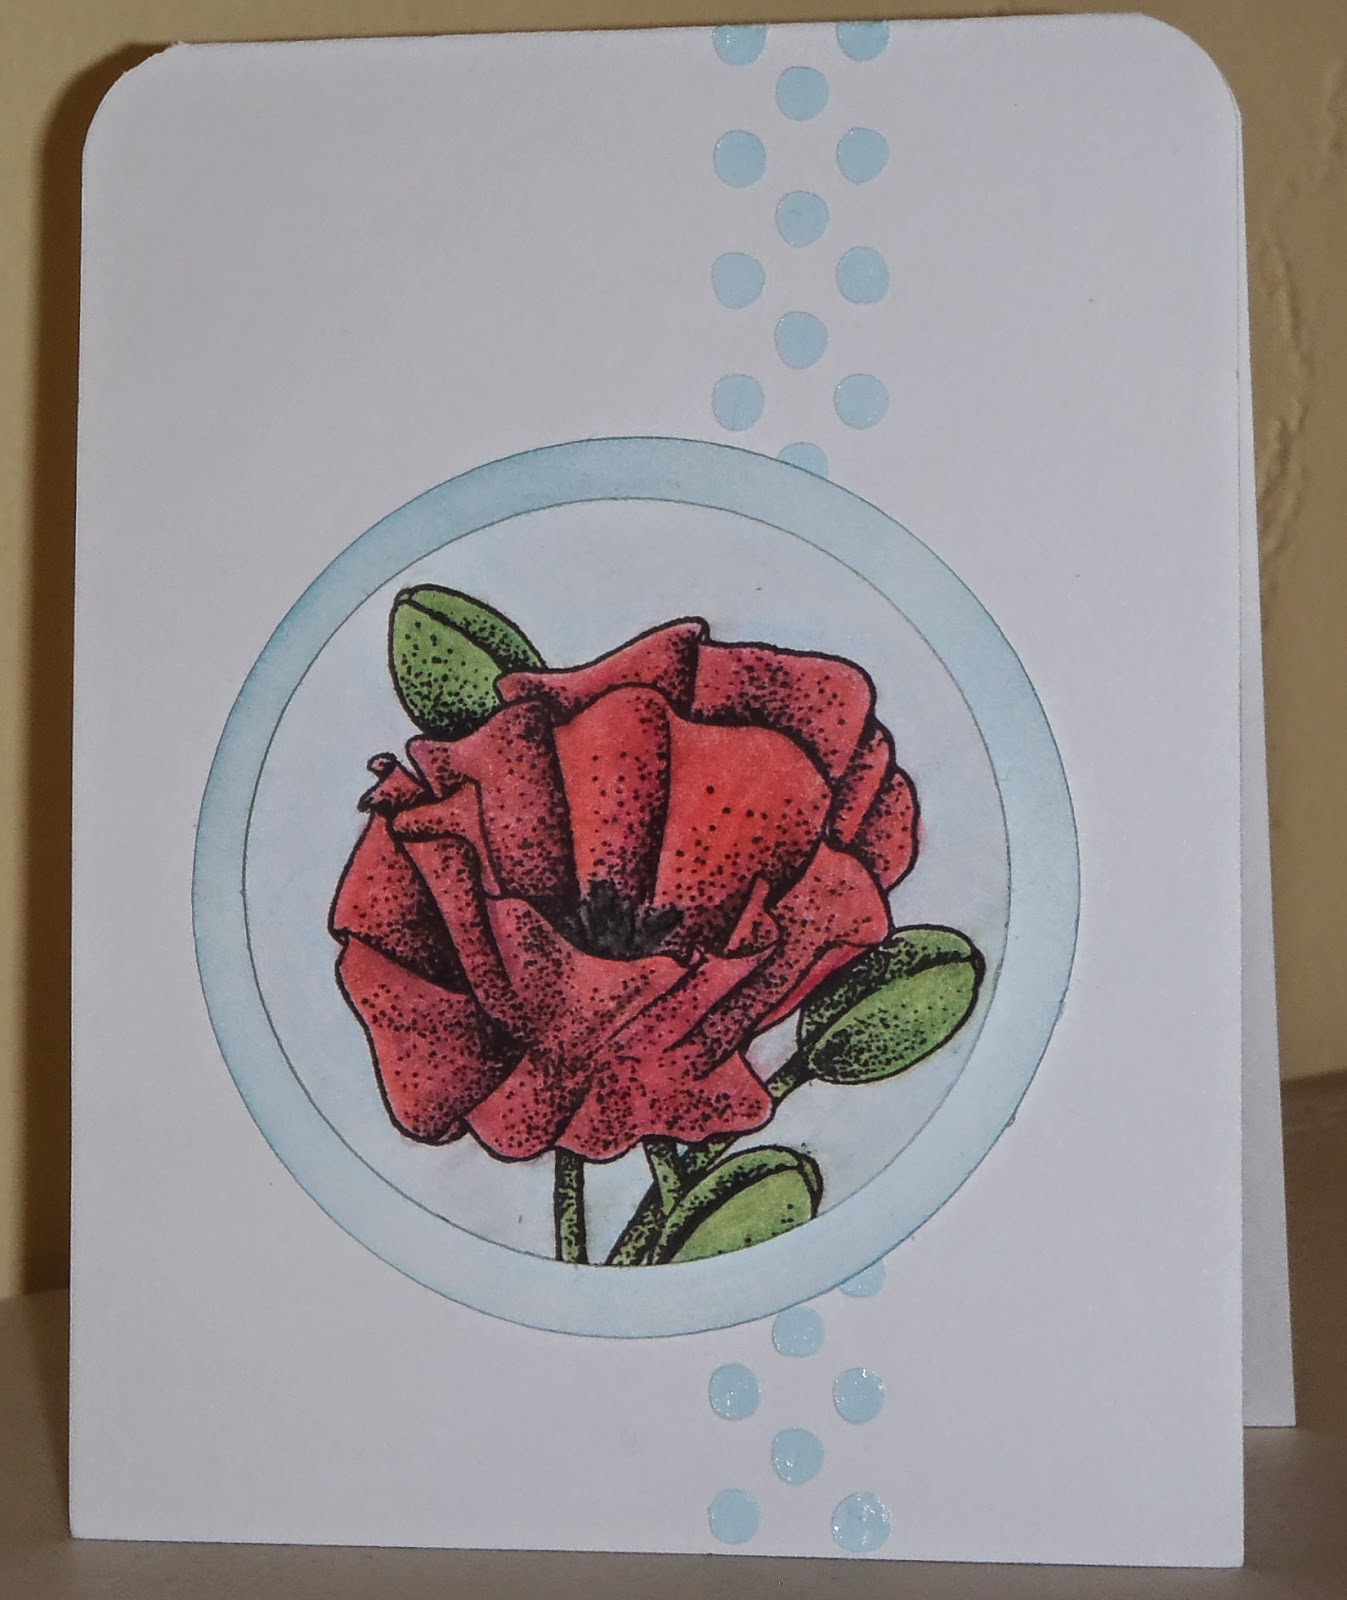
Today I'm sharing a sympathy car with you.

I was so sad to hear a friend's Mom had 
passed away.
Sympathy cards are so difficult to make,
but I wanted to make one rather than buy one for
this lovely woman's family.
The poppy stamp is one of my favorite stamps from 
I colored it with colored pencils and Gamsol,
which helps blend the colors.
The larger circle is inked with Distress Ink.
The stripe of polka dots was created using a stencil.
I laid the stencil down and spread embossing paste, that
I had colored with Distress Ink, over the stencil.
I love the look of embossing paste, it gives a little bit of
dimension to the card.  
This picture shows a little bit of the dimension.
The embossing paste has almost a rubbery feel to it.

I left the inside of the card blank so I could write 
a personal message.

Thanks for stopping by today,
I hope you'll think about trying out some 
stencils and embossing paste.
They give a whole new look to a card.

Until next time, Happy Crafting!


Wednesday, November 26, 2014

Lunch bag and boxes

A while back my son's girlfriend, Sara, started a new job.
Not long after that, Jaryd, found some "Bento Boxes" on 
clearance and picked them up.
He asked me to help him personalize them with him.
So we went to my Silhouette Designer Edition software and got started.
I had recently picked up some insulated lunch bags on
clearance at Michael's, so I let him pick on for Sara.
Then he chose the font that he liked and the colors for the lettering.
He chose a different font for the boxes.
Have you ever seen Bento Boxes?
They are pretty cool.
They are like this when you buy them.
Great for storage.
And the expand to fit quite a bit of food.
Once you finish your lunch or snack or whatever,
you just collapse it again.
And in the top there is this cool little utensil with
a fork at one end and a spoon at the other.
It snaps into the little carrying spot in the cover.
Very convenient.

Jaryd and I put the boxes into the lunch bag,
when he gave it to her she was surprised and loved it all.

I went to the store and picked up some of these bad boys 
for myself.  Not sure what I'll do with them, who will end up 
with them, or if I'll vinyl them,
but I couldn't pass them up.

Thanks for stopping by today.
Come again soon.


Monday, November 24, 2014

M&Ms

When I saw these faces on one of the Silhouette facebook
pages, I knew I had to make these M&M ornaments.
Who doesn't love M&Ms 
and who could resist those faces?
I coated the inside of the ornaments with glitter.
I cut the vinyl faces with my Cameo.
And I applied the faces to the ornaments.
On the back I put the traditional M.
I can't decide which one I like the best.
I think they are all adorable and it's going to be
tough deciding who will receive them for 
Christmas.
I may just have to make a whole lot more
and give them to everyone in the family 
as stocking stuffers.

Hope you like my M&Ms as much as I do.
Until next time, Happy Crafting!


Thursday, November 20, 2014

Bachlorette Painting Party


I don't know about your area, but around the Buffalo, NY
area painting studios have become a big thing.
This is a studio where you can go and learn to paint a picture from
start to finish in about 2 hours.
Vicki had her bachlorette party at a studio like this.
is one of the studios in our area.
Vicki chose the picture ahead of time and they were all
set up for us when we got there.
This was the painting we were to learn to paint.
We started off with a blank white canvas.
Notice the paper plate palette?
There were only 3 colors on it,
red, black and white.
Those are the only colors we were going to use.
Step by step the picture began to emerge.
We did have a break, while our paintings dried.
Refreshments are encouraged and we had plenty of them.


Painting with a Twist doesn't have a liquor license,
but if you bring wine (or whatever) you can serve it 
yourself.
Here is a selfie of me with Vicki, 
our beautiful bride.
Then it was back to work on our painting,
and before long.......
the painting was done.
This is my painting ready to come home to
be framed and hung.
Since my husband is a photographer and frames
his own work, I have a custom framer in the house.
I think this painting will be hung in my crafting room.
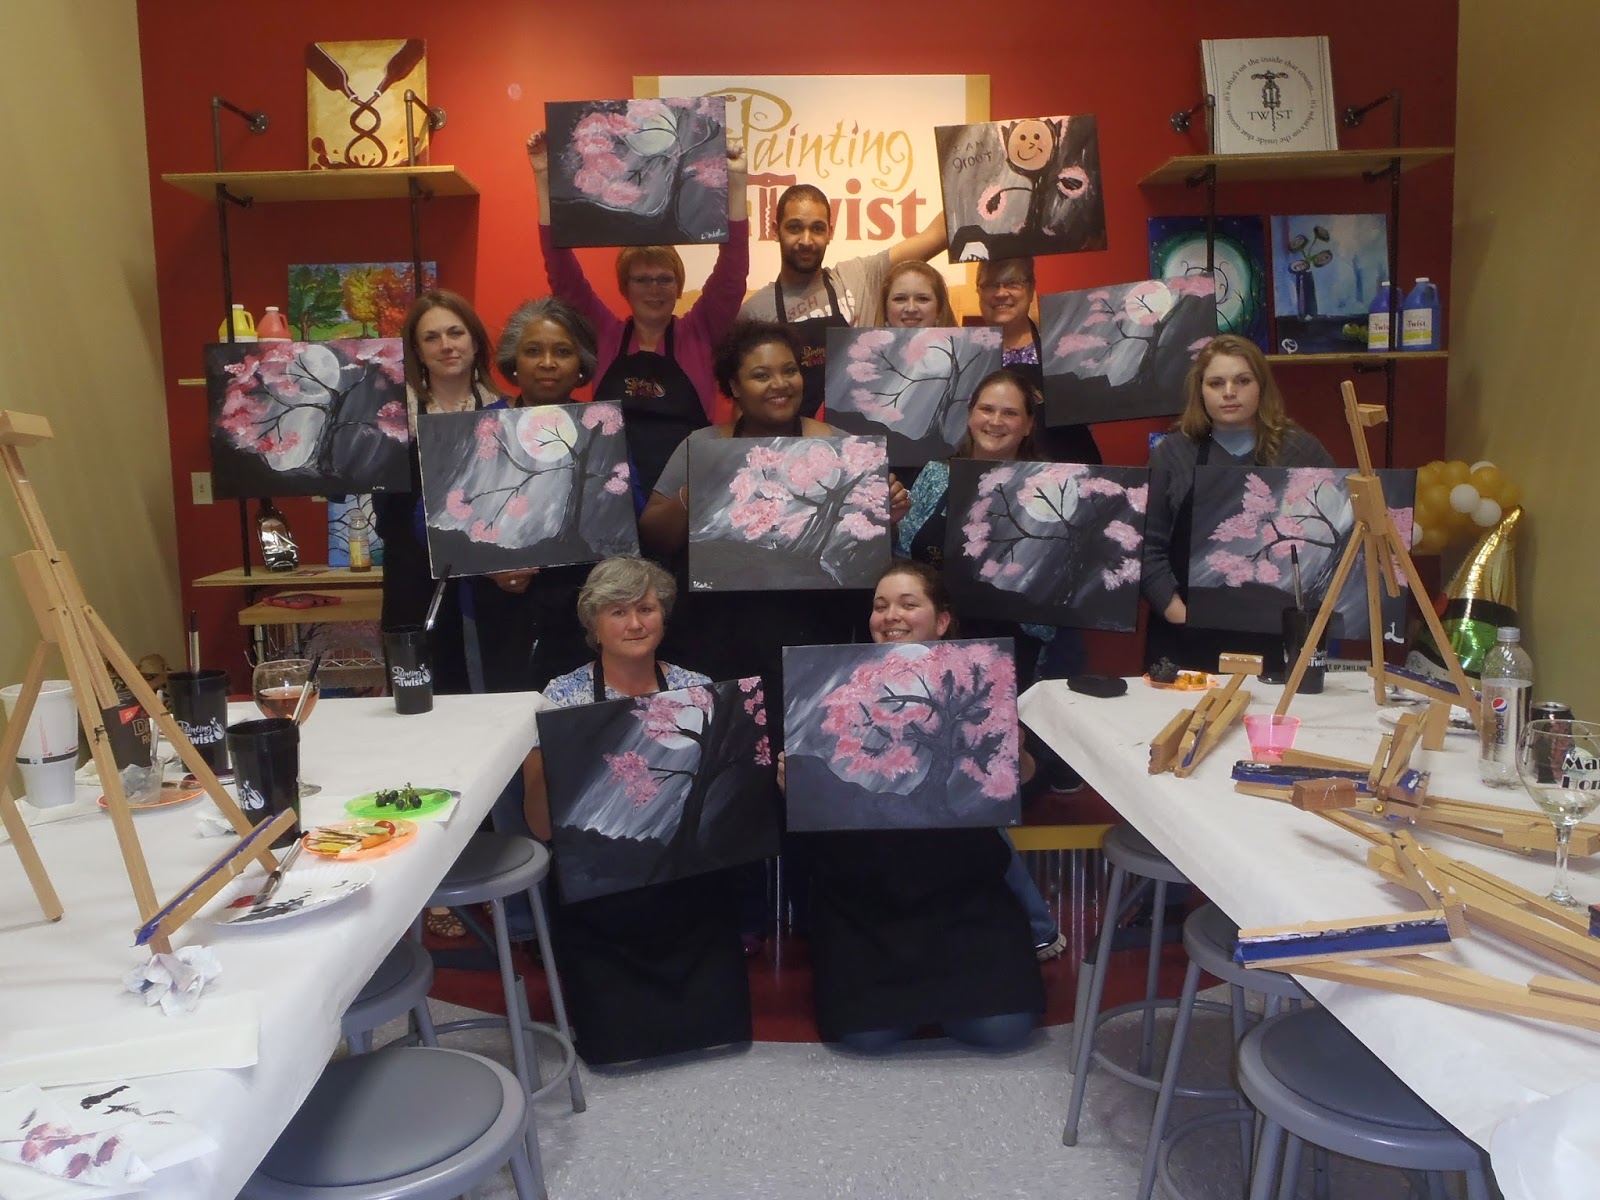
And here is the whole group with our paintings.
Now you might ask, why there is a guy at a bachlorette party.
That is the brides brother, Mikey, he was her "Man of Honor"
Patrick had a "Best Lady"
I'm sure you also noted that Mikey's painting is a bit different than the rest.
The teacher told us that something like 80% of the men who 
come to a painting class, don't follow the directions and 
end up with something totally different than what was intended.
Mikey's painting sure was different!
The important thing is that we had a lot of fun.
Everyone's painting turned out different.

I'm glad you stopped by today.
If there is a Painting with a Twist 
or another studio like it in your area,
I'd encourage you to give it a try.
It's a lot of fun and you'll be surprise what you can create.

Until next time, Happy Crafting!


Monday, November 17, 2014

Wedding Card for Mom

I'm having so much fun with my Silhouette Cameo!
I have been playing around with designing my own cut files
and I'm having a ball with it.
I saw a wedding card that I loved and was inspired 
to make a file of my own in a similar style.
I cut everything out twice and took it all with me to a crop
to assemble.
My intention was to make a card for my Mom to give my 
nephew and niece for their wedding.
I only needed the one, but wanted to be prepared in the event that
I messed something up.
Not to worry, I didn't goof up and ended up with 2 cards.

The panels of the dress were embossed with an embossing folder
with tiny hearts using the Cuttlebug. 
I embossed the stripes on the shirt using a scoring board
and a stylus.
I made this card a gate fold.
The flowers on the dress and the lapels were 
popped up with foam tape and glue dots.
The second card was made the same way, with 
a different colored card base.
Mom chose the red card.
I printed a sentiment on the computer for the inside 
of the card.
This card fits perfectly in an A-2 sized envelope,
it measures 5 1/2 x 4 1/4.

I was very pleased with the way these cards turned out.
I love that I created the cut file myself.

I hope you've been inspired in some way today.
Come again soon, you never know what you'll
see next on 
Kristie Kreates.

Until next time, Happy Crafting!