My Other Pages

To make it easier to read about our trip to Ireland, I have made a page that is just for that. There is a tab above for Ireland Trip 2014 or click on the Home tab to read my other posts. I have also created a new page for My Weight Loss Journey if you are interested in that, click on the tab above.
Showing posts with label Blog Hop. Show all posts

Saturday, August 20, 2016

Inklipse Blog Hop


Hello crafty people!
Welcome to my blog and to the 
Inklipse Blog Hop!
Simon, has set up a fun blog hop
to bring inspiration from crafters you may not
have known before.
There are some wonderful, generous sponsors
for this hop. Please consider visiting their
online stores and showing your love to them.
have generously provided prizes for this hop.
To be entered to win you will need to:
Subscribe to Simon's blog
Leave at least 3 comments throughout the blog hop
Now that all the particulars are out of the way,
on to my projects.
I have 2 projects to share with you.
The first is a gift card holder/birthday card.
Since I don't have the equipment for a video,
this post is very heavy on pictures.
But hopefully you'll find it worth your time.
Starting with a piece of red card stock  11" x 4 1/4"
score along the long side at 2", 7 1/4" and 7 3/8"
The insert piece is white card stock cut to 6 1/2" x 3 3/4"
score along the long side at 1 3/4" and 6"
Burnish all the score lines.
(If you click on the picture,you can see that there are
actually 2 folds very close together.)
punch a notch 1" from each side on the smaller flap.
Use Washi Tape along the bottom of the small flap,
close to the fold.
The tape should go all the way around the card.
This is not only decorative, but it holds the flap closed.
I used 2 pieces of Washi Tape on my card I think it
gives it a bit more security and also looks more finished.
Place strong adhesive along the small flap of the 
insert piece of card stock.
I used Score Tape, but use whatever works for you.
Line up the edge of the insert right along the 7 3/8" fold.
Use Glue Dots at the corners of the flap that makes
the pocket.  This will make a pocket for the gift card.
The insert can now be slid into the pocket,
the card front will stay closed when 
tucked behind the center flap of the pocket.
To decorate the front of my card,
I cut 4 Happy Birthday sentiments with my 
Silhouette Cameo out of white card stock.
I ran them through my Xyron sticker machine
and layered them on top of one another.
I then coated them with VersaMark ink ,
covered them with silver embossing powder
and heat set them.
The Happy Birthday was adhered directly to the front
of the card.  I also cut some stars and
embossed them, they were adhered with foam tape.
On the inside of the card, I stamped
"Celebrate" which is from a very old
Scrappy Cat  stamp set.
You can see, when you open the card,
the pocket with the gift card pulls out.
Here is a side shot showing how the 
gift card goes down into the pocket.
I think my son will like this card,
I made it for him, we'll be celebrating his
birthday on Sunday.

Now for my 2nd project.
Did you know that you could stamp and use
Distress Crayons on canvas.
This is my first time doing this and I know
I'll be doing more of this technique.
This canvas is very small, only 2 1/2" x 3 1/2"
First it needs to be prepped with Gesso.
The Distress Crayons blend out much better
when it has the base of Gesso.
I used a sponge paint brush,
but you can use whatever is available to apply
the Gesso, or whatever base you might like best.
Since this canvas is mounted on a wood frame,
I had to fill in the back with pieces of cardboard.
This gives a firm surface to stamp onto.
I used my Mini MISTI
to stamp one of the birds from 
onto the canvas with VersaFine Onyx Black Ink
It did take a couple stampings since it was onto canvas.
(The set I have is not this same set, it is one that
I found that has 3 birds, 3 matching dies, a few 
word stamps and an embossing folder.
The set is called Bird Talk.)
I used the Distress Crayons and laid down a little
color around the sides of the bird.
Using my water brush I blended out the crayon.
This is what it blends out to with a little bit of water.
I then added another color and blended that out.
I dried the crayon between layers and continued to 
add color until I was satisfied with how the bird looked.
These are the colors I used for the project.
As you can see I colored some "dirt" under my bird
and "sky" on the rest of the canvas.
The sentiment are words from the 
Bird Talk set.
I did use the fine tip of a black Prismacolor Marker 
to go over the lines of the bird,
as the crayons did dull it a bit.
I'm very happy with how my little painting
turned out, especially for a first time effort.
I hope you have enjoyed my projects and are
inspired in some way.
Thanks for sticking with me through this long post.
Please leave a comment to be entered to win
one of the fabulous prizes on this hop.
Now it's time to hop on to
 blog and see what he has to show us.

Here is a list of all the blogs on the hop.
Kristie Kreates That's me!
Be sure to comment at all the blogs,
leave a little love for the
artists/crafters.
The more blogs you comment on the
more chances you have to win
one of the wonderful prizes from our
generous sponsors.

Thanks for stopping by,
I hope you'll come again soon.
You never know what you'll find on
Kristie Kreates!

Friday, November 20, 2015

SSS prize

Hello crafty friends!
In October on
I love a good blog hop, so I hopped along
and commented on all the blogs.
There was some wonderful inspiration and fabulous
 ideas, techniques and tips.
A few days after the hop was finished, 
I was surprised to find that I had won one of the 
prize packages.
This is what I received in the mail a week or so later.
It's one of their card kits.
I was thrilled to win this kit and knew I'd be able to put
all these goodies to good use.
There is an "inspiration sheet" that comes with the kit
that shows 6 cards that Kristina Werner made with the
supplies in the same kit.
How could I go wrong?
A kit from a company I love and 
inspiration from one of my favorite designers!
The other day I made a couple cards and barely put a dent
in the supplies.
I used strips of various papers to make this
pretty card.  
"What A Beautiful Day" was stamped
Some of the strips were adhered with foam tape 
to give a little dimension to the card.
This second card is very clean and simple.
With the beautiful papers in the kit,
I couldn't go wrong,
a few thin strips of paper and the
"Just a note" stamp made for a quick and
easy card.

Thanks to 
Simon Says Stamp
for the great prize they sent me!
If you aren't familiar with them,
pop over to their blog linked above or to there 
where you'll find just about anything you will need 
for paper crafting and more.

I'm glad you stopped by today,
I hope you will come again soon.
Until next time, Happy Crafting!


Thursday, June 7, 2012

Thinking summer!

Hello and welcome to my blog!
has some lovely images that bring summer days to mind.
And what is more summery than flowers?

I have 2 cards to show you today.
This first card was made with
"Daffodils" (#83303)
I stamped it onto white cardstock and colored it with FlexMarkers
then layered it onto the card.
I know daffodils are more of a spring flower, so I also made this next card.

I used 3 stamps on this card.
First, I stamped the "Happy Birthday" (#36314) sentiment onto cardstock.
I then stamped it again onto a scrap, cut it out and used it as a mask as I
stamped "Babys Breath" (#35111) randomly onto the cardstock.
I used "Large Sunflower" (#35804)  and stamped it twice onto the brown patterned paper and twice onto white cardstock.
I fussy cut one white and both brown flowers, cutting off the smaller petals on one brown one.  I layered the flowers onto each other.  I cut the center of the 2nd white flower and colored it with a FlexMarker then adhered it to the center of the flower.
Once I added the Sunflower to the card and curled the petals up a bit,
 it was finished.

I hope you have gotten some inspiration from my cards today.
Biblical Impressions has many wonderful images that can be combined or used alone.  Stop in to the Biblical Impressions store and see all the wonderful stamps they have to offer.

Thanks for stopping by today, leave a comment if you will
and come again soon!

Until next time, Happy Crafting!

Sunday, November 13, 2011

Eureka! Stamps November Blog Hop

Welcome to my post for the Eureka! Stamps Design Team Blog Hop!

If you have just happened upon the hop, you may want to start at the beginning, as you won't want to miss any of the inspiration the design team has to show you.
If you have come from
 you are on the right track.  I'm sure she had something wonderful to share with you.

I have 2 cards to share today. 
For this first card I used my Cuttlebug to emboss some blue card stock with a snowflake pattern.  I then used a white ink pad and a direct to paper technique to add a bit of white to those snow flakes.  Even though it may not show in the picture, the card has a snowy sparkle to it, as I sprayed it with some Tattered Angels Glimmer Mist.  I love the way it makes things shimmer and shine!

The "Bundle up" is part of the "Bundle Up and Enjoy" (#34401) image from Eureka! Stamps.  I used the digital format of this image for my card, which made it easy to size and fussy cut for my card. This image also comes in rubber.

I used the 2nd half of the image inside my card.

When I saw the next image I had to have it.
It is called "Photographic Memory" (#24207) also from Eureka! Stamps. When I read it, I laughed out loud.  I used the rubber stamp of this sentiment, but it does also come in digital format.

I had this camera die cut from a sheet of die cuts I bought a long time ago.  When I got the sentiment I knew exactly what I would do with it. 
When my son suggested that I adhere the camera to the card base and fussy cut around it, I thought it was a great idea.
I stamped the first 1/2 of the sentiment onto silver vellum and adhered it to the back of the camera to show through the lens opening.

I used the other half of the sentiment inside the card and added a couple stars, that were on the die cut sheet, as accents.
Now I have to find just the right person to send this card to.  LOL

I hope you have enjoyed my cards today, thank you for hopping along.
Leave a comment and let me know what you think of my cards and then hop on over to
and see what lovely inspiration she has to show you.

Eureka! Stamps has a lot of sentiments in their shop. Some funny, some sentimental and some just plain nice. So why not hop there after you finish the hop and see what they have to offer?!?!

Until next time, Happy Crafting!

Sunday, October 9, 2011

Eureka! Stamps Dog and Cat Blog Hop.

Hello, and welcome to my part of the Eureka! Stamps Dog and Cat Blog Hop!

If you have hopped over from 
you are headed in the right direction. I'm sure you got some great inspiration there! 
 If you just happened to stumble onto the hop, hop over to the start of the hop at the Eureka! Stamps blog and start there. There will be links to all the participating blogs there, so if a link doesn't work or you get lost along the way, check back there and get back on track.
When I saw "Party Poopers" (#14303) in the Eureka! Stamps store, I knew I would love working with it.  Are these little guys cute or what?!?!

They were stamped onto white card stock and colored with Copic markers, fussy cut and adhered with foam tape to the colored card stock.
Brads were added as accents and it all was layered together onto a cream card stock base.

There are many adorable dog and cat images in the Eureka! Store, so once you are finished hopping here, hop on over and check them out.
For now, hop over to 
where I'm sure you will find something wonderful to inspire you.

Thanks for stopping by today.  Leave me a comment and let me know which of these little guys you like the best.

Until next time, Happy Crafting!

Sunday, September 11, 2011

Eureka! Stamps September Blog Hop

Hello Blog Hoppers!

If you have just happened onto this hop, you should hop on over to the Eureka! Stamps Blog and start there.  It's the best way to be sure you don't miss any of the wonderful projects the design team has to show you.

If you arrived from
you are headed in the right direction.

This month our theme is "Fall" It's not quite here, but we need to be thinking about getting those fall themed cards and projects done.

Today I have a card that I made using the "Pumpkin Background" (#26601) image from Eureka! Stamps.
For this card I stamped the image twice, once on kraft card stock with VersaMark  and once on white watercolor paper with brown StazOn ink.

I used water color crayons to color parts of the image and fussy cut them to adhere over the image on the kraft card stock.  I used foam tape to give the images dimension.

I wanted the images to stand out so I layered them onto white card stock.
I then added the brown embroidery floss and layered it onto a kraft card stock base.

What says "Fall" more than pumpkins?

Thanks for stopping by, leave a comment if you like and then hop on to
where I'm sure you will find something lovely.

Until next time, Happy Crafting!

Thursday, August 18, 2011

QKR Stampede August Blog Hop

Hello Hoppers!

If you have just happened upon this blog hop, welcome!  But you should probably start at the beginning on the QKR Stampede Blog.  You don't want to miss out on any of the fun projects that the other design team members have to show you.

If you came from Jessica's blog, great, you are on the right track.  I'm sure she had a great project to share.

By now you know that our theme is "Boys, Trains, Planes and Cars" this month.  I have decided to go with this wonderful boy image.
QKR Stampede has many 'boy' images and "Going Fishing" (#13209) is one that I love to work with.
I stamped onto watercolor paper and colored with watercolor crayons.
I used scraps from my scrap stash and layered the image onto them.
I had some brown brads that I've had in my stash forever and this is just why I have been saving them.  I knew I would find the perfect place to use them.

I hope you like my 'boy' card.  Leave me a comment if you wish and pop on over to QKR Stampede to check out the fabulous images they have to offer.

But first, hop on over to see what Kristine has to show you.  I'm sure it will be something wonderful.

Thanks for hopping along!
Until next time, Happy Crafting!

Sunday, August 7, 2011

Balloons and Holders

Hello everyone and welcome to the Eureka! Stamps Blog Hop.
Today we are sharing some of the fabulous balloon and holder stamps that Eureka!  has available.

If you have come from Dawn's blog you are on the right path.
I'm sure she has a wonderful project to share with you.
If you have just happened onto the hop, you should probably start at the beginning.
Hop on over the beginning at the Eureka! Stamps Blog.
If you get lost along the way or a link doesn't work, you can hop right back there where all the participating blogs are listed.

Now on with my projects.
I am having so much fun working with these images and as soon as I saw Noah and all the different animals, I knew I wanted to create with them.
I need to apologize as this project isn't quite finished.  It needs to be put into a frame, but I don't have one handy at the moment.
I stamped all the images onto watercolor paper and colored them with watercolor crayons. 
The background is also done with watercolor crayons and paper.
The boat is freehanded onto card stock then colored and cut out.
I fussy cut all the pieces and adhered them with foam tape.
I tied a piece of string to each balloon and attached them to Noah's hand so they wouldn't float away.
I love how this turned out.  Hope you do too.
There are many more animals in the Eureka! Balloon and Holder colletion, so if you don't see your favorite, pop into the shop and see what else is there.

My 2nd project is a card done with the Pirate Balloon Holder and the Parrot Balloon.
I used the same techniques for stamping, coloring and cutting as the other project, then made a card with the images. 
I used some Cosmo Cricket sticker for the "Ahoy Matey"

All the images I used for these projects are listed below and are available at Eureka! Stamps.  There are lots of fabulous images in the balloon/holder category as well as in the rest of the store, so pop in and see what you might like.

Now leave a comment if you wish and head over to see what fabulous project
Roxie has to show you.  I'm sure it will be worth the trip.

Thanks for stopping by, hope you have enjoyed seeing my projects.
Until next time, Happy Crafting!

Here is a list of the images I used for my projects:
7953(488) Noah Balloon Holder

11804 Moose Balloon
23906 Parrot Balloon
24101 Monkey Balloon
5205(438) Elephant Balloon
5209(416) Giraffe Balloon
8001(499) Zebra Balloon
8002 Rhino Balloon
8009 Lion Balloon


23907 Pirate Balloon Holder
All available at Eureka! Stamps in the balloon/holder category

Sunday, July 10, 2011

Christmas in July with Eureka! Stamps design team

It's Christmas in July with the Eureka! Stamps design team!

If you have happened upon the hop because you stopped by my blog, you can start right here, as I'm the first of the design team on the hop.

The Eureka! Stamps Blog is the official starting point and has a list of all the blogs to visit. If you have a problem, you can always hop on back to the
Eureka! blog and get back on track. 

Be sure to comment on the blogs as you go, to give youself as many chances as possible to win a free stamp of your choice from Eureka! Stamps.

You also will have a chance by following the Eureka! Stamps Blog and following QKR Stampede on Facebook. 

The official start is at 8a.m. so if all the links aren't functioning, please be patient, they will be soon.

You don't want to miss any of the wonderful inspiration
the design team has to offer so be sure to hop through all the blogs.
If you have come from Eureka's blog you are on the right track.

Today I'm sharing a scrapbook layout that I made with pictures from my family Christmas tree hunt 2010.  While the guys were doing the tree cutting, Kelsie and I were getting silly and modeling for one another.
The poinsettia was made using Eureka! Stamps
"Poinsettia Pattern" (#30401)
This is one of the wonderful 3-D stamps that Eureka! offers.
You stamp the image, cut it out, score on the lines indicated and piece the flower together.  It really is quite simple.  Each 3-D stamp comes with directions on how to make these lovely pieces.

Here is a close up of the poinsettia.  It does come with leaves also, but I chose not to use them for on this layout.  This flower can be made to have even more dimension, but for this layout I didn't want too much bulk as it could get smootched (that's a technical scrapping term, LOL) in my scrapbook. 
It's all up to you, when you use these stamps.  Lots of dimension, or a little.  Either way they turn out beautiful.

I hope you will pop on over to the Eureka! Stamps shop and check out all the beautiful Christmas and pattern/3-D stamps that are offered.
It's a great time to get started on your Christmas cards, or maybe use some stamps on your scrapbook layouts like I did.

Now it's time to hop on and see what the talented Holly has to show you.  I'm sure it will be something wonderful.  

Thanks for stopping by, be sure to leave me a comment and become a follower.

 Until next time, Happy Crafting! 

Thursday, February 17, 2011

Sweet Angel Card

Hello!  And welcome to the QKR Stampede Heaven Sent Blog Hop!  This month our theme is angels.

If you have come here from Monika's  
you are on the right track. I'm sure you found something wonderful on her blog, that will give you lots of inspiration.

 If you have just happened onto the Hop, you may want to go back and start at the beginning at the QKR Blog.  You won't want to miss anything.  If you get lost along the way or one of the links isn't working, just head back there and you will be able to pick up where you left off.  There will be an entire line up on the QKR Blog

And to make things even better, if you hop along and comment on each blog in the hop, your name will be entered into a drawing for a QKR Stampede gift certificate!  So be sure to comment on everyones blog posts, then return to the QKR Blog and let us know that you completed the hop.  Good luck!

Watering Hearts (#8403) is the image I used on today's card.  It is one of the many angel images that QKR Stampede has available in rubber stamp or digi form.
She was stamped onto white card stock and colored with watercolor crayons.  Then layered onto card stock from my stash.  The card base is kraft card stock and was layered with patterned paper from my stash also.
To add the ribbon to my card I ran it through my Xyron "X" sticker maker.

Have you seen the Bow Easy
It's a simple little tool that makes it quick and easy to make a bow for your project.  I don't have one of these, but when my son, Jaryd saw it, he decided to create one for me.
He used my Sure Cuts A Lot 2 program and designed one, I tweaked it a little and cut it out with my Cricut Expressions. 
I'll tell you, it sure makes it easy to make perfect little bows! This is what I used to make the little bows on this card, which I used Glossy Accents to adhere to the card.

Now that you have seen what I have made, you will want to hop on to Jessica's blog, where I'm sure she will have some wonderful inspiration posted.
Thanks for stopping by today!  I hope you'll leave a comment and let me know what you think of my sweet angel card.

Until next time, Happy Crafting!

Tuesday, February 15, 2011

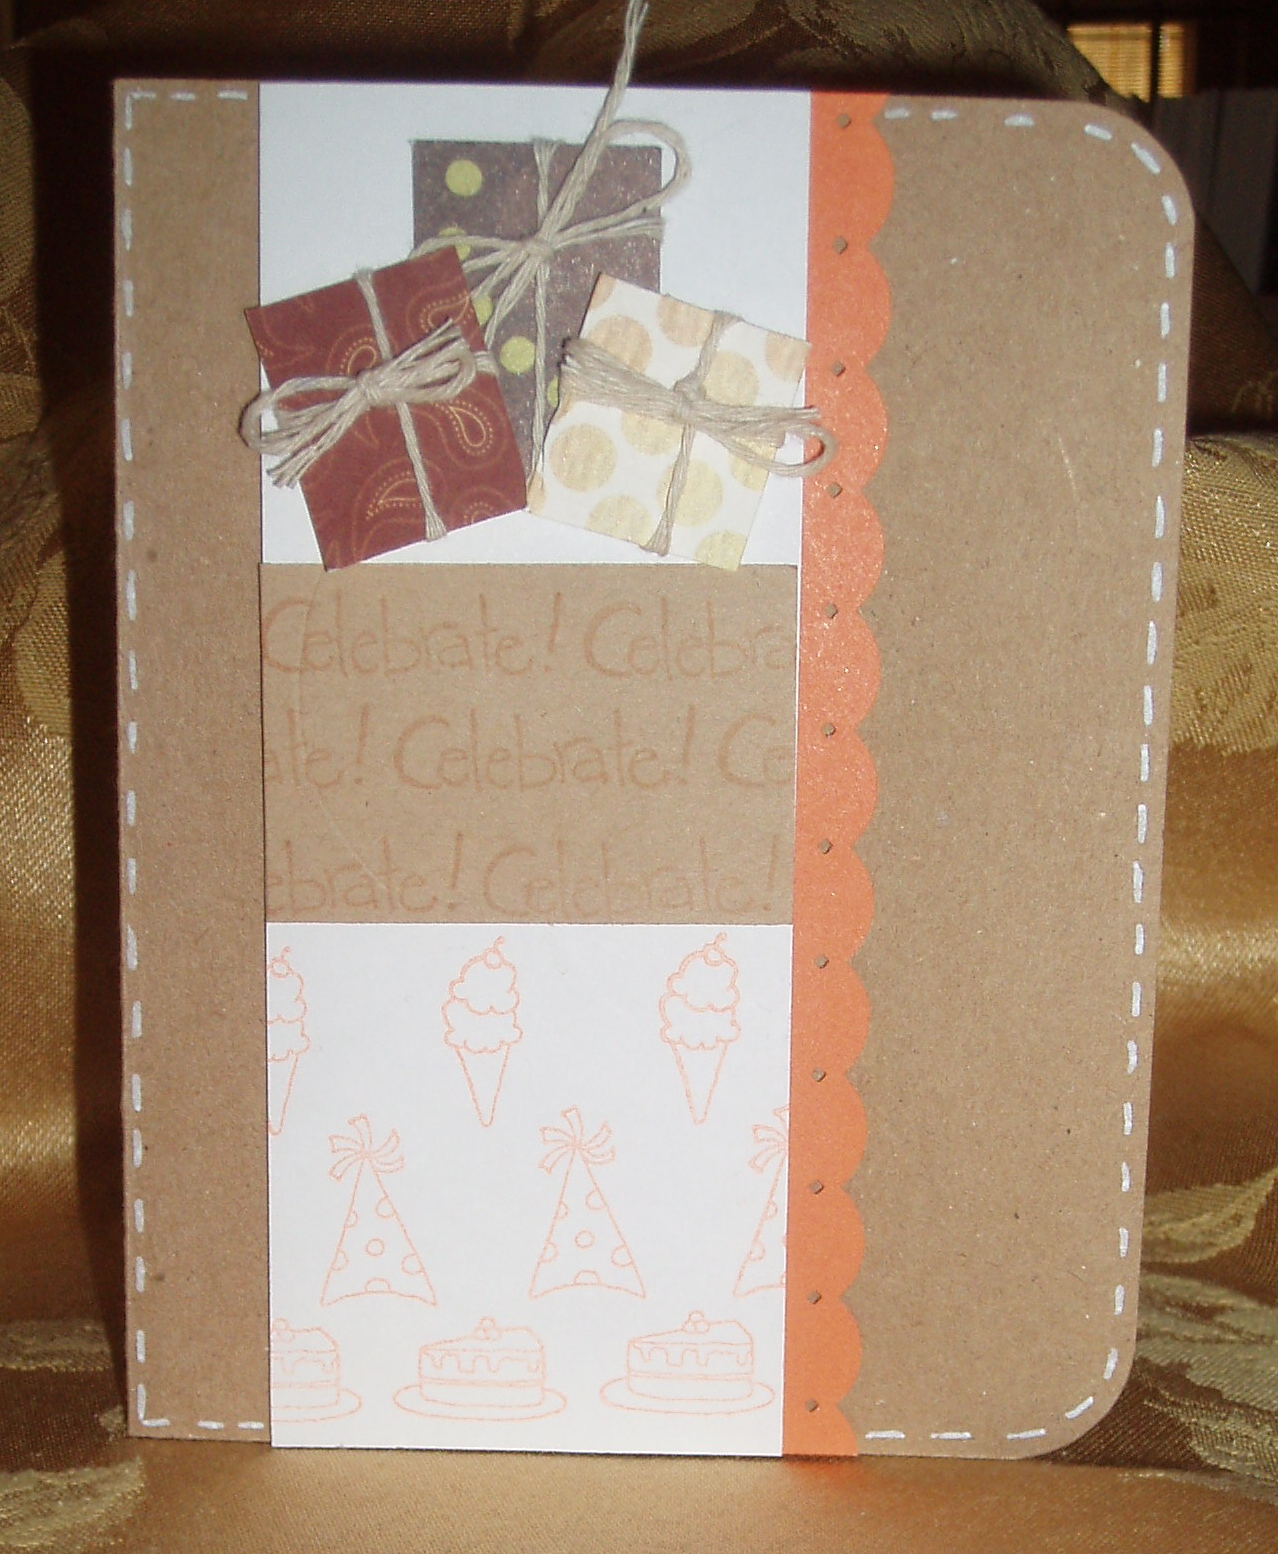
It's hubby's birthday

Hi all!  Today is my hubby's birthday and I thought I should probably make him a card.  LOL!  So here it is.
The stamps I used on the front of the card are for an Inky Antics set.  The papers are all from my stash, see it's a good thing to save even those little tiny scraps!
I used an EK Success border punch for the orange scallop.
On the inside I stamped "Happy Birthday, Happy Birthday, Happy Birthday" and will write a little something more personal along with it.
The Happy Birthday stamp is one from the Happy Birthday (#22803) set from QKR Stampede
Thanks for stopping by today.  Leave me a comment if you would like to and come back soon. 
The QKR Heaven Sent Blog Hop is this Friday, February 18th, so come back and join in the fun.
Until next time, Happy Crafting!

Thursday, December 16, 2010

Flying Downhill

Hello and welcome to the December QKR Stampede Design Team Blog Hop.  This months theme is Winter Sports.  If you haven't arrived from the QKR Stampede Blog you might want to see what is posted there, then pop back over here, as you won't want to miss any of the wonderful projects the other DT members have created. If you get lost along the way or one of the links doesn't work, hop back there as all the links will be posted there. 
Today, I am showing you a card I created with Sledding (#8707) from QKR Stampede.  I love this image, these little ones look like they are having a lot of fun in the snow, don't they?

I stamped the image with Black Onyx Versa Fine ink onto a piece of card stock that I used Smooch and water to create a marbleized design.  I love the way it looks like sky.  I then colored the image with water color crayons.  I added Glossy Accents to the runner of the sled, which unfortunately doesn't show in the picture, but it does give it a shiny, wet metallic look.

I used Versa Mark to put the snowflakes in the sky and embossed them with clear embossing powder.

The fluffy "snow"  was put on with Sticky Powder, which is a product sold in the QKR Stampede store.  It is simple to use, very much like  using embossing powder, but when heated it becomes sticky.  I swiped Versa Mark across the 'hill' area of the card, applied Sticky Powder and heated.  When it became sticky, I pressed cotton onto it.  This gave me the fluffy snow.  Easy peasy!

Once this was done, all I had to do was round the corner and adhere the image to the red base card, round the corner on the card and my card was finished and ready to go.

Now from here you will be hopping on to Roxie's blog where I know you will find a wonderful project.

Be sure to check out this and the other wonderful stamps (both rubber and digital) that QKR Stampede has in their store. You never know what you might find that you need!
Thank you for stopping by today, I hope you have gotten some inspiration from the card I created.  Please leave me a comment and let me know what you think. 

Until next time, Happy Crafting!