My Other Pages

To make it easier to read about our trip to Ireland, I have made a page that is just for that. There is a tab above for Ireland Trip 2014 or click on the Home tab to read my other posts. I have also created a new page for My Weight Loss Journey if you are interested in that, click on the tab above.

Thursday, October 31, 2019

Halloween Cards

Happy Halloween!
Today I'm sharing a couple cards I made for
Halloween.
I made this spinner card using 
I stamped the image onto white card stock, 
colored it, adhered it with temporary adhesive
to another piece of card stock and fussy cut it.
Adding the other card stock to the back gives 
that second layer to sandwich the thread
to make the spinner mechanism.  It also
gives a nice clean look to the back
of the image.
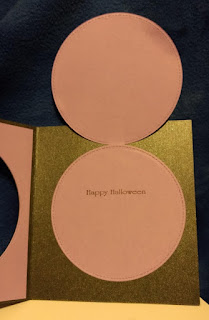
I didn't want the sentiment and what I wrote
to show through the front of the card,
so I made a circle flip up the same size as
the cut out in the front of the card.
Where I stamped Happy Halloween and
signed the card.
This card was an odd size, so I made my own 
envelope with my 
I stamped 
and colored it for a festive look, 
using colored pencils.
The other card I made was this
spider card.
I think he turned out pretty cute.
I love the little shoes I made for him too!
It was a little bit of a challenge getting him into 
the envelope, but since I made my own envelope
I made it happen.  I just hope he arrived okay, 
having been squished into the envelope.
I attached a card base to the bottom, 
where I stamped a greeting and could sign the card.
I stamped the envelope with 

I hope the kids I sent these to enjoyed them,
and had a frightfully good Halloween.

Thanks for stopping by today,
hope you enjoyed your Halloween.
Come again soon,
until then 
don't eat too much candy!


Note the links are only to give a reference so you can
see what the products are.
I didn't necessarily purchase from these sites,
except where specified,
and you may find better prices elsewhere,
I am in no way promoting any particular site.

Tuesday, October 29, 2019

Soup and Sandwich Sets

Hi All!  I hope you're having a great day!
Today I have some oldies but goodies to show you.
Years ago, I worked at a paint your own pottery studio
and I made a lot of different projects.
Some of the projects were these 
Soup and Sandwich sets.


I don't have a clue what this means.
I'm sure at the time I looked it up and copied it, 
but now I couldn't even guess. Maybe one day
I'll figure out how to look it up.

I think this is my favorite of the sets.
I think that little guy is just adorable.

I haven't done any ceramic painting for a very long time,
I'd like to give it a go again sometime.
Have you ever painted ceramics?
Thanks for stopping by today,
I hope you'll come again soon.
Until next time,
how about trying 
an oldie but goodie of your own?!?!

Friday, October 25, 2019

Post Cards for El Paso Kids

A while ago, after the El Paso shooting, a couple teachers
asked for cards of encouragement to be sent to their
classes.  The children were afraid to come to school
and they thought cards from around the country 
with encouraging words would help them.
These are the post cards that I made and sent.
I wrote an encouraging message on the other side
and I hope they helped the children in their classes
For this card, I stamped the "grid" with VersaMark Ink
and embossed it with silver embossing powder.
I then used water colors to paint it.
The sentiment was stamped with 
I used Distress Inks with water to make this background,
then stamped the unicorn with 
VersaFine Onyx Black ink.
I added a bit of clear Wink of Stella to the horn, mane and tail.
Both were done on water color postcards.

Thanks for stopping by today,
have a wonderful day and 
Be Kind To Others!


Note the links are only to give a reference so you can
see what the products are.
I didn't necessarily purchase from these sites,
except where specified,
and you may find better prices elsewhere,
I am in no way promoting any particular site.


Monday, October 21, 2019

Crafty Card

Hello!
Today I'm showing you a little card that I made 
for a crafty friend.
I used one of the backgrounds that I had in my 
hand made stash of backgrounds.  This was made with 
alcohol inks.  I then stamped the images from 
The My Monthly Hero Kit that I purchased for 
May this year.  I seldom purchase these kind of
kits, but this one was so cute, I couldn't resist it.
I'm pretty sure it is probably sold out and no longer
available, but I linked to the site, just in case.
For the inside, I used one of the sentiment stamps from
the set.  I made the envelope with my 
with some paper from my stash.

Thanks for stopping by today, I hope you
are having a lovely fall where you are.
Come again soon,
until then, share your crafty love!


Note the links are only to give a reference so you can
see what the products are.
I didn't necessarily purchase from these sites,
except where specified,
and you may find better prices elsewhere,
I am in no way promoting any particular site.


Wednesday, October 16, 2019

From Desk to Changing Table

Hi everyone!
Today I'm showing you a project that my 
son and daughter in law did together.
My Mom moved out of her house several
years ago and when we cleaned her house out,
Jaryd wanted her desk, so he's had it ever since.
When they found out they were pregnant, 
he decided to make her desk into a changing 
table. Recently Jaryd and his father in law got to
work on doing just that. 
I don't have a picture of the desk before, but....
here is a picture of them working on making it into 
a changing table.  In the lower left corner, you can just
see the corner of the desk. It was a very dark color, way
too dark for a baby's room.
They decided to paint it white, with the feeling that in years
to come they could always sand it down and bring it
back to it's natural state if they wanted to.
Here is what it looked like when they were done.
The hardware was painted purple, to give some
contrast and match her room. These too, can be 
changed back to their original brass if they want to.
After they got it home Sara added
a bit of vinyl to pretty it up even more.
She then took some fabric and covered the top of the 
changing area,
as well as the bottoms of the drawers.
I think they did a fabulous job with this project.
And I think G-Ma would be thrilled that her 
Great Grand daughter, Marie, will have this beautiful
changing table, that she can eventually use as her own
desk.  That top part just lifts right off, so no screws or nails
were put into the desk.
I love that my kids are creative and love doing these kind
of projects.

Thanks for coming by today and spending time here.
I hope you have been inspired to think of something 
that you can repurpose to get more use out of it.
Until next time,
think outside the box!


Friday, October 11, 2019

Flowers and Grapes

Hello crafty people!
This summer my hubby and I spent about
a week in Cape May, New Jersey with 
friends.  I love to take pictures of flowers
and they are often great color inspiration.
I thought I'd share some of the pictures of 
the flowers as well as grapes
that I took on our vacation.
Isn't nature beautiful?!?!


Thanks for stopping by today.
What do you like to take pictures of?
Come again soon,
until then, get inspired!


Monday, October 7, 2019

Challenge Swap - Halloween

Halloween isn't too far away, so my friend Lisa, 
should be able to use this soon.
The theme for our last swap was 
Halloween.
I decided to make a bag book with the
Halloween theme.  The challenge I made for myself
was to do something different with it, I decided to make 
the tags something a little different.
A friend suggested I make them with a candy theme,
and that got me to thinking.
We always have snack items at My Happy Place, 
where I was making this, so I used different candy and
snack wrappers for the tags.
I happened to have a small pad that was fall and 
Halloween themed paper and that worked out
perfectly.  I designed and cut the spider with my 
Silhouette. I cut it out of adhesive foil vinyl and 
added the googly eyes.
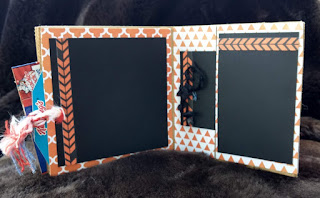
Each double page has spaces for pictures and/or journalling.
Some of them had pockets at the side for
the tags.
Here is the first tag made with a Hershey' Kisses
package.
Love the owls!
A Cracker Jack box worked perfectly for a tag.

I cut this from a box of Rice Krispie Treats
and it works great.

I think this tag is my favorite.
Starburst on one side......
Bazooka Bubble Gum on the other side.
No, I didn't chew all that gum. 
Or eat all those treats for that matter.
LOL!
Lisa loved the book,
she has kids that still dress up and do
trick or treating, so she will be able to make use of 
it this year.
I love how it turned out too.

Thanks for spending time on my blog, 
I hope you'll stop by again soon.
Until then,
Happy Crafting!


Wednesday, October 2, 2019

Birthday Gifts for the Dad to be.

Hello!
Welcome to Kristie Kreates!
My son's birthday was in August and 
since he's going to be a Dad in November,
I wanted to make a shirt for him.
Here is what I came up with.
I designed it with my 
Silhouette Designer Edition software,
then cut heat transfer vinyl with my
Silhouette Cameo
and applied it to the shirt with my
heat press.

I also made him a onsie for Marie.
For this I used the new 
Cricut Infusible Ink Sheets.
I created and cut it with my Silhouette
and applied it with the heat press.
I love how this product works,
easy to use and gives a great result,
as long as you use the right kind of 
fabric. The infusible ink MUST be used
on polyester fabric.
Jaryd loved his gifts and I loved making them.

Thanks for stopping by today,
I hope you'll come again soon.
You never know what you'll see on
Kristie Kreates!