My Other Pages

To make it easier to read about our trip to Ireland, I have made a page that is just for that. There is a tab above for Ireland Trip 2014 or click on the Home tab to read my other posts. I have also created a new page for My Weight Loss Journey if you are interested in that, click on the tab above.
Showing posts with label Envelope Punch Board. Show all posts

Monday, October 21, 2019

Crafty Card

Hello!
Today I'm showing you a little card that I made 
for a crafty friend.
I used one of the backgrounds that I had in my 
hand made stash of backgrounds.  This was made with 
alcohol inks.  I then stamped the images from 
The My Monthly Hero Kit that I purchased for 
May this year.  I seldom purchase these kind of
kits, but this one was so cute, I couldn't resist it.
I'm pretty sure it is probably sold out and no longer
available, but I linked to the site, just in case.
For the inside, I used one of the sentiment stamps from
the set.  I made the envelope with my 
with some paper from my stash.

Thanks for stopping by today, I hope you
are having a lovely fall where you are.
Come again soon,
until then, share your crafty love!


Note the links are only to give a reference so you can
see what the products are.
I didn't necessarily purchase from these sites,
except where specified,
and you may find better prices elsewhere,
I am in no way promoting any particular site.


Thursday, June 6, 2019

Challenge Swap #2

Hello crafty people!
I'm in an online group of friends and crafters
and we're doing a monthly challenge swap.
Today I'm showing you the card I did for the 2nd 
challenge.  It was my turn to choose the theme
and I chose "friendship"
I got to send my project to one of my closest friends,
so this was perfect for me.
I started by playing with some alcohol inks on
Yupo. I can't tell you which colors I used,
I just chose them and got to work playing.
This is how my first piece turned out and I loved
the color combination.
I made a couple more pieces with the same colors,
but blended them a little bit more.
I then used Alcohol Lift Ink to lift the Poppies image from
the ink on the Yupo.
I stamped what I picked up onto a piece of white card
stock, you'll see that later.
I loved the colors with this stamped image, 
so I started stamping on vellum and loved the results.
I cut a couple masks and stamped over this sheet of vellum.
I then laid it over the bright colored piece that
was my original creation.
I trimmed it down and adhered the vellum by 
folding it over the sides of the base piece,
using ATG tape on the back to hold it in place, then 
mounted it onto a white card stock base.
I use my computer to print the sentiment and adhered the
pieces to the front of the card.
I then took the pieces that I lifted the ink from and
played with them a little more, by adding some 
alcohol to them and this is what I got.
I love that you can just add more alcohol, and ink
if you want, and get more use out of the pieces.
I used the 2 pieces inside the card with the rest of the 
sentiment.
The flower in the bottom corner is the original
one that I stamped from lifting the ink.
I stamped it and fussy cut it, then added it
to the inside of the card.
The card was an odd size, so I made my own envelope
I lifted another bit of ink and stamped the envelope with 
a matching flower.
I loved making this card and sending it to one of
my closest friends.
I think she loved receiving it too.

Thanks for stopping by today,
I hope you learned something and/or have been
inspired in some way.
I hope to see you again soon.
Until then,
make something for someone you love.


Note the links are only to give a reference so you can
see what the products are.
I didn't necessarily purchase from these sites,
except where specified,
and you may find better prices elsewhere,
I am in no way promoting any particular site.


Thursday, October 19, 2017

Halloween Envelopes

Hello and welcome!
My last post was about my Halloween cards,
today's post is about the envelopes I made for those cards.
I started by making the envelopes with white card stock
I then stamped images onto the envelopes
and colored them with my Fantasia Colored pencils
This is "Pumpkin Vine Stamp"
QKR Stampede
I drew the banner freehand and added Mom's name.
This is done with 
"Ghost" Eureka Stamps
"Halloween Border"  Eureka Stamps

My friend loaned me this stamp, I don't know
what company it is from.


My friend also loaned me this stamp.
The background with the clouds doesn't show very well
in the pictures, but in real life it turned out pretty cool.
This one I didn't realize that I hadn't colored the 
owl or broom until I took the picture.
I may just leave it white like this, or maybe color the 
broom and leave the owl white.
I have never done any artwork on envelopes before,
but I was inspired by Kristina Werner in 
Kristina is one of my favorite artist and bloggers,
she does a mail art video every month and I've wanted
to give it a try.  This was the perfect time and I loved
the way they all turned out.  I'm sure I'll be doing more
mail art in the future.
If you haven't checked out Kristina's blog you should
do so, she's really quite wonderful and talented.

Thanks for stopping by today,
I hope you were inspired in some way.
Maybe you'll give mail art a try, I hope so.
See you next time, you never know what you'll find on 
Kristie Kreates!


Note the links are only to give a reference so you can
see what the products are.
I didn't necessarily purchase from these sites,
except where specified,
and you may find better prices elsewhere,
I am in no way promoting any particular site.


Tuesday, October 10, 2017

Crazy Dog Card

Hello friends!
Today is another card from my 
unused stash of goodies.
I love the dogs from the 
They are just so darn cute and bring a smile to 
my face, they have such personality!
I colored this card using my 
watercolor crayons for the dog as well as the
sky and grass.
Inside I stamped this sentiment from the 
from Cas-ual Fridays Stamps.
I added a little Glossy Accents to his nose and tag
to give a little shine.
I also made an envelope, since it is a square card,
Did you know square cards cost more to mail?
I made the envelope a bit larger than the card, in 
a rectangular shape to avoid the extra postage.

Thanks for stopping by to see what I've been up to,
I hope you have a wonderful day and 
create something fun.


Note the links are only to give a reference so you can
see what the products are.
I didn't necessarily purchase from these sites,
except where specified,
and you may find better prices elsewhere,
I am in no way promoting any particular site.


Friday, October 6, 2017

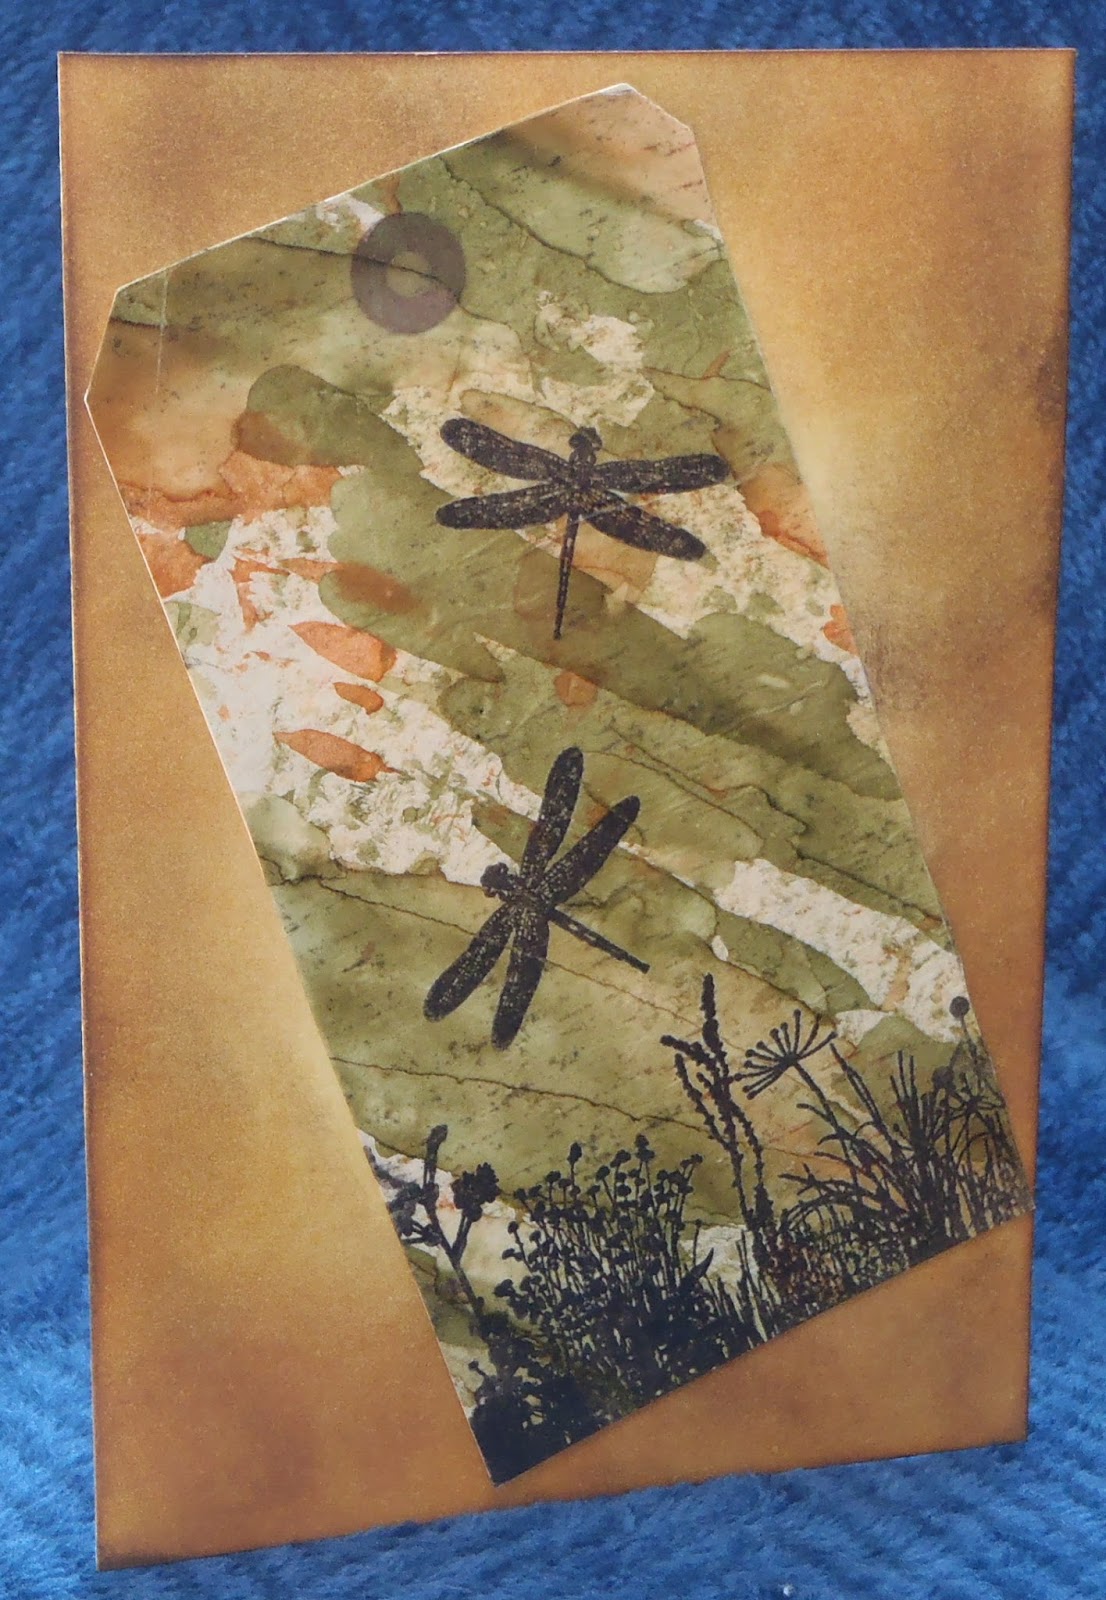
Firefly tag card

Hello crafty people.
Today I have another project to show you
from my stash of unused "stuff"
Quite a while ago I made this tag, but never used it.
I used alcohol inks and deli paper to make the
background paper, then glued it to a manila tag.
I then stamped the images with Versafine Onyx Black Ink
and then the tag sat for a long time.
I decided I wanted to make it into a card.
I used Distress Inks to give a white card base
a different color, then simply adhered the tag
to the card base.
I stamped this so long ago, that I have no idea
about the names of the stamps or even what company 
they are from.
My friend, Jen, absolutely loved this tag
so I decided to make it a card for her.
I stamped this sentiment inside the card with
Color Box Chalk Ink and it wasready to go. 
This sentiment is True Friends and can be purchased
I also made an envelope for this card with my 

Thanks for stopping by today,
I hope you have been inspired in some way.
Maybe you'll dig into your stash of
"stuff" and come out with something
that you started and never finished.
Until next time,
Be Creative!


Note the links are only to give a reference so you can
see what the products are.
I didn't necessarily purchase from these sites,
except where specified,
and you may find better prices elsewhere,
I am in no way promoting any particular site.


Saturday, August 6, 2016

Kitty Cards

Hello everyone!
Today I have 2 cards I made, a little different,
yet mostly the same.
Someone very close to me was diagnosed with breast cancer
recently and I wanted to send a card letting her know
I'm thinking of her.
I made this "big hugs" card for her and wrote a personal
note inside.
The cat image is stamped with VersaFine Onyx Black  ink,
I colored the cats, on both cards, with 
colored pencils and blended with Gamsol.
The background was painted by scribbling some
water color crayon onto an acrylic block and 
mixing it with water, then painting it on with a
  I also made the envelopes since the cards are
not a standard size.  I used my
to make the envelopes for both cards.
This second card I made for my Aunt Marilyn who
will be 93 at the end of September.
She loves cats and I know she will get a kick out of this
card. I can hear her now, exclaiming how cute the cat is.
The cat image is
The sentiments are both 
I have linked many of the supplies I used,
I did not necessarily purchase them from the linked
sites. I only use them for reference for you to
see the supplies.
You may very well find these supplies at 
many other sites and maybe at better prices,
just do a little research.

Thanks for stopping by today,
I hope you have enjoyed my cards as 
much as I enjoyed making them.
Come again soon.
Until then, Happy Crafting!

Monday, October 14, 2013

Scarecrow with twine.

It's time for another
This week the theme has 2 parts,
"Fall and add some string or twine"
(not ribbon)
For my card I used
"Scarecrow and Sunflowers" (#15901)from
I stamped the image using Versa Fine Ink
and colored it with water color crayons.
The edges were inked with Distress Ink.
I added a bit of twine at the top.
I made the envelope with some patterned paper from my stash
 
Why not hop over to the
and check out all the fun images they have.
Then create something for our challenge.
Thanks for stopping by today.
I hope you've been inspired in some way and
will come back again soon.
 
Until next time, Happy Crafting!
 

Monday, September 23, 2013

Tag You're It Challenge

Hi Everyone!
Today's challenge from the
is "Tag You're It"
For my card I used
"Snow Background" (#27301)
"Snowman Balloon" (#11805)
"Christmas Balloon" (#16402)
"Reindeer Balloon" (#2606)
All from
I stamped the Snow Background onto white card stock with
Versa Mark Ink and embossed with white embossing powder.
I then sponged over it with Distress Ink.
The embossing resists the ink and remains white.

Each of the balloon images was stamped with VersaFine ink
and colored with water color crayons.


The "baker's twine" is some that I made and had in my stash.
The envelopes were made with green vellum, using my new
There weren't exactly the measurements I needed,
but it was easy enough to do a little figuring and get the right size.
 
Thanks for stopping by today.
I hope you are inspired to create some kind of tag
 and enter our challenge.
Come again soon to see the other tag I created
 
Until next time, Happy Crafting!