My Other Pages

To make it easier to read about our trip to Ireland, I have made a page that is just for that. There is a tab above for Ireland Trip 2014 or click on the Home tab to read my other posts. I have also created a new page for My Weight Loss Journey if you are interested in that, click on the tab above.

Tuesday, February 28, 2017

Molly

Hello blog friends!
I can't believe I forgot to write up this post.
This is one of the gifts I gave my husband for Christmas.
It's a painting of our dog Molly.
Depending on how you look at it, you may 
say that I cheated a little bit when I did this painting.
But either way, I love how it turned out.
First I found a picture of Molly that I liked and printed it
on "canvas paper"
I have had my canvas paper a long time and never used it,
but I know you can purchase it at Michael's.
At my store it is in the aisle with the canvases.
You simply put it through your printer like you would
a piece of paper.
I changed my picture to black and white before 
printing it.
I started by painting Molly, BUT I should have painted 
the background first, because it was difficult to paint
around her "edges"  and had to do a lot of touching
up.
I also printed a couple pictures on regular card stock
as guides, so I could see the coloring and shading.
These are the paints I used to paint Molly.
I don't know if you have discovered 
Glad Press'n Seal
but it is great in the craft room.
I spread a piece of it onto my work surface as 
a pallet.
I put the paints directly onto the Press'n Seal 
covered surface and it works great.
It's easy to mix colors,
and clean up is simple, just pick it up and
throw it away.
Now back to my painting.
Here is Molly when I had finished painting her,
and still had to do the background.
And here is the final painting with the background 
finished.
It's not perfect, but I don't think it's bad for a first
try.
No, I could have never done this without the printed
version to paint onto, but that's okay,
 my hubby loved it anyway.
I'd like to try painting some other pictures
using this technique.
Possibly my children.
I really enjoyed it.
Thanks for stopping by, I hope you'll think
about trying something a little different.
Come again soon.
Until then,
Happy Crafting!


Friday, February 24, 2017

Bird Crazy

Hello everyone!
I have several birthday's in February, so I decided
to get moving one day and made the cards I needed
for the month.
I absolutely LOVE these mini crazy birds
from Tim Holtz.
I bought the set of 3 stamps and dies 
one day at Michael's
and I've never seen that set again
and haven't been able to find it online either.

This card is just an extra that I made while I was 
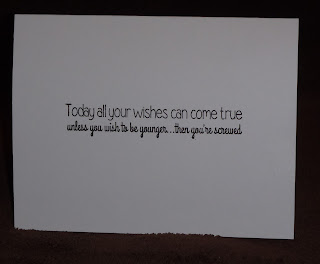
at it.  Love this sentiment.
This card I left blank inside so I can add a
sentiment when I need it.

I don't remember who I addressed each of these
cards too, but I think this one work well 
for anyone you want to give a smile too.

I thought this was a cute sentiment.

I'm sure this one is going to one of
my OLDER brothers.

This one is going to my other OLDER brother.
I think they'll get a kick out of them.

I made the backgrounds using a stripe from the
from Simon Says Stamp
I used these stamps sets from
 Cas-ual Fridays Stamps
for the sentiments:
and stamped them in

Thanks for stopping by today,
I hope you'll come again soon.
I have decided that this year 
I will get better about sending out cards
to family and friends.
So I will probably be posting a lot
of cards in the future, so be sure to pop 
in and see what I've been creating.
Until next time,
Happy Crafting!


Note the links are only to give a reference so you can
see what the products are.
I didn't necessarily purchase from these sites,
except where specified,
and you may find better prices elsewhere,
I am in no way promoting any particular site.


Monday, February 20, 2017

Valentine Treats

Hope you all had a lovely Valentine's Day!
Here are the goodies that I put into the boxes
that I made for my family.
I started out by putting mini marshmallows
on little pretzel sticks.
I then dipped them into melted milk chocolate.
Then I made Rice Krispie Treats and cut them into
hearts with a little cookie cutter.
I melted some white chocolate and dipped one
side into the chocolate and added a few sprinkles. 
 I also dipped little pretzel sticks into chocolate,
then rolled them in sprinkles, chopped pecans
or coconut.
The last goodie I added was a Chap Stick.
Something they all can use during this cold weather.
These little cello bags that I picked up at 
Hollo's worked perfectly.
I put the bag into the goodie box and filled them
inside the boxes, closed it with a twist tie 
and added the Chap Stick on top.
Hubby got his on Valentine's day, but I didn't
see the others until later.
I don't think they minded at all that they were
a little late.

Thanks for stopping in today.
I hope you'll come again soon,
you never know what you'll find on
Kristie Kreates!

Friday, February 17, 2017

Valentine Treat Boxes

Hi blog friends!
I hope your Valentine treated you well.
I had several people who received treats from 
me this year.
Here is what I put them in.
I found the video tutorials for these on
one of my favorite blogs,
Sam is amazing and does lots of
videos showing little boxes, bags and 
other projects. Love her blog!
Post for each box is linked below.
This is a 4 sided box
I used scrap paper pieces for all my boxes.
Here is a triangle box
I stamped the Swirl Heart and sentiment
and fussy cut them.
Hearts and senitments were adhered with foam tape.
Another 4 sided box
A 5 sided box which I figured the 
pattern and dimensions myself.
And lastly another 6 sided box.
These boxes look like they'd be difficult
to make, but they are really quite easy.
Especially since Sam did all the figuring for us.
Be sure to go to Pootles and check out Sam's
blog, she really is quite wonderful.

I filled these little boxes with some
Valentine's Day goodies, but didn't give them 
out until we are together a couple days after
the holiday.
I hope they liked them as much as I do.

Thanks for popping in to see what I've
been creating.
I'll be showing you what goodies I put into 
these boxes in my next post.
Come back and check it out.
Until then,
go check out 


Tuesday, February 14, 2017

Valentine's Cards

Hello!
Happy Valentine's Day!
I don't always send/give Valentine's Day cards,
but this year I am.
I saw this idea on Kristina Werner's blog and
was inspired to try it.
I cut pieces of watercolor paper into squares.
I then taped them down to a board.
This helps prevent warping of the paper when
it is wet.
I cut thin strips of tape to make the "cross bars"
You can use masking tape, painter's tape or Washi tape.
Just be sure that it isn't too sticky and you'll be able to 
remove it easily without tearing the paper.
I then used Distress Inks to paint them.
I smooched some ink, in the colors I wanted to use,
onto an acrylic block and mixed with some water.
Once they were completely dry I removed the tape
and cut the pieces down to the size I wanted.
This watercolor piece I embossed 
Swirl Heart from Biblical Impressions
with silver embossing powder and matted
it with a silver metallic paper that I found
I printed all the sentiments for the insides of these
cards from my computer.
I matted the sentiments to mimic the outside of the
cards.
I love these mini crazy birds from
Tim Holtz.  I colored them all with 
colored pencils and cut them with the matching dies.
The heart was hand cut and I wrote 'Love You' 
on it with black pen.
I cut a slit in the birds beak to hold the heart.
This one was heat embossed with 
and mounted onto 
shiny metallic silver card stock
that I got at Hollo's
I used "I Love You" from Eureka Stamps
for these next 2 cards.

This card I watercolored the entire piece with one 
color and embossed "You're Huggable" onto the 
panel and added that adorable bird.
I simply stamped this heart, fussy cut it
and put it through a slit in the bird's beak.
I heat embossed this "Scribble Heart" from
Biblical Impressions onto a watercolored panel,
then layered it onto Matte Silver Metallic Card Stock
from Hollo's

This final card I used a piece of card stock for 
the front panel, added the crazy birds and heart,
it needed a little something more and the gold ribbon
worked perfectly to pull it all together.
I love how these Valentine's cards turned out
and I hope the recipients like them as much as I do.

Thanks for stopping by today,
if you come again soon, you will see
what I made for Valentine's treats to go with
some of these cards.
Until next time,
make something fun!


Note the links are only to give a reference so you can
see what the products are.
I didn't necessarily purchase from these sites,
except where specified,
and you may find better prices elsewhere,
I am in no way promoting any particular site.


Sunday, February 12, 2017

Kids Birthday Cards

Hi Everyone!
I have a couple of greats that I needed to make 
birthday cards for.
Andrea is really into Shopkins, so I thought a 
Shopkins card was the way to go.
I drew out the cupcake top on scrap paper and 
then traced it and fussy cut it out of pink card stock.
I used a little bit of 
around the edges and the layers of frosting.
Using google eyes made it easy to put the face on 
and I drew in the rest.
I think she'll love it!
Anthony loves Pokemon,
so I created this Pokeball card for him.
Once I decided what I wanted to do, it was a pretty 
simple process.
I used a brad at the side so the card could swing open 
to reveal the greeting.
This is the same greeting I used for Andrea's 
Shopkins card.

Their birthday party is today and I'm sure it
will be fun and the cards will be a big hit with the kids.

Thanks for stopping in today.
I hope you've been inspired in some way,
perhaps to make some kind of 
"character card" next time you need one
for a child in your life.
See you soon!

Tuesday, February 7, 2017

Kelsie's Card

Hello!
Today I have a card to show you that my daughter made.
She wanted to make a card for her boyfriend's father
for his birthday.
First she made the striped background with my 
and 
She then stamped the cupcakes onto white card stock
The cupcakes are an old set from Inkadinkado
and I can't find them anywhere to link to.
She fussy cut the cupcakes, adhered them to the 
striped panel with foam tape 
and adhered that to the card base.
Inside she simply stamped 
'happy birthday' 
from 
stamp set.
She then made an envelope to go with the card 
I think it turned out great.
We had a nice time and I got to teach her some new things
which I know she will use again for future cards.
Thanks for stopping by,
have a wonderful day
and learn something new.


Note the links are only to give a reference so you can
see what the products are.
I didn't necessarily purchase from these sites,
except where specified,
and you may find better prices elsewhere,
I am in no way promoting any particular site.